How to make a Camera Obscura
“The best thing I did during my time at School was turning the entire classroom into a camera” – One of my Yr13 Students
The Camera Obscura is fun to make, interactive and is always a hit with students and staff alike.
What also makes this activity fantastic for schools is that it employs Physics in order to work which opens the door for cross-curricular activities. Physics students can learn how light moves, Art students can learn how master painters understood scale – Rembrandt, Caravaggio and Vermeer have been ‘accused’ of using a Camera Obscura to ‘trace’ their paintings. Members of staff and other students often come to experience it purely out of curiosity, it’s a fantastic talking point across the school.
At the end of my first year of teaching a student wrote in the yearbook that the classroom Camera Obscura was the most fun activity she had undertaken during her time at the school. I’ve repeated it every year since.
Day one of sixth form can be tough, a new environment, new teachers and for some students, a brand new school. This is a fun activity and is intended to get students moving, interacting and developing their understanding of photography. Many of them will have no idea what a Camera Obscura is and are mesmerised by the results. Students have to interact and work together, helping break the ice and allowing them to bond.
You will need:
- Black out cloth/cardboard/rubble sacks
- A classroom (less windows the better) ((North facing/not looking into the sun))
- Scissors/craft knife
- Sellotape/Gaffer tape/Magic tape – careful of the paintwork!
- Glue gun
- +1 close up filter or pinhole in tin foil if strapped for cash.
- Huge sheet of white paper/white cloth/white shower curtain
- A sunny day!
Method:
Find a classroom in the building that ideally has few windows, is big enough to fit your class into and where the windows don’t face directly into the sun.
It’s worth noting that when the windows and doors are light tight, the room will get hot very quickly, particularly if you have a large class. A room with fans or air conditioning is a bonus.
Roughly measure the window then cut out the light tight material to a size a bit larger than the window. Decided where the lens will go relative to the window (avoiding sash window bars etc.) Cut out a circular hole in the cloth that will cover the window and sellotape/glue gun the lens filter in place.
Cover the windows with the black out cloth/rubble sacks. The material you use isn’t an issue, the room however does have to be 100% light tight in order for this to work.
Turn the lights out an allow your eyes to adjust. In modern buildings there are often blinking lights on computers and motion sensors that may interfere with the outcome so be sure to turn off all electronics.
Once the room is completely light tight erect the projector screen a metre or so away from the window. Using cloth, paper or a shower curtain allows for the image to be seen on the reverse. This means the class can stand at the back of the room looking towards the aperture.
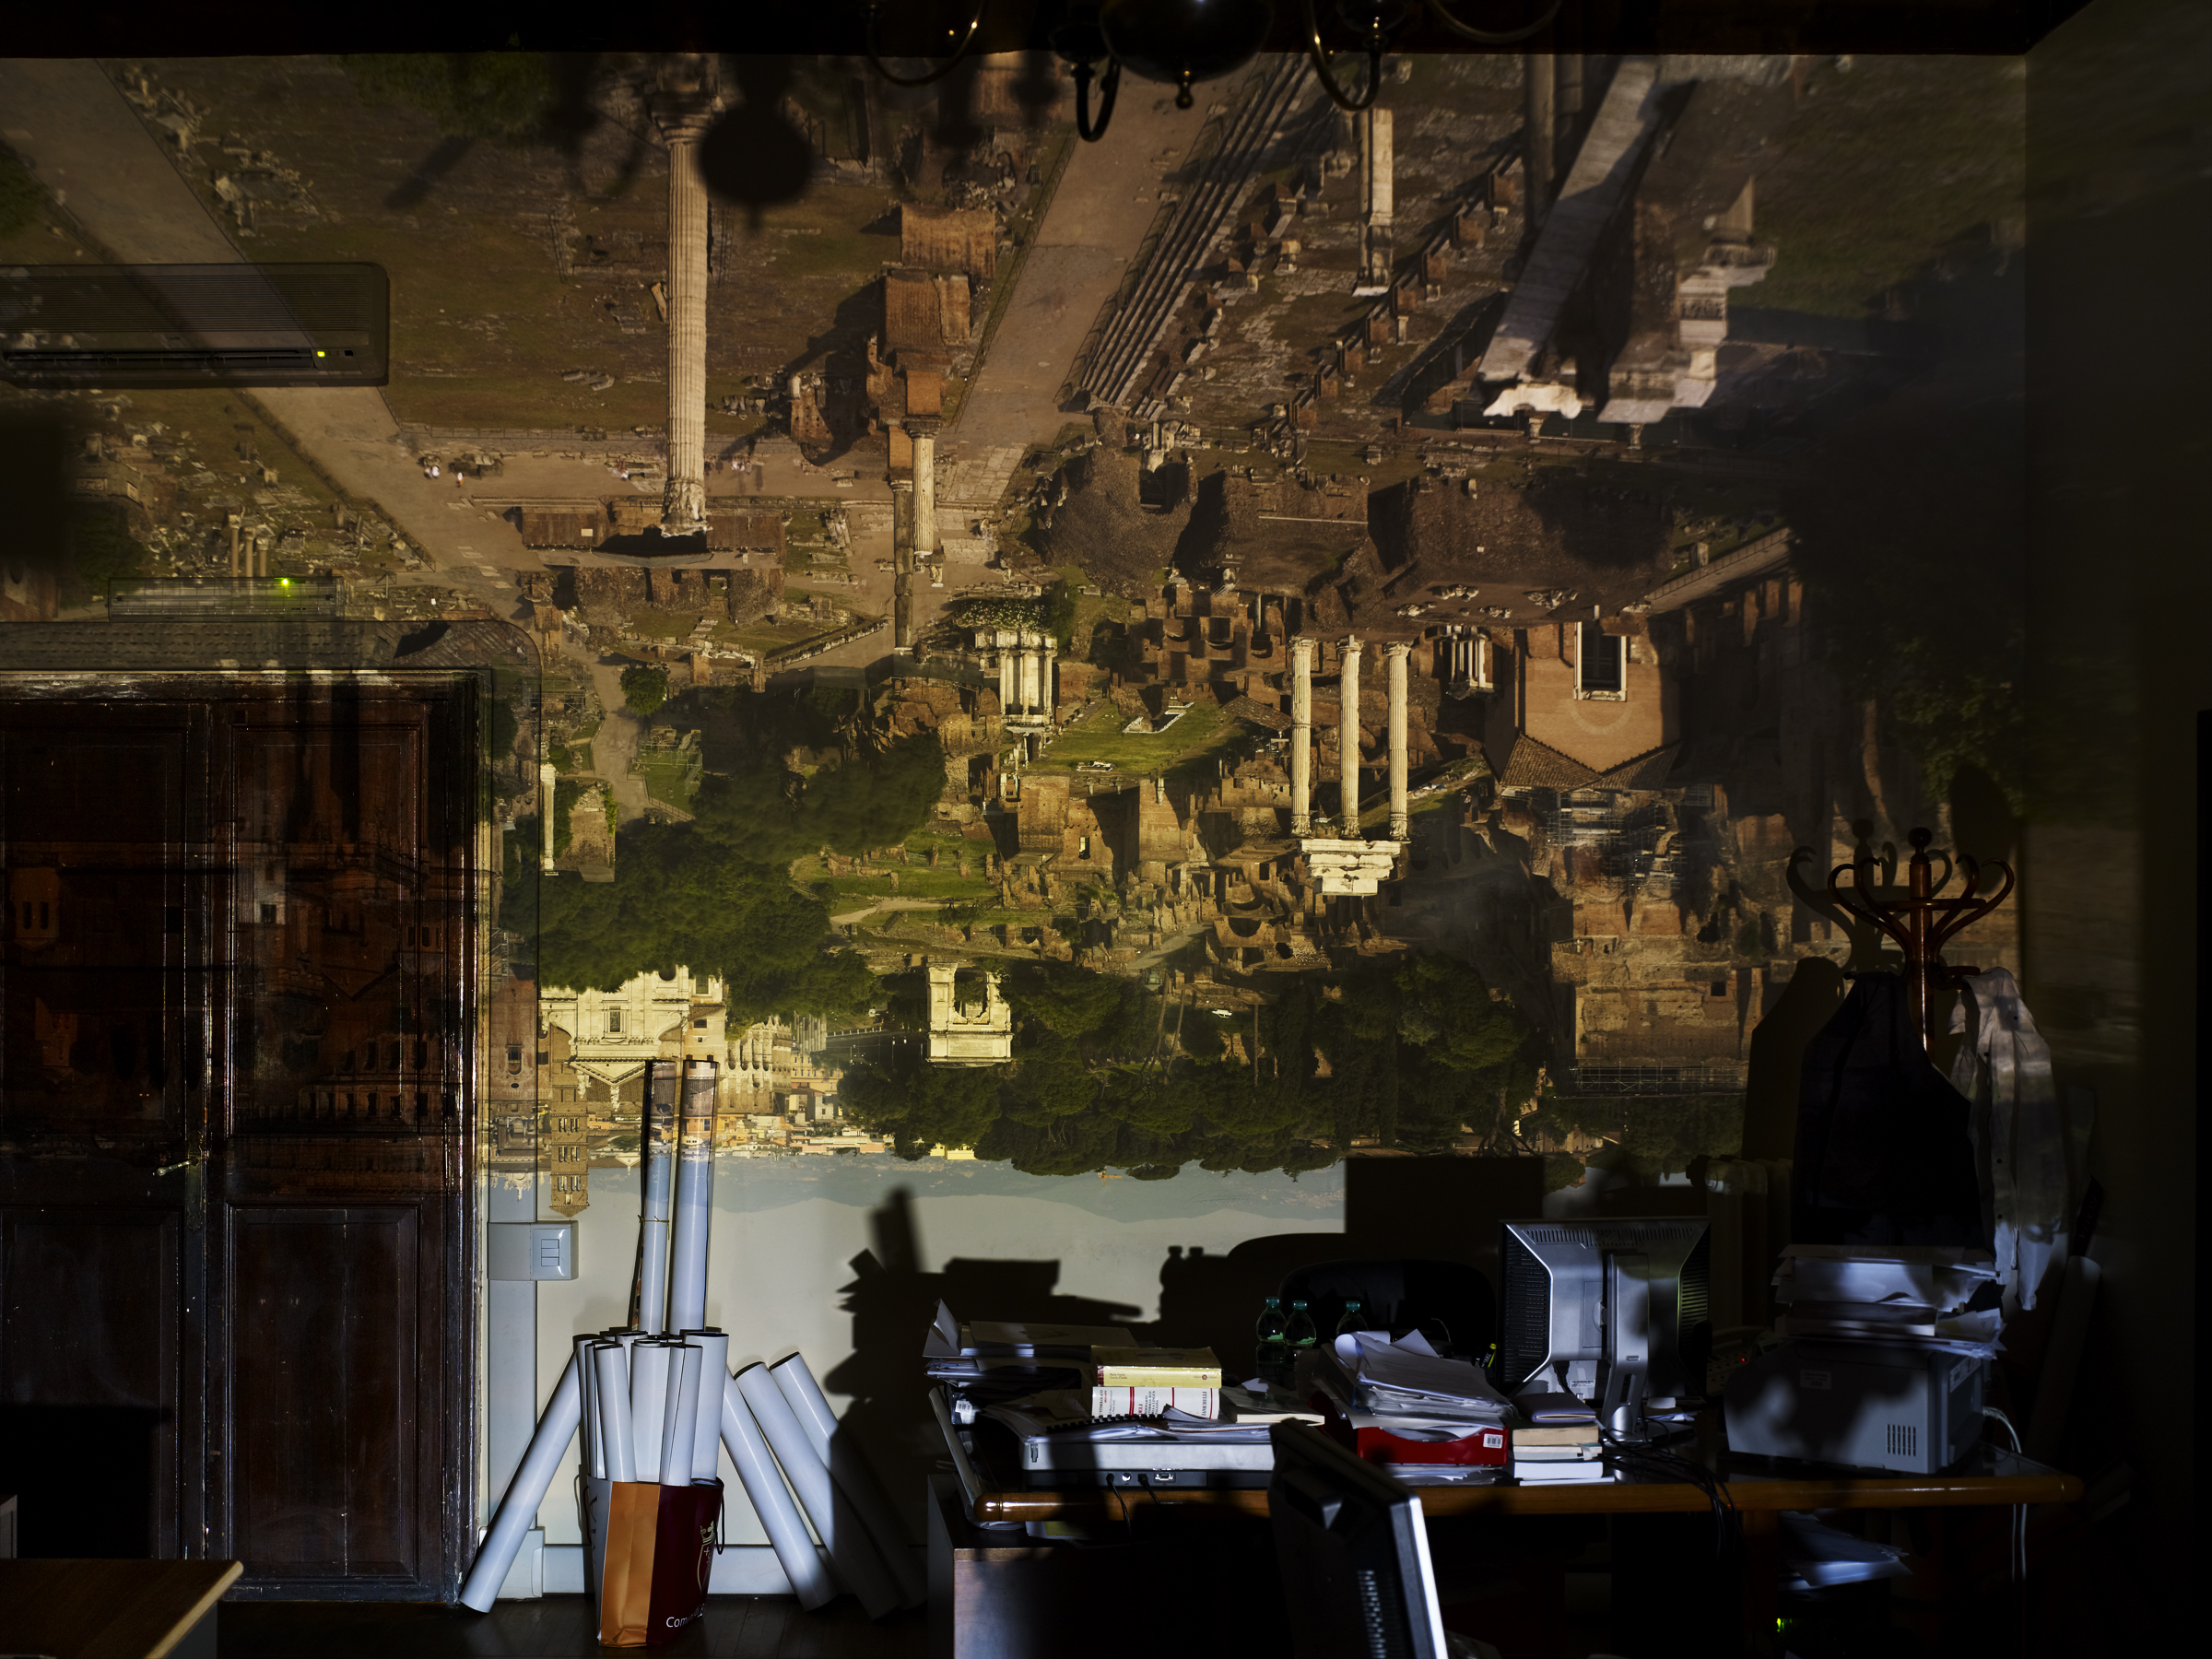
If you are fortunate enough to have a very sunny day, then there is no need for a screen at all. Given long enough your eyes will adjust and the outside will be projected on the walls on the opposite side of the aperture.
Students can go outside and move in front of the aperture in order to be projected into the room upside down! This then leads to conversations on Mozi and Sir Isaac Newton. Students can then be introduced to the fundamental principles of photography and aperture. Conversation can then be directed to developing ideas using this technique and understanding that the miracle of Physics occurring before them is what happens in every SLR camera. I structure my lesson plans so this leads nicely onto the next lesson, where students will make their own pinhole cameras, make a miniature Camera Obscura and take their first photograph!
Lens positioned on window

Image projected into the room

Resources
National Geographic on Youtube
If you or your students have Netflix, the Cosmos series by Neil De Grasse Tyson is fantastic, the episode ‘Hiding in the Light’ is where this clip comes from and has much more detail.
In depth guide to Aperture
Photography project ideas
Camera Obscura artist Abelardo Morell
History of the Camera Obscura
The camera obscura is an ancient optical phenomenon and precursor to modern photography, which laid the foundation for the invention of cameras as we know them today.
Discovery and Mechanism
The camera obscura, Latin for “dark chamber,” dates back to the 5th century BCE, when it was first documented by the Chinese philosopher Mozi. However, the concept was likely known long before Mozi’s time, as natural occurrences of the phenomenon have been observed throughout history. The camera obscura occurs when light passes through a small hole or aperture in a darkened room or box, projecting an inverted image of the outside world onto a surface inside the darkened space.
The phenomenon can be explained using the principles of optics: light travels in straight lines, and when it passes through a small hole, it projects an image of the scene outside the hole onto a surface opposite the hole. Due to the geometry of light rays crossing at the hole, the image is flipped both horizontally and vertically, resulting in an upside-down and reversed projection.
Historical Uses
Throughout history, the camera obscura has been employed for a variety of purposes, including:
- Art and Painting: Artists such as Leonardo da Vinci, Canaletto, and Johannes Vermeer were known to use the camera obscura as an aid in creating realistic paintings. By projecting the scene onto a canvas or paper, artists could trace the outlines, ensuring accurate proportions and perspectives.
- Astronomy: The camera obscura has been used to safely observe solar phenomena, such as sunspots and solar eclipses. By projecting the image of the sun onto a surface, astronomers could study these events without risking damage to their eyes from direct sunlight.
- Education and Entertainment: The camera obscura was a popular source of entertainment and education during the 18th and 19th centuries. Large-scale camera obscuras were constructed as tourist attractions, often at scenic locations, providing visitors with a unique view of the surrounding landscape.
Contemporary Uses
Today, the camera obscura is still employed for various purposes, including:
- Art and Photography: Some contemporary artists and photographers continue to use the camera obscura as a creative tool, exploring its unique properties to produce thought-provoking and visually striking images.
- Education and Demonstrations: The camera obscura is often used in educational settings to demonstrate the principles of optics and the history of photography. Science museums and educational centres may have camera obscura installations for visitors to experience this fascinating phenomenon first-hand.
- Pinhole Photography: Pinhole cameras, which are simple cameras that use a small aperture instead of a lens, work on the same principle as the camera obscura. Pinhole photography is a niche art form that emphasizes the simplicity and beauty of the camera obscura’s basic optical principles.
So there you have it, the camera obscura, how to build one and a brief history. I hope you’ve enjoyed this article, happy building!