What’s white balance in Photography?
This article is a brief introduction to White Balance and Colour Temperature in Photography.
Imagine you’re drawing a picture with a box of coloured pencils. The paper you’re drawing on is white, so all the colours you use look exactly how you expect them to. Now, imagine you have to draw on a piece of yellow paper. The colours you draw with will look different because they’re mixing with the yellow background.
In photography, white balance is like making sure your “paper” is the right colour, so that all the other colours in your photo look accurate. You see, different light sources, like the sun or light bulbs, can make things look different colours. Have you ever noticed how colours in a room can look warmer and more yellow under a lamp, but cooler and more blue outside on a cloudy day? That’s because the light source affects the colours we see.
Cameras have a white balance setting that helps to adjust the colours in your photo to look more natural, based on the type of light you’re shooting in. It’s like telling your camera, “Hey, I know the light is a bit yellow here, but I want my photo to look like it was taken on white paper.” By adjusting the white balance, the camera will make sure the colours in your photo look just right.
Examples of using white balance in Photography
Have you ever noticed how different light sources can make colours look different?
For instance, sunlight tends to make things look more yellow, while fluorescent light can make them look bluish.
Understanding white balance means you’ll be able to correct your photographs so they’re not too cool, and not too warm.
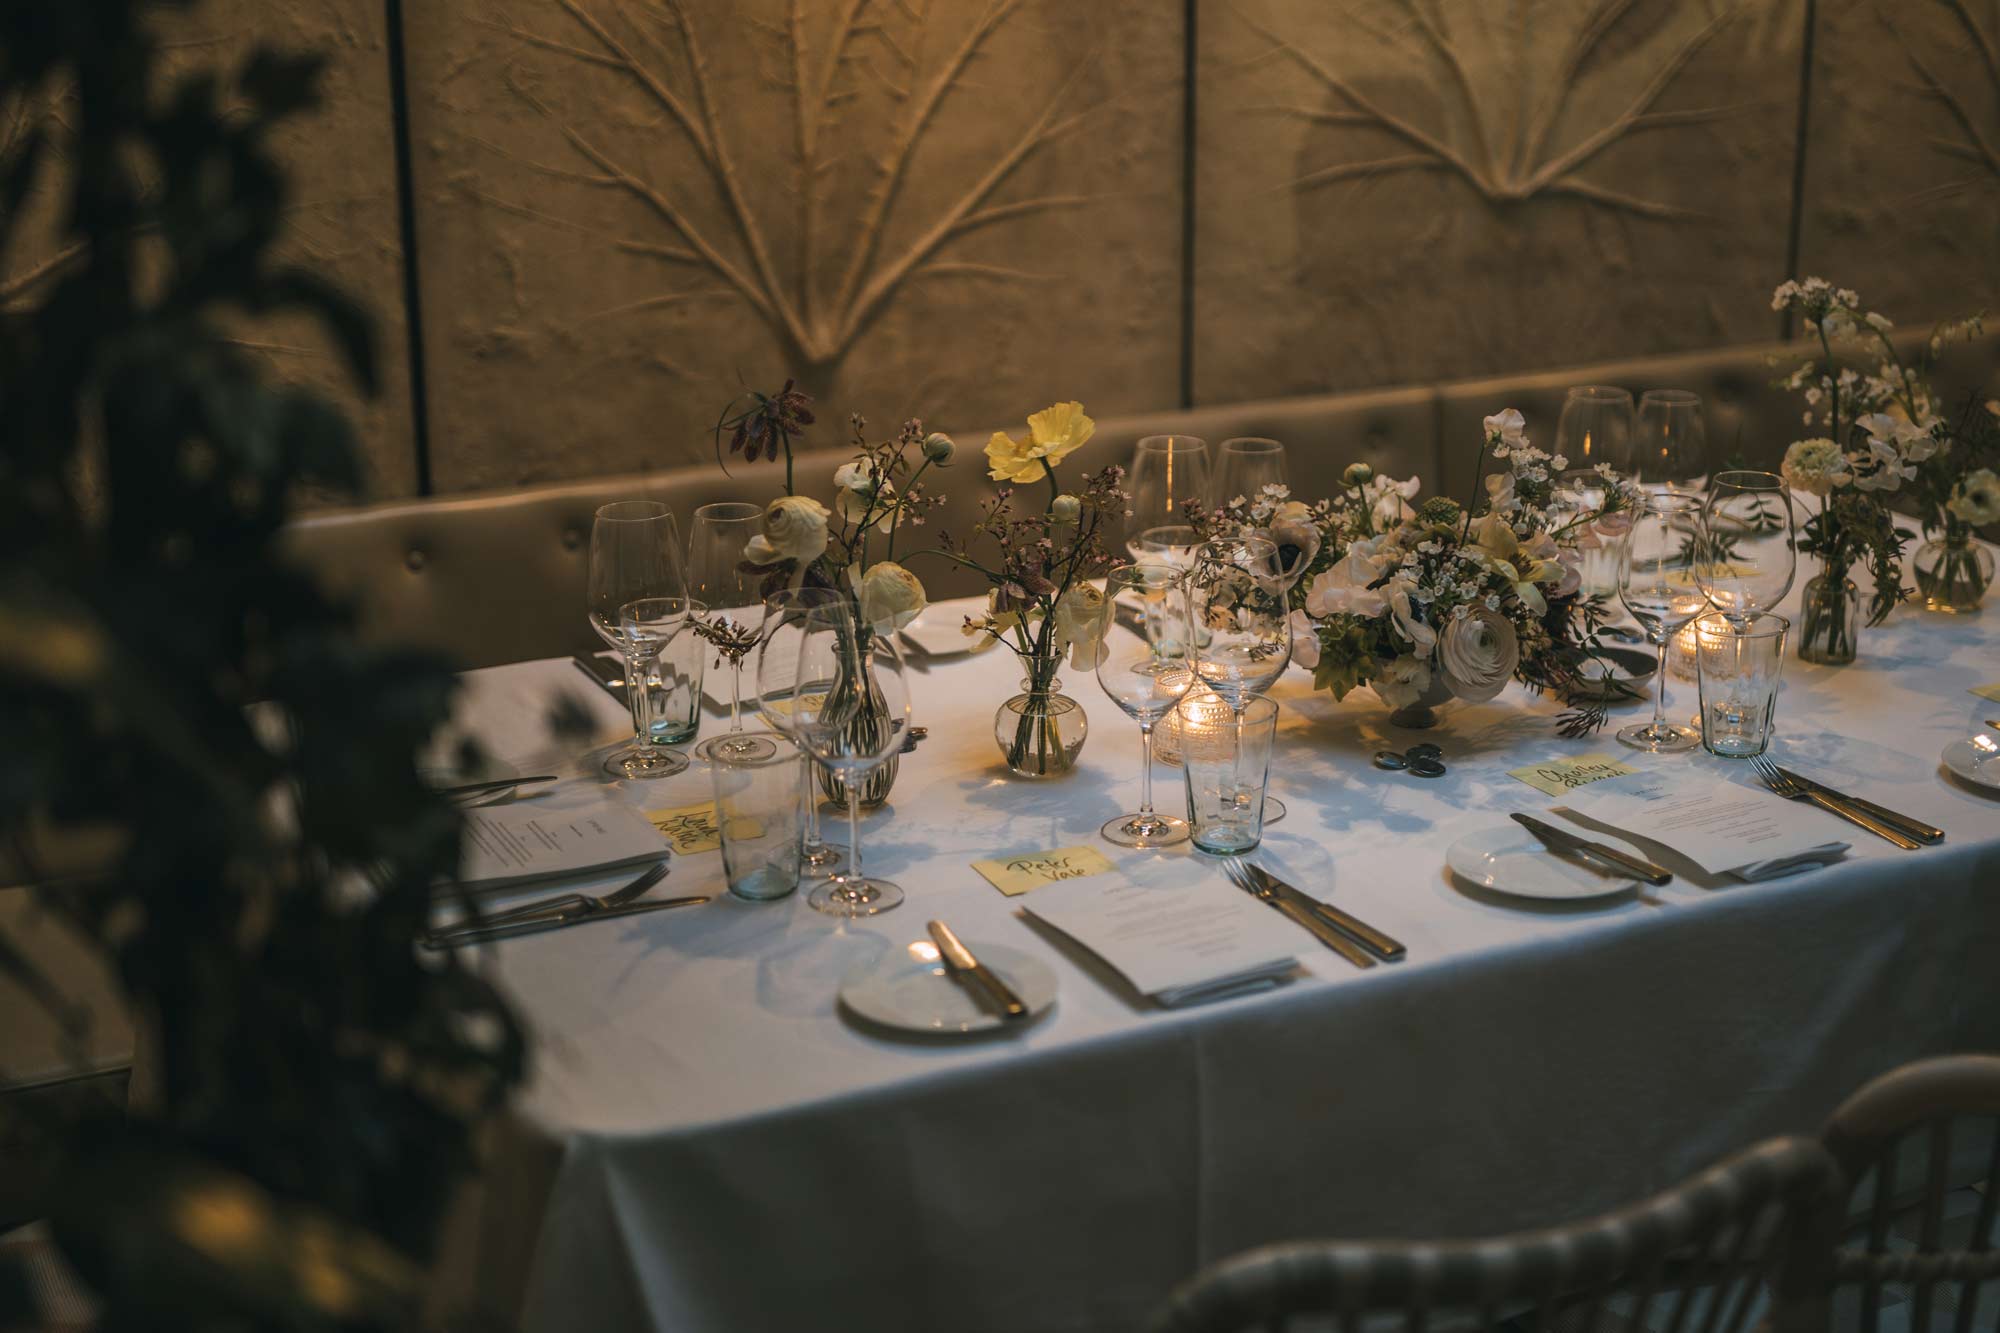
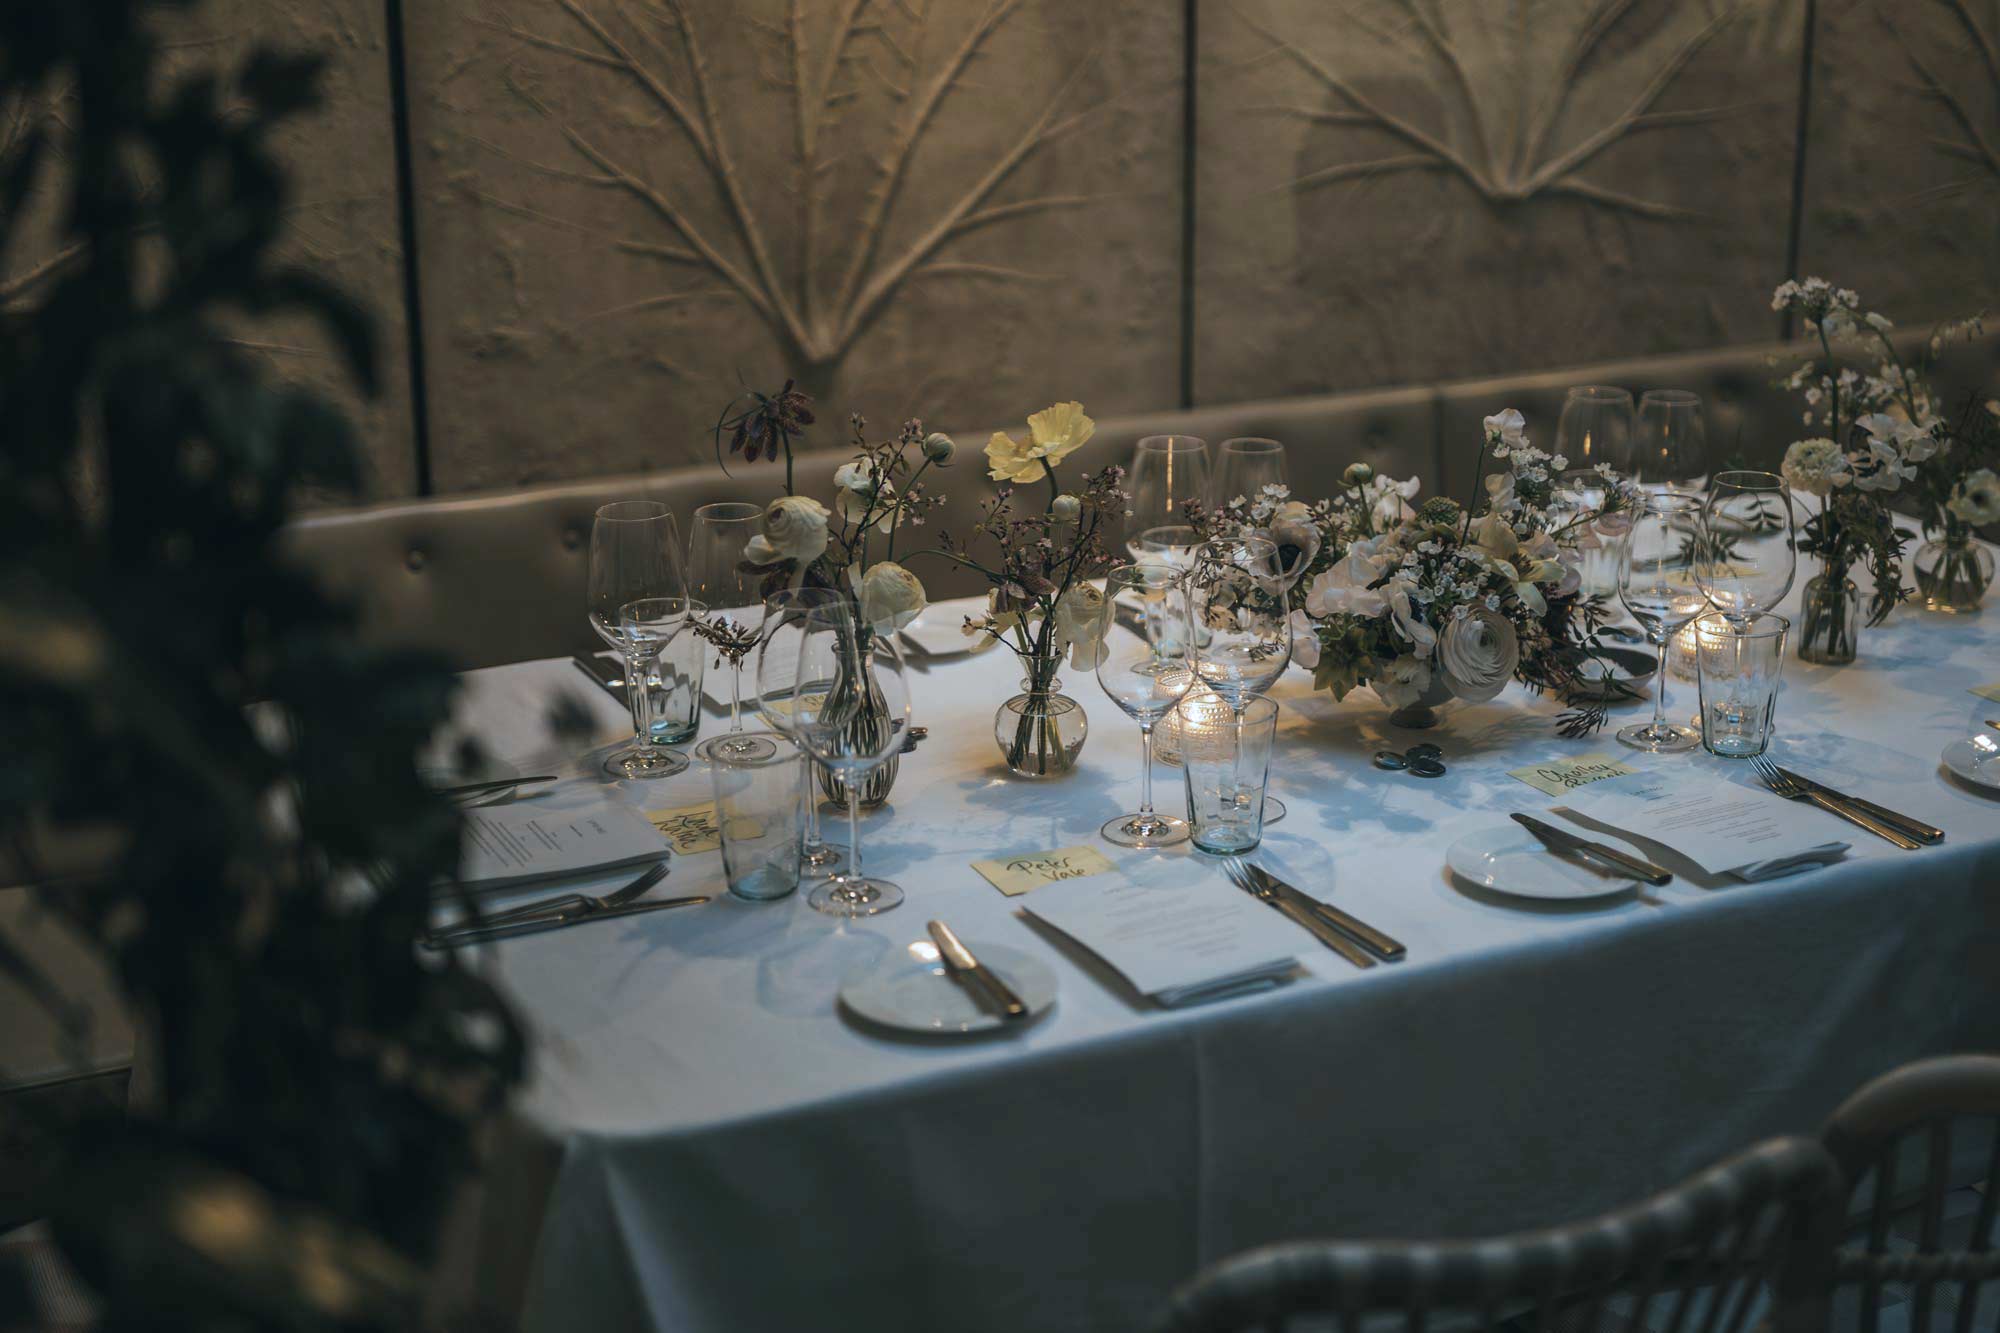
I find dining rooms are a good example of where white balance is needed. You often have white table cloths with yellow lighting.
 As a creative, it’s at your discretion how you want the image to look of course, but typically you would want to remove some of the yellow, to make the table cloth look closer to white.
This is of course a balancing act, make your image too cool and the scene will no longer look inviting.
 This effect is due to something called light temperature, which is a measure of the colour of light.
White balance is the process of adjusting the colours in an image so that they look natural under the given light conditions.
Most digital cameras have an automatic white balance setting that does a pretty good job of correcting for different light temperatures.
However, if you’re not happy with the results, you can adjust the white balance manually in camera.
I won’t lie, I find white balance and colour temperature a pretty boring subject, but it’s essential to get your head around it if you’re going to be editing your own photographs.
Practical examples of White Balance
Mixed light sources
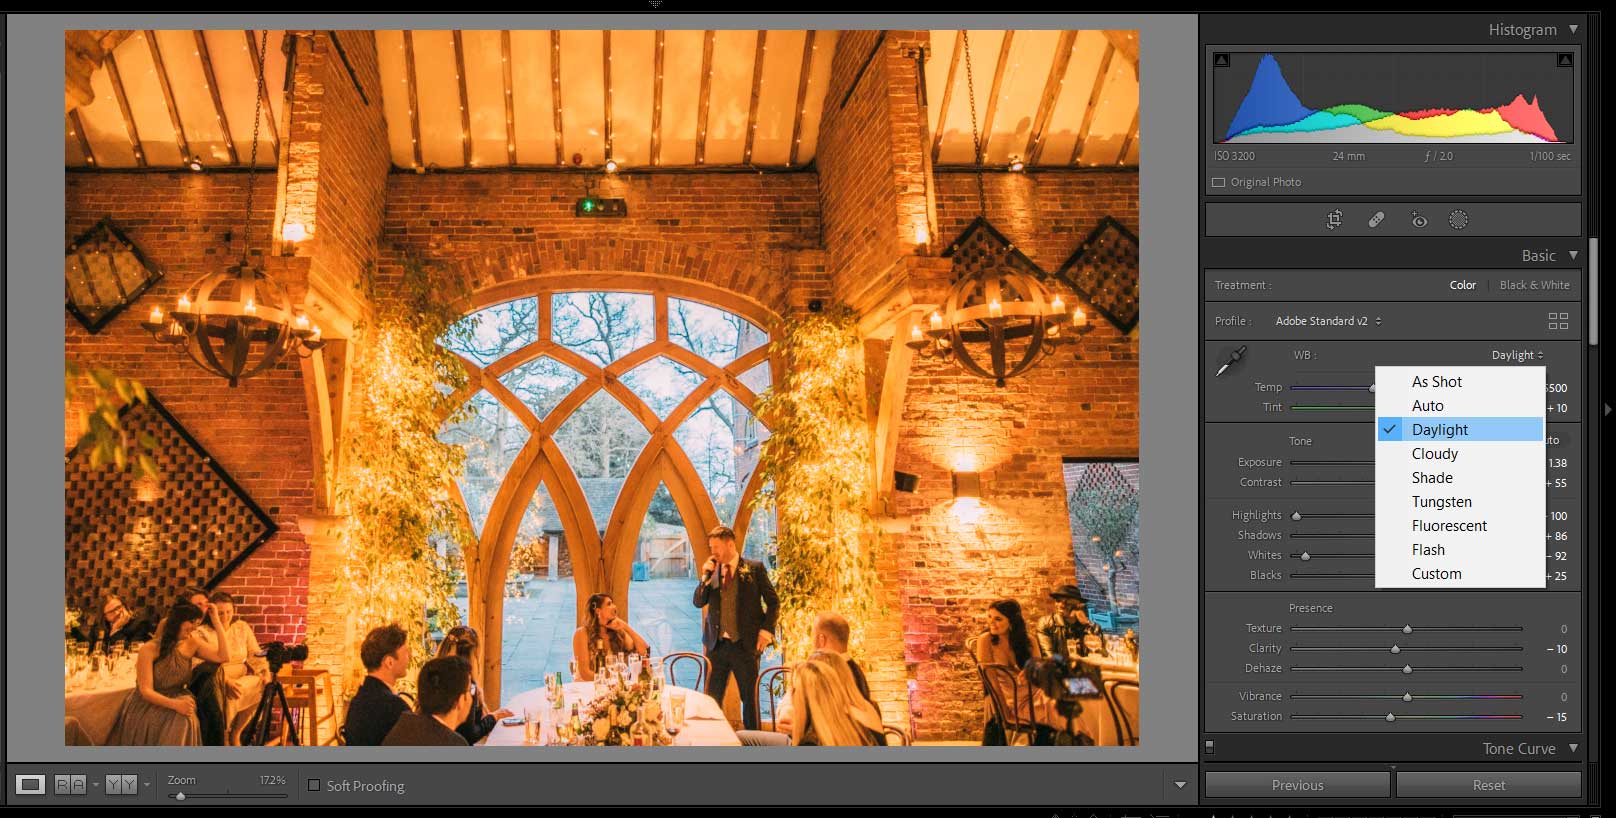
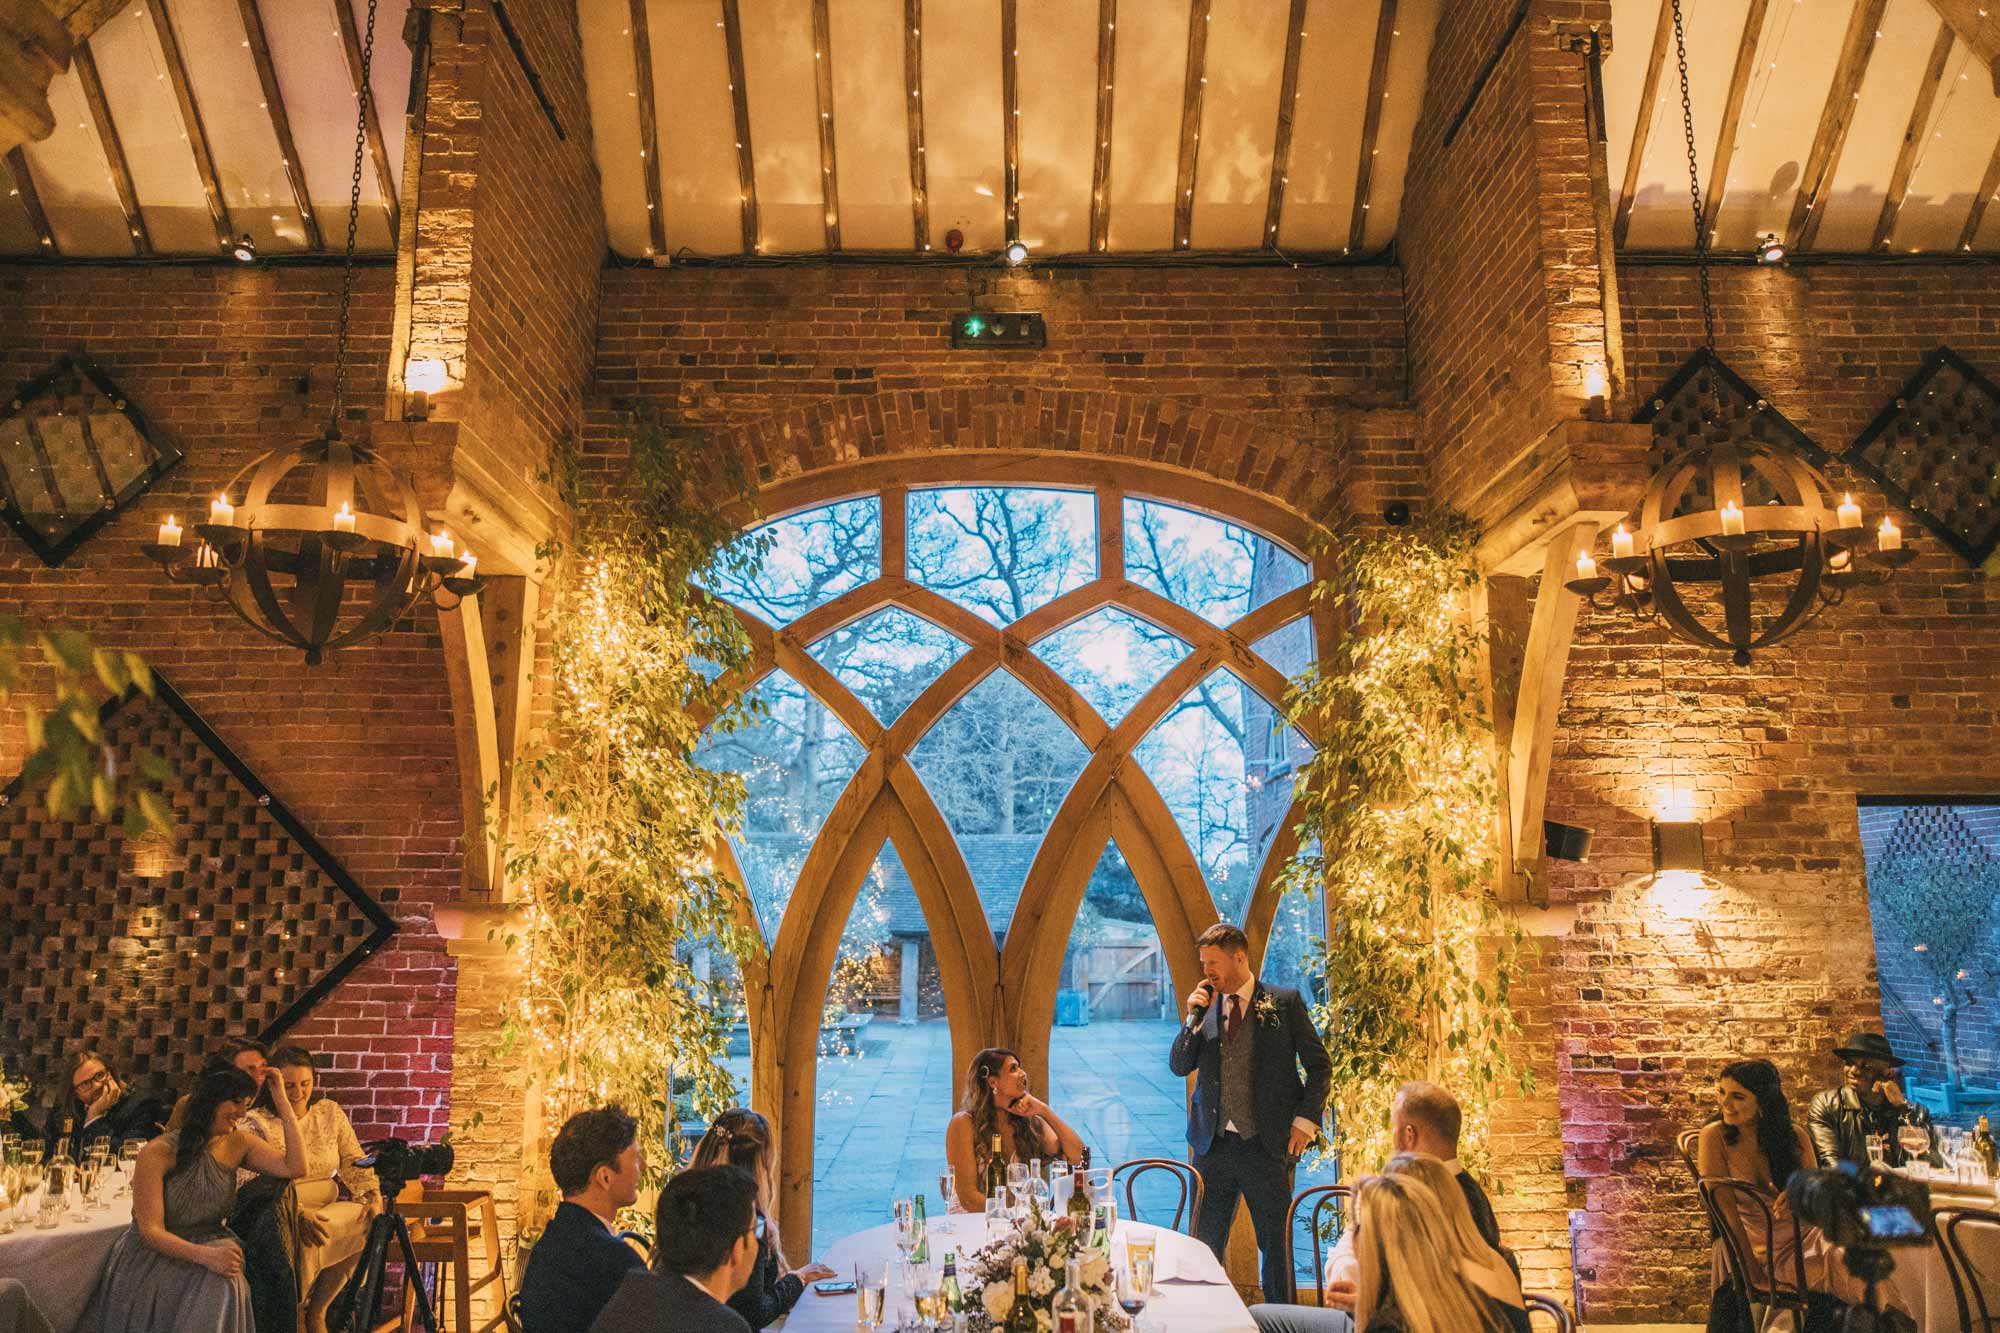
The hardest white balance to get right is when you have two different types of light in the same scene. The image below highlights this perfectly.
Outside the daylight is more blue, inside the candles are more yellow.
Because the two light sources are different, getting them both technically correct is impossible without more complicated Photoshop work.
How to adjust the White Balance in Lightroom
In this example I’m using Lightroom.
The image is shot in RAW, which if you’ve read the other articles in my free photography guide, then you’ll know this gives you much greater latitude to change your pictures without destroying the quality.
In the right hand menu, click on ‘Auto’ and a drop down menu will appear.
This is where you can adjust your White Balance using Lightroom’s built in presets.
These settings are generic, so expect them to not be exact after one click, but it will get you into the right area.
For the below image, I took the picture in RAW, using Auto White Balance. In Lightroom I then selected ‘Auto’ and this is the result.
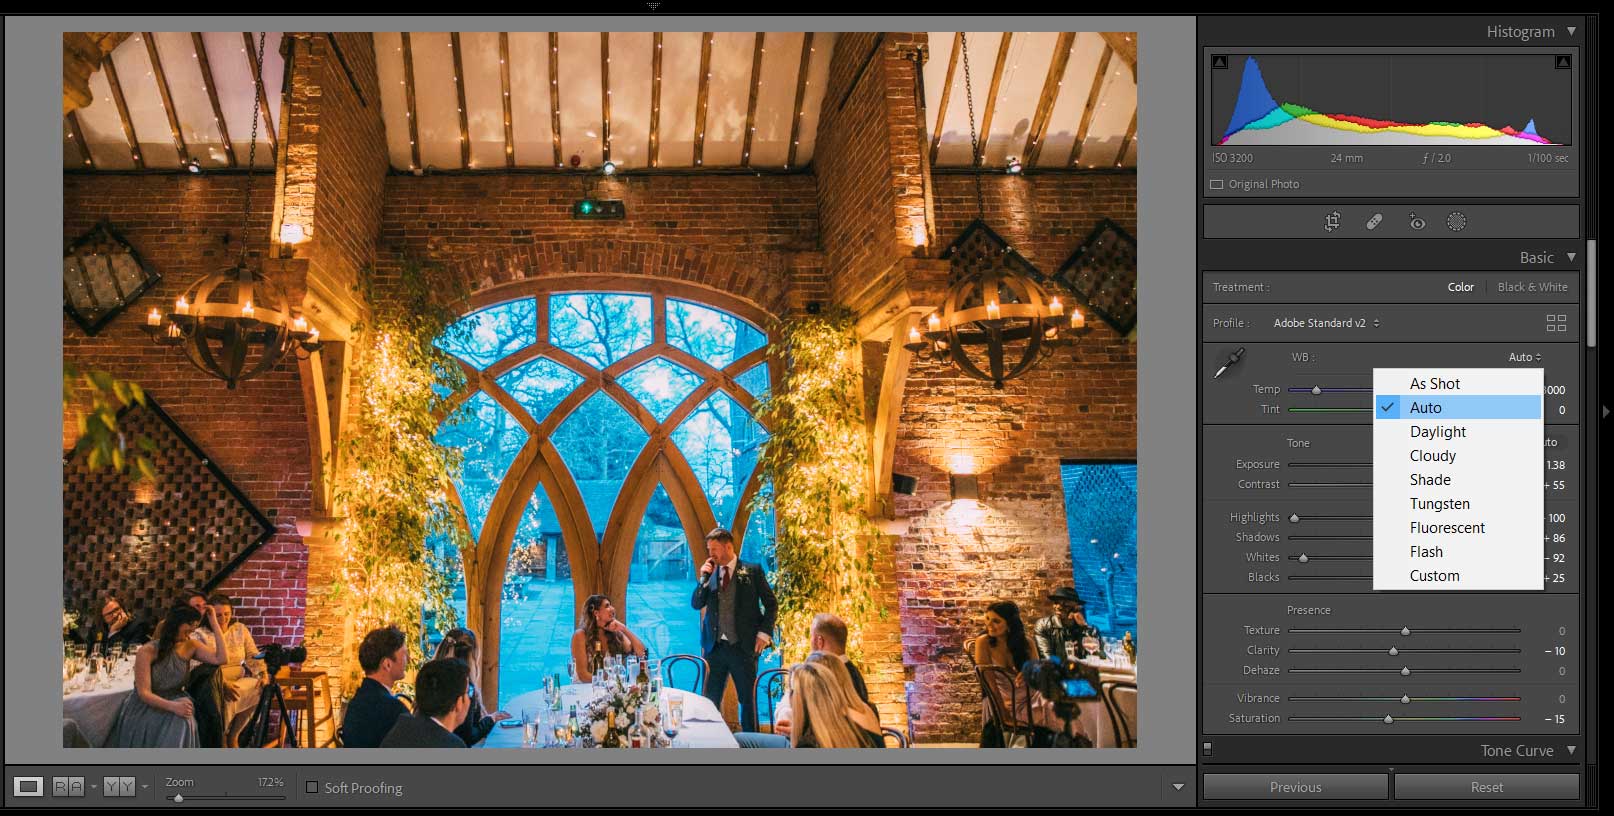 Pretty good I think it’s fair to say. I’d be happy to deliver that image to a client.
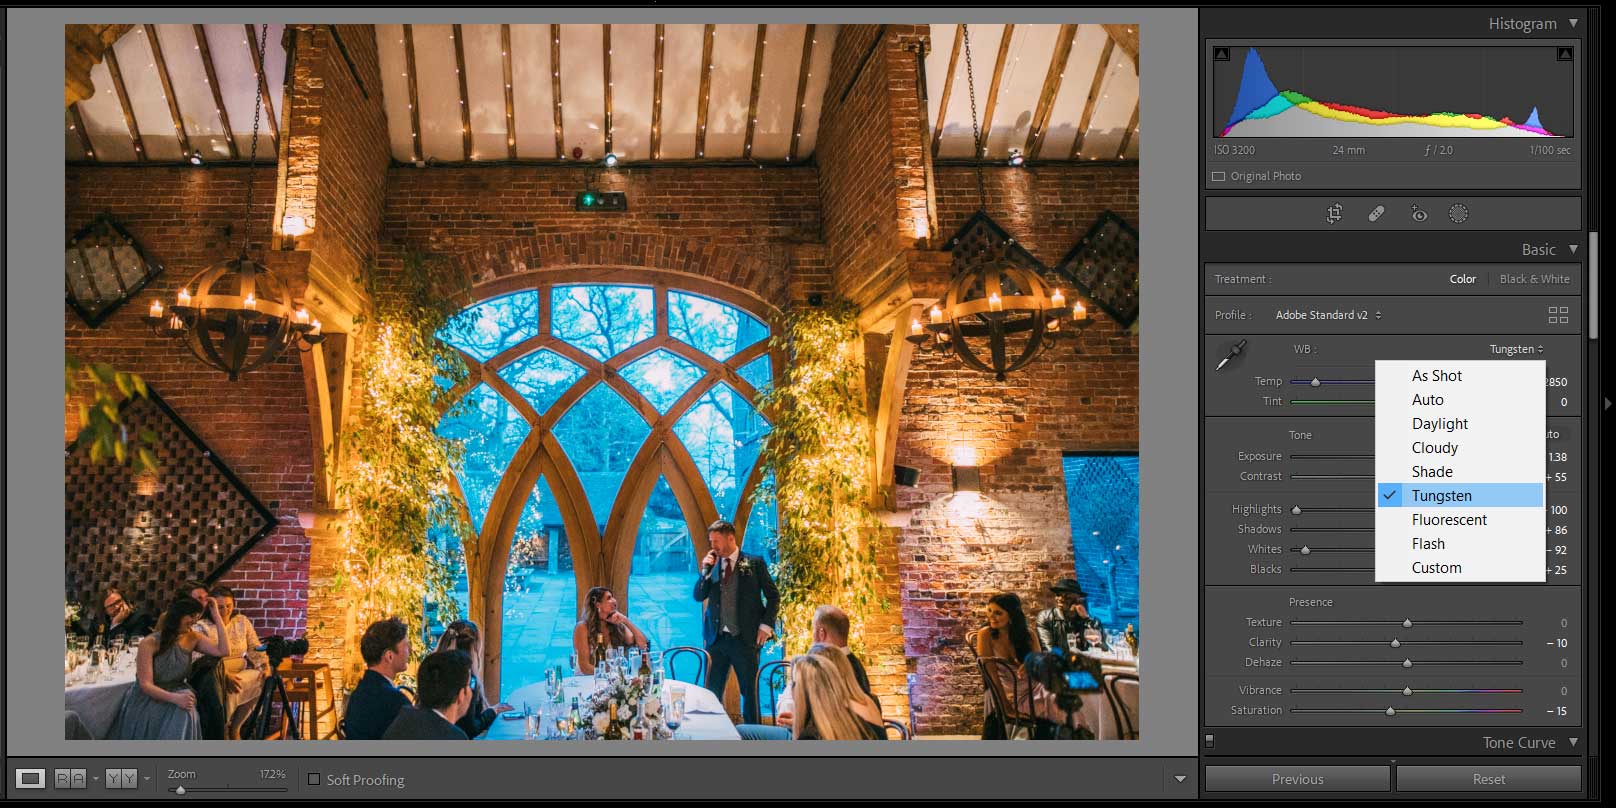
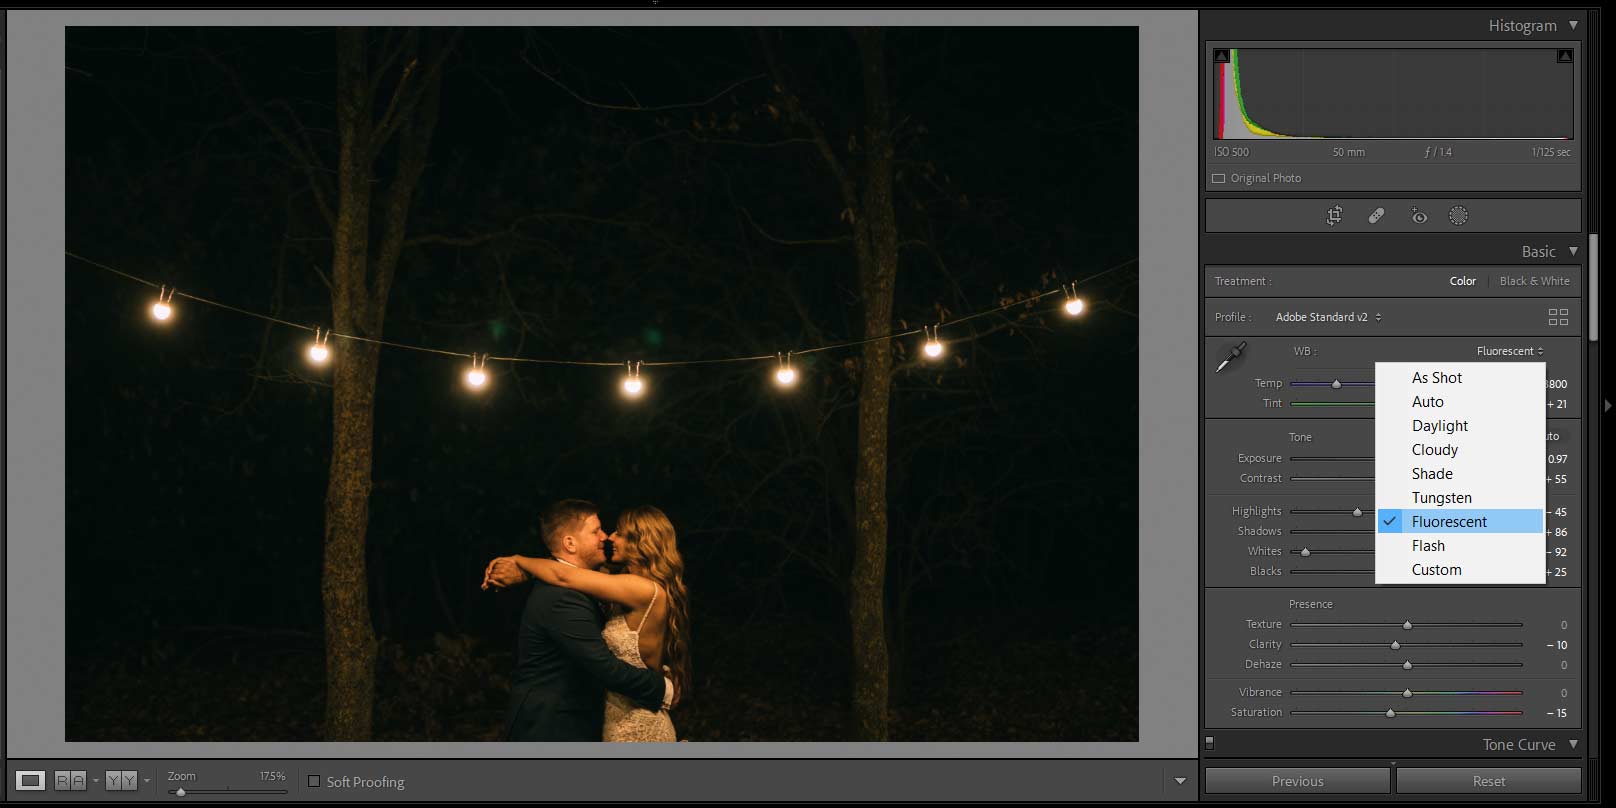
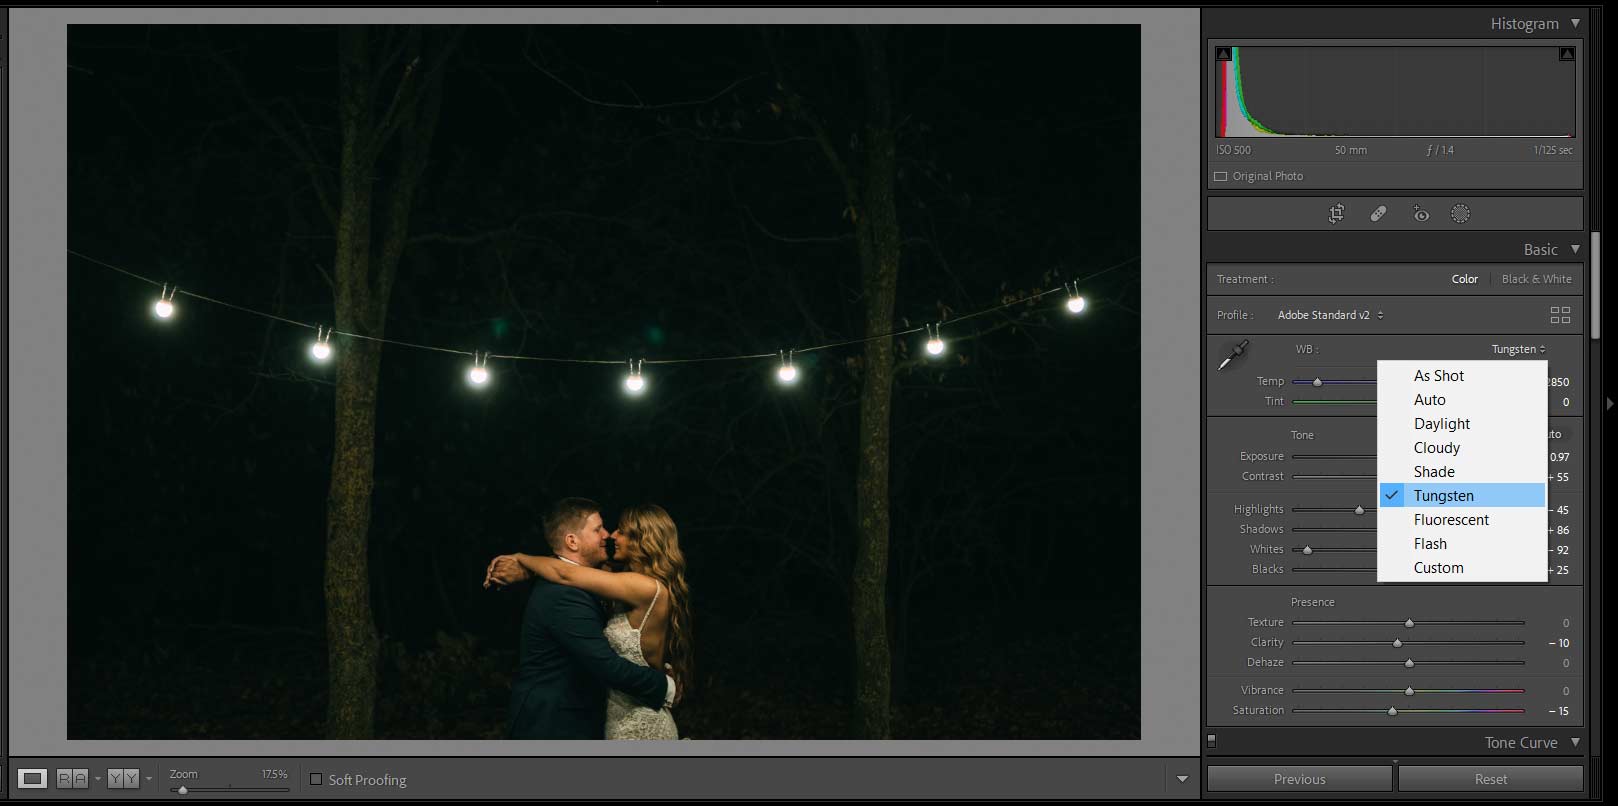
But what do the other settings do? Here’s a few examples.
If you find that your image still looks incorrect to your eyes, you can then use the colour sliders Temp & Tint.
Temp is Cold to Warm.
Tint is Green to Magenta.
Correcting white balance from Single Light Sources
To the naked eye these garden lights are an intense yellow.
Whilst it can be flattering for skin to have a warmth to it, too much yellow and it simply looks artificial.
Below I’ve corrected the colours, by reducing the amount of Yellow by sliding the Temp gauge in Lightroom to the left.
 Below is the image straight out of the camera (or SOOC as some blogs shorten it to). You can see with the ‘As Shot’ setting for white balance the lights are very yellow and also have a Green tint to them. We can correct this by making the Temperature cooler by moving the slider to the left. We can reduce the Green by effectively adding Magenta by moving the Tint to the right.
  Auto gives us pretty accurate colours straight away, but a bit too green.
Fluorescent setting is quite close to what the naked eye sees in this example, but it’s too yellow for my liking.
 The Tungsten setting again makes the skin tones too green.
What is White Balance in photography?
White balance is effectively the process of trying to make the colours in your pictures look ‘right’.
White balance in photography is measured in degrees Kelvin. You’ll see it written in Photoshop or Lightroom as a four digit number followed by a capital K.
The easiest way to understand white balance in photography is to turn a light on in your house in the morning or evening, look at the light source hitting wall and then look at the light coming through the window. The light from the bulb will be yellow or orange and the light from the window will be blue.
Now consider that above scenario, now put a person in that scene in a white dress. The action of white balance in photography is trying to make sure your colours are ‘correct’ in often very difficult scenarios where you’re dealing with mixed light sources.
White balance definition photography
What is white in real life is rendered white in the photograph
What’s the easiest way to use White Balance?
The simplest, easiest way to get your white balance right is to shoot in RAW and use auto white balance (AWB).
Why?
Because it gives you the latitude to fix it afterwards in post production.
Is this solution a bit lazy?
Yes and No.
I’ a wedding photographer, so the light is changing all the time, changing the white balance settings is pointless when I know I can adjust it later. In all honesty, modern cameras are so good at adjusting it in auto, even shooting in jpg I don’t think is an issue anymore.
The sciencey bit…
What is degrees Kelvin
The Kelvin scale is an absolute temperature scale named after the Belfast-born engineer and physicist William Thomson, 1st Baron Kelvin (1824–1907). Unlike the Celsius and Fahrenheit scales, the Kelvin scale has a ‘null point’ – absolute zero. This is the point at which all thermal motion ceases in atoms and molecules. The coldest anything can be is thus absolute zero on the Kelvin scale, or – 273.15 degrees Celsius. The unit of measurement for the Kelvin scale is thus called the ‘Kelvin’ (and has the symbol: K). Zero on the Kelvin scale is equivalent to – 273.15 on the Celsius scale. One degree Kelvin is equal to one degree Celsius. The boiling point of water at standard atmospheric pressure (101.325 kPa) is 373.15 K (100 °C; 212 °F), making it convenient for very precise temperature measurements with commonly available water-based thermometers. Relative to the triple point of water, zero kelvins (−273.15 °C; −459.67 °F) is 459.69 degrees Fahrenheit (−459.67 °F; −273.16 °C) lower than the triple point’s value on that same temperature scale. Absolute zero
Do I need to know that bit?
No
Ok, how does it affect my photographs?
In short – low number = cool images. high number = warm images
Degrees kelvin are a crucial consideration in photography, especially when it comes to setting the white balance of your images. Simply put, a degree kelvin value refers to the colour temperature of light, and it is an especially important concept for photographers who use digital cameras. Since most digital cameras have a range of colour temperatures available for white balance auto settings, it can be helpful to have a basic understanding of these values in order to make sure that your photos turn out exactly as you intended.
Conclusion
Generally speaking, daylight has the lowest degree kelvin value of any type of lighting, with values ranging from around 5200 Kelvin up to 6000 Kelvin depending on the time of day and location. Higher values are associated with artificial light sources such as incandescent bulbs or fluorescent tubes, which have greater colour temperatures than daylight. So when you’re adjusting the white balance settings on your camera, it’s important to think about what type of lighting you’re working with and choose accordingly in order to prevent unexpected changes in hue or tone in your photos. By understanding how degrees kelvin work in photography and taking this into account when setting your camera’s white balance settings, you can ensure that your images always come out looking, well…how you want them to look.
