
Need to know how to create that vintage feel in your photographs? Want to instantly age a photographic print and make it look like it’s from a bygone era? You need Sepia toning.
In the old days, it was a labour intensive process involving toxic chemicals. However, advancement in technology has simplified it to a simple one step application of a liquid if you’re in the darkroom, or a mere filter in digital cameras and photo-editing software.
This guide not only defines the term ‘Sepia’ but also thoroughly explains how you can achieve it. We discuss two methods, the first is to use the in-camera Sepia function. The second method produces Sepia toning using software. Continue reading to learn both of these methods.
What exactly is Sepia in Photography?
Sepia toning is the process of applying a colour toner to a photographic print to produce a brown/orange colouring. The Sepia toning converts a black and white image to a brownish burnt shade, synonymous with images from the early days of photography.
However, with sepia toning, the image still remains monochromatic, but just not black and white.
Sepia was extremely popular around the 1880s to 1900s. There are two main reasons behind this:
First, in the age of black and white, the brown colour produced by Sepia toner looked flattering and quite artistic.
Second, it was observed that the use of Sepia not only changes the tones of the image but also acts as the preservative of sorts.
Images applied with Sepia toner had a 50% longer life compared to those that were left untreated. The chemicals present in the toner slowed down the deterioration of the print which helped to slow down the aging of the print.
How to pronounce sepia?
Sepia is pronounced: C – P – Uh
The colours of Sepia
It is critical to understand the origins of Sepia before we talk about its colour.
The word ‘Sepia’ was created by the ancient Greeks, and is the exact same in English that we now use to describe the red/orange/brown tones from antique photographs.
Originally, the ancient Greeks extracted the inky secretion of the Sepia Cuttlefish.
After extraction from the cuttlefish, the ink was used to create a brown dye.
Originally the brown toning was a by-product of the chemical reaction that takes place when halides become suphides in the darkroom, vintage photographs acquired this tone organically and are a sign of age. Now however, the brown colour of the Sepia is largely associated with a feeling of nostalgia. The burnt hue of Sepia is reminiscent of a bygone era and is used to artificially ‘age’ the picture, making it appear older than it is, or to deliberately stylise an image.
Take this image by the band The Eagles for example:

Taken in 1973, the image would have been taken in black and white and then a Sepia toner applied to create the feel of being taken in the American wild west.
How to Pronounce Sepia
Apart from the process itself, there is one more thing that some people struggle with. It is how to pronounce Sepia. To make it easy, convert it into syllables. The word Sepia has three syllables which are SEE+PEE+UH. Try to say them quickly for perfect pronunciation.
Understanding a Sepia-Toned Image
Now that we know how to pronounce Sepia, let us get into the technical details of the whole process.
Sepia toner is made of sodium sulphide, and is applied to the image after developing in the darkroom.
The chemical compound converts the light sensitive silver halide chemicals present in photographic paper into sulphides. The chemical reaction creates the change in tone and simultaneously makes the image more stable by reducing it’s sensitivity to light.
Sepia toners are still widely commercially available today, so if you have access to a darkroom, creating sepia toned prints is absolutely possible.
However, if you don’t have access to a film camera or don’t have access to a darkroom, creating Sepia toned images is still very easy to do. Using a digital camera and a good photo editing tool like Photoshop, you can achieve create Sepia toned images in a few simple steps.
Sepia in a Digital Camera
Most digital cameras today have a built-in filter for Sepia toning. The settings may vary for different models or manufacturers, however, here is a basic roadmap.
For a Nikon camera for example, go into Shooting Menu and then to Set Picture Control. There you have to look for the Monochrome option. Press the right arrow to open the Monochrome subsection and select Toning and set the Toning colour to Sepia. You can also set the intensity of Sepia toning from its adjustment scale.
Sepia in Photoshop
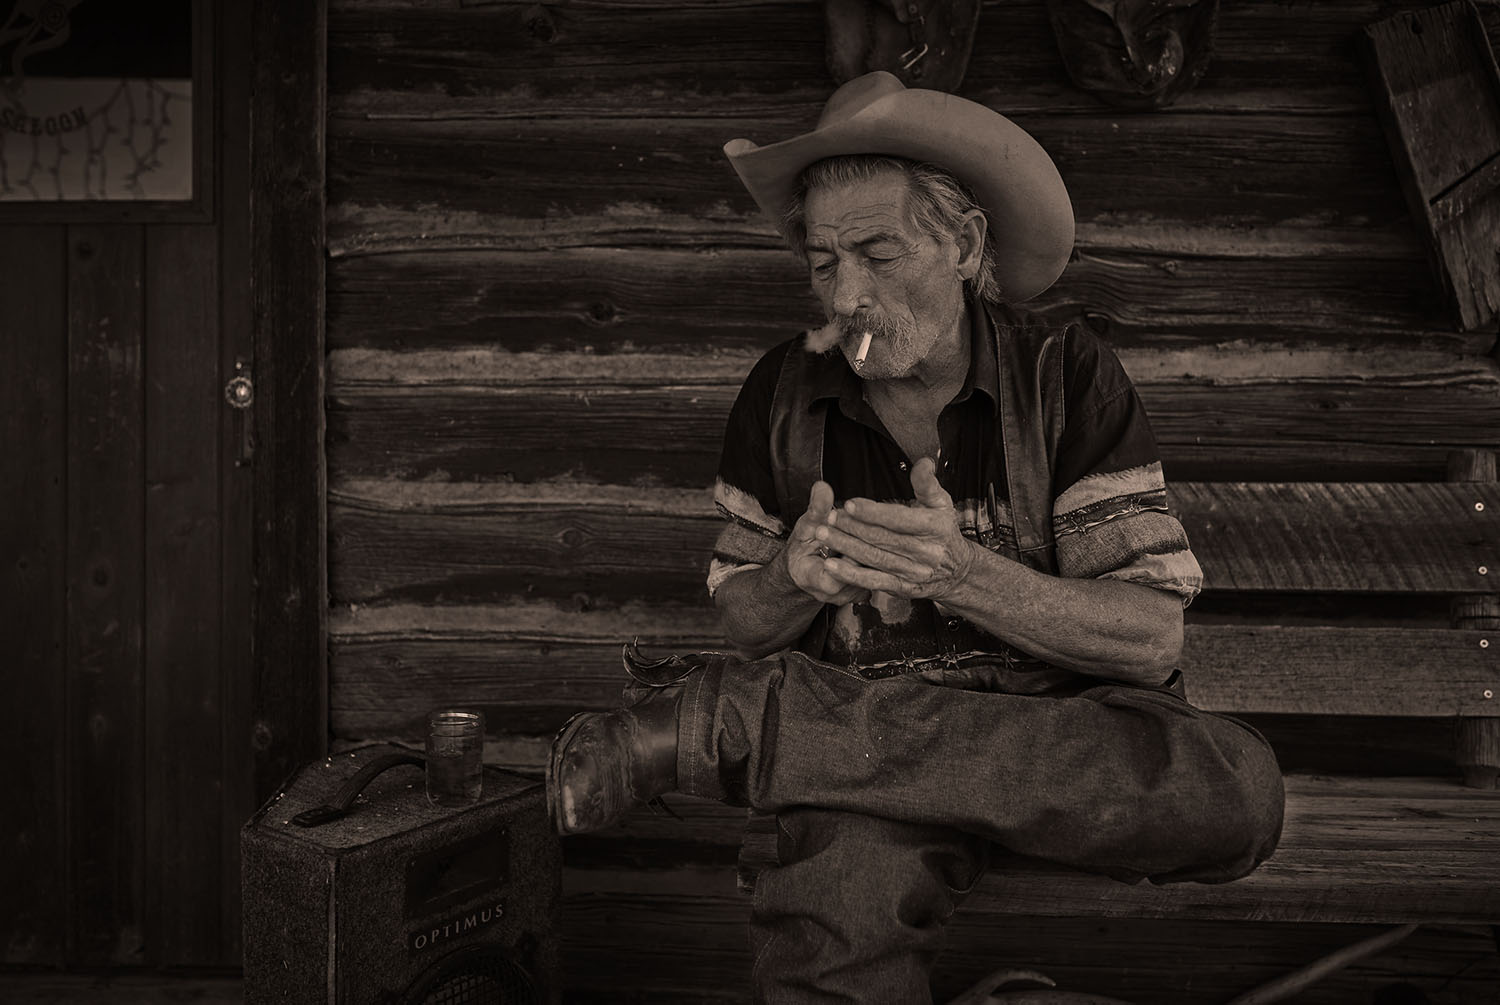
Carrying on the cowboy theme, I’ve selected this image for the tutorial: https://unsplash.com/photos/Z6kch3PSHj8
Download and follow along!
The first step is to convert the image to black and white, a simple black and white conversion can be completed by clicking on ‘Layers’ at the top of the screen, then ‘New Adjustment Layer’ and click on ‘Black & White’.
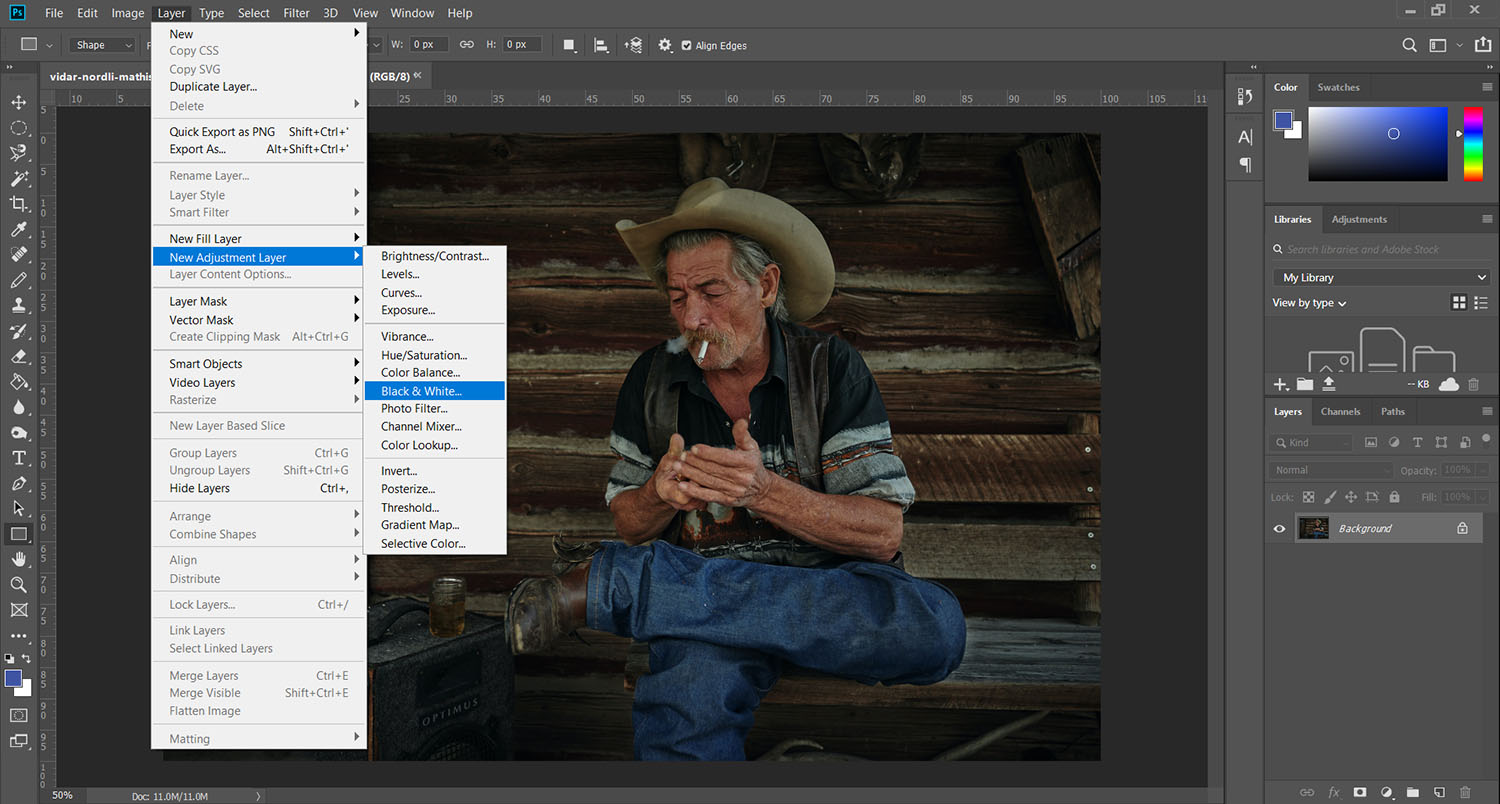
Next, click on ‘Layer’ then ‘New Adjustment Layer’, and then ‘Photo Filter’.

Next double click on the layer editing icon (number 1).
Then select ‘Warming Filter’ from the drop down menu (number 2).
Move the slider to 50% (number 3).
Preserve Luminosity should also be selected.

Similar to the darkroom method, the warmth of the Sepia can also be changed upon your preference. Just change the Density value to get different intensities of Sepia toning.
Then go to ‘Layer’, ‘Flatten Image’ and you’re done.
Photography Tips for Sepia
As you already know, achieving the results of Sepia is pretty simple and basic in digital photography. However, there are a few things that you need to keep in mind to get the best results. You should look for an image that is not only well exposed but also has a good range of contrast.
Conclusion
This guide thoroughly explains the meaning of Sepia toning. Additionally, we have talked about using the settings available in a digital camera menu as well as using software such as Photoshop to achieve a similar result a person would produce using a more rigorous chemical bath setup.
For your own first attempt at Sepia toning, try photographing a very old building and see if you can create that aged aesthetic.