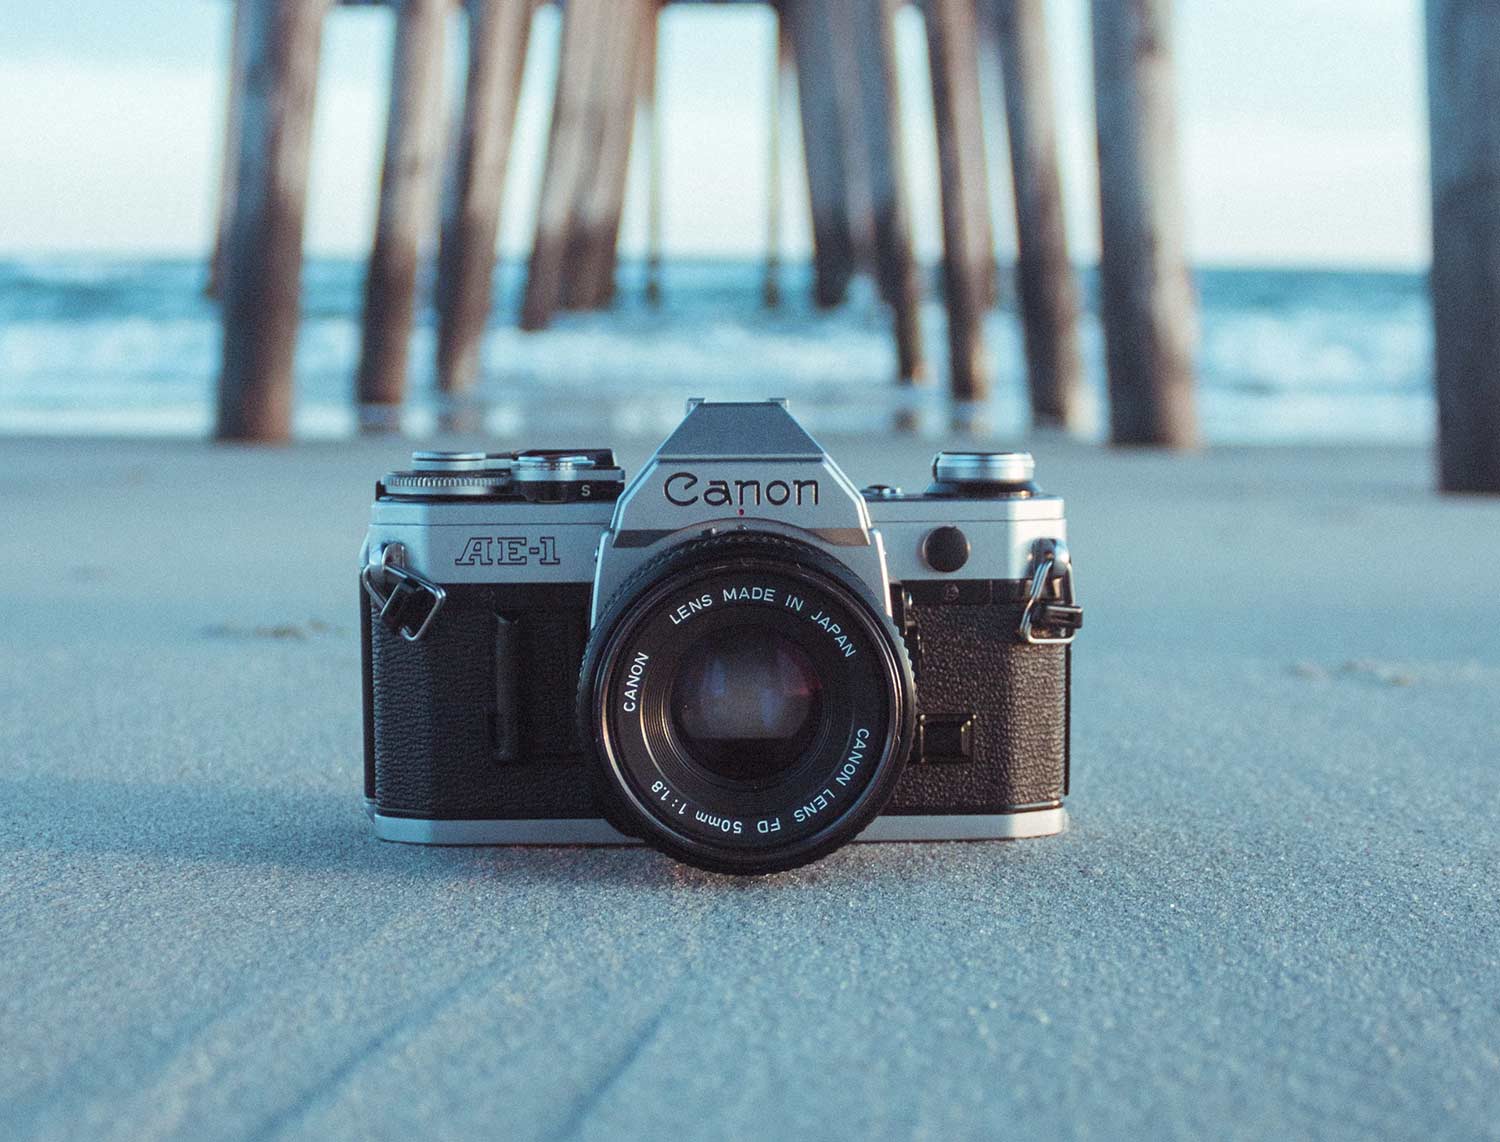

What does SLR stand for in photography? – Single Lens Reflex
A camera which is reasonably compact, easy to operate, and can take a whole range of lenses opens up dozens of possibilities for any photographer.
Telephoto lenses for sports action pictures and portraits, wide angle lenses for depth in landscapes and for shooting in cramped spaces, or close-ups of insects using a macro (close-focusing) lens.
But what the hell is it?
Single Lens = One lens
Reflex = Uses a mirror
For contrast. There is a camera called a TLR – a twin lens reflex. The TLR has two lenses, one for looking through and one for taking the picture. The result of this? The image you take is never exactly the same as the image you framed.
However, with an SLR, light travels through the lens, hits a mirror and then moves through a prism to the viewfinder. I’ve written a whole post on the SLR vs TLR here.
Then, when you take a picture, the mirror flips up and out of the way, allowing light to pass through to the film. The advantage of this system is that whatever you see in the viewfinder, is what will be recorded.
SLRs are the most popular interchangeable lens camera, widely used by amateurs and professionals alike. 35mm is the most common size of SLR or DSLR (35mm being the diagonal size of a film negative or a digital image sensor).
Other interchangeable lens systems exist, medium format, large format, and some viewfinder cameras – but we’ll get to these later.
What is the difference between SLR and DSLR?
They are essentially the same cameras in functionality and build, only the term SLR is used when talking about a film camera, and the term DSLR is used when referring to a Digital camera.
In conversation, most people will simply say SLR, regardless of whether it’s digital or film.
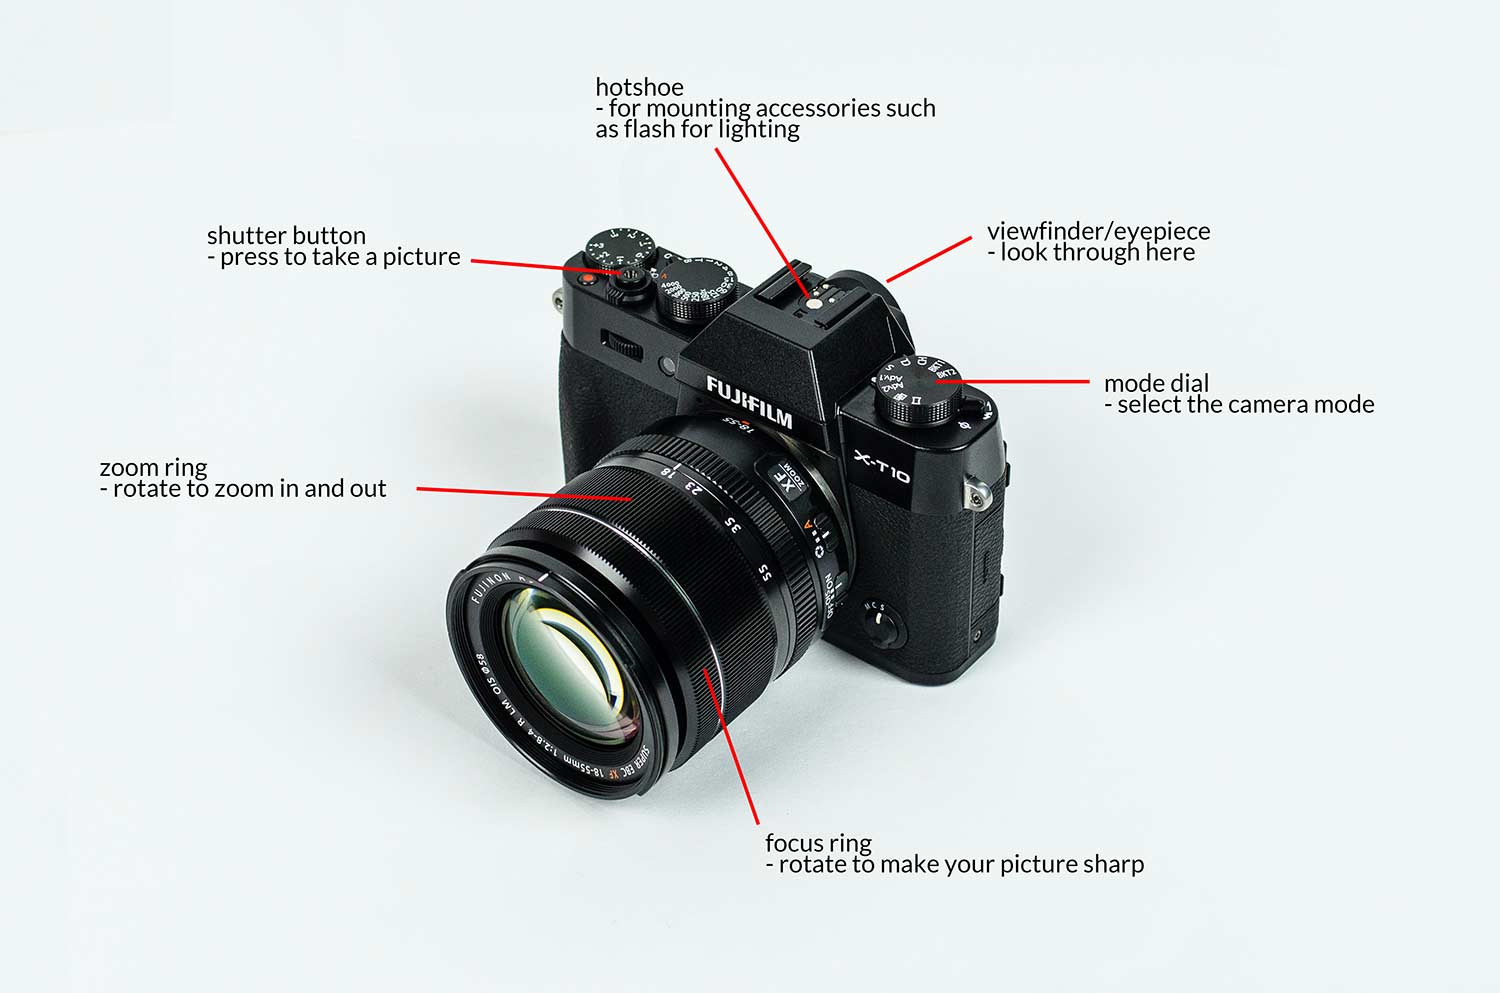
What are all the buttons and dials?
This diagram I’ve made is a very simple guide on what some of the key parts of the SLR do.
If you’ve never used one before, this may come in handy.
How does an SLR work?
I won’t waste your time writing it out, the best explanation of how an SLR works is this video:
For extra coolness, the slow-mo guys filmed the insider of a camera working so you can see what is actually happening:
As you can see, the mirror flips up and out of the way, then the shutter then moves to reveal the sensor below it which records the picture.
The gap that you can see in the shutter is the shutter speed setting in action. If you set a fast shutter speed, it’s a very narrow gap, if you set a slow shutter speed it’s a big gap.
If you’re interested in how this is different to a video camera, they also have this awesome video:
What is 35mm format?
35mm film looks like this when you buy it.
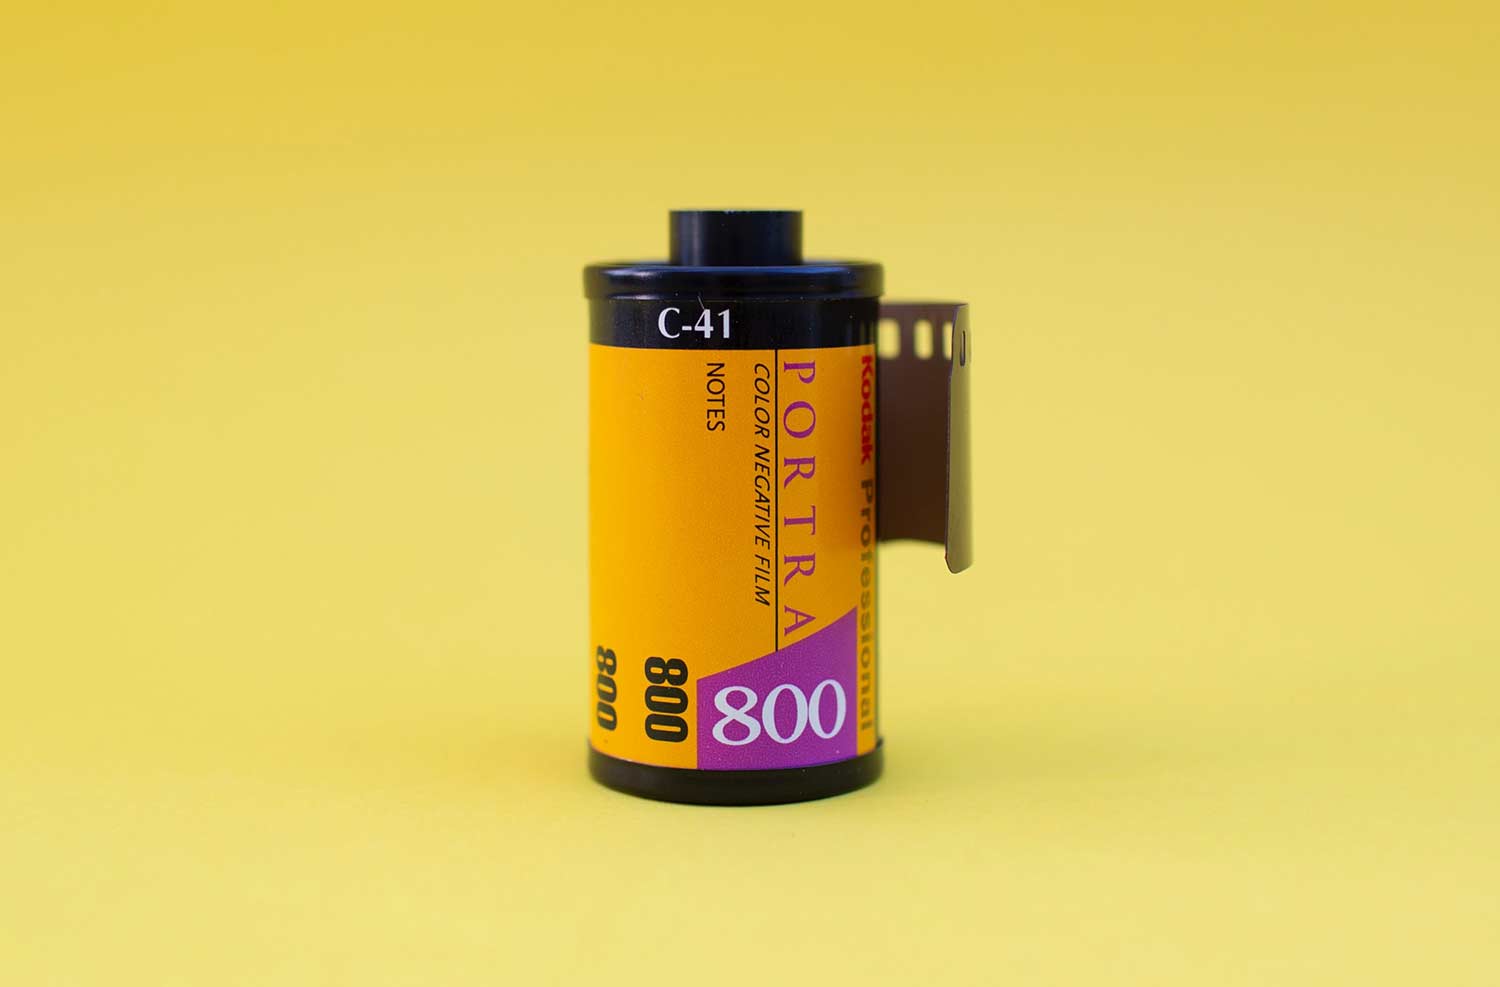
35 millimetres is the size of a piece of film or digital sensor when measured corner to corner.
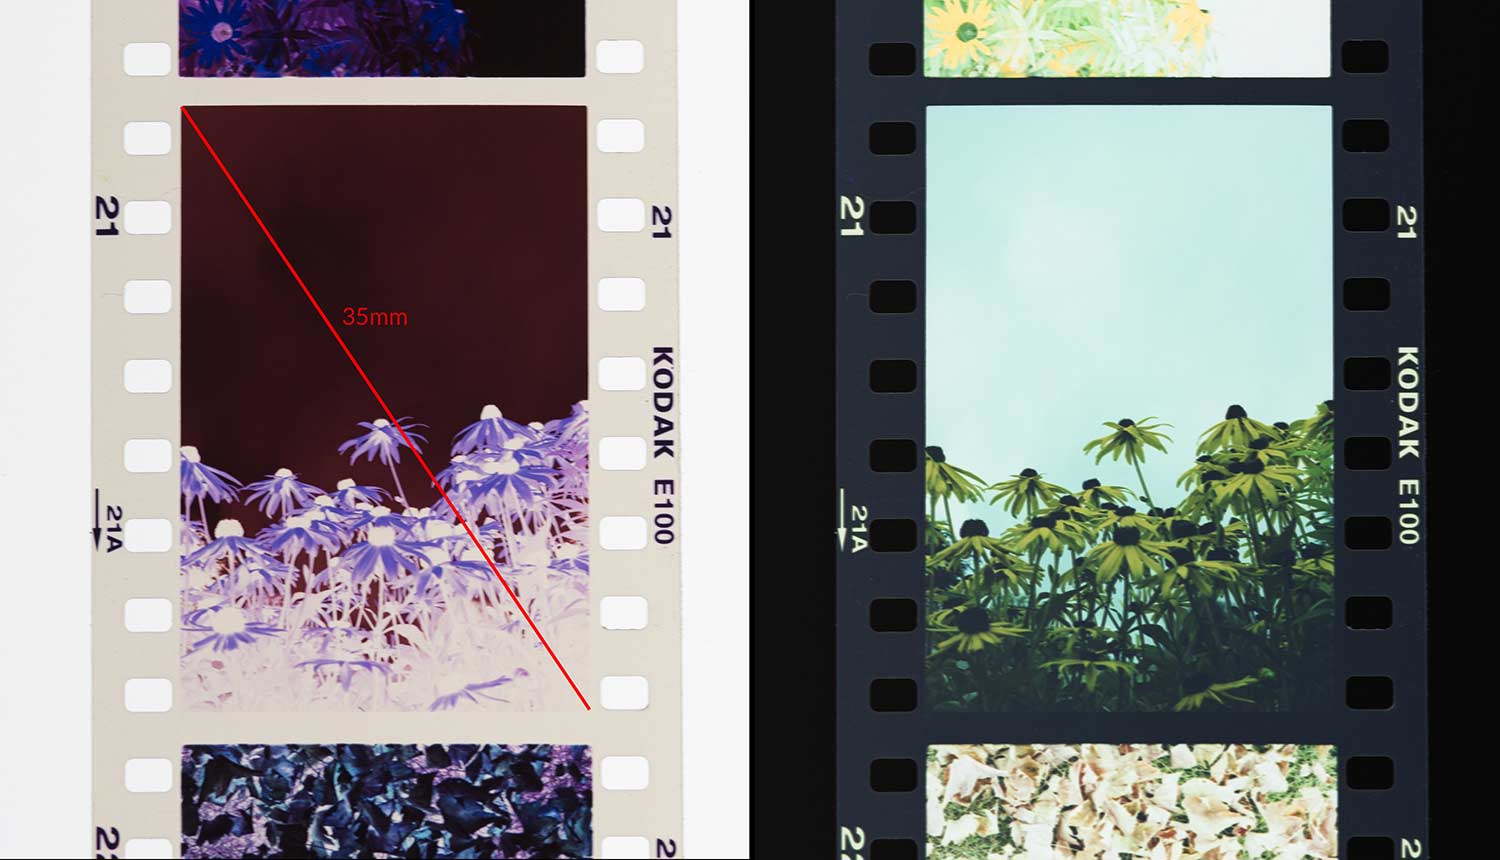
When you take pictures using film, it produces what we call Negatives. When you print the image, it becomes a Positive.
On the left is the negative, on the right is the same image as a positive.
Special features of the SLR
The advantages of the SLR camera to the are enormous. It is unrivalled for flexibility and can be used in nearly every photographic situation.
Different lenses, filters, accessories etc. exist to fit every conceivable situation, from 600mm sports lenses to underwater housing, technology has widened the scope of possibilities.
There are however, certain basic features the SLR possesses which make it an incredible tool in your creative arsenal and a worthwhile long term investment.
The range of lenses
Camera manufacturers such as Sony, Nikon and Canon have hundreds of lenses that you can choose from. As long as your camera has the correct lens mount, then the lens will fit it.
It doesn’t matter if you use the Canon EOS 3 film camera or the 5D Mk4 – if the lens is EOS fit, it will work.
Film SLRs are being phased out by most manufacturers, however the second hand market is alive and well. So well made are film SLRs that you can often find a 20 year old model that will still last you a lifetime if well looked after.
If you buy a brand new camera, it’s going to be a digital SLR referred to from now on as DSLR.
A DSLR will typically come equipped with a kit zoom lens, typically in the region of 18-50mm. 50mm is considered standard as it roughly replicates how you see the world through your own eyes.
This is a good rule of thumb to remember, as you can easily recognise if a lens is wider then your eyes can see (from now on referred to as wide angle) or more ‘zoomed in’ than your eyes can see (from now on referred to as telephoto) based off of this rule.
Anything below 50mm is going to be wider than you can typically see, anything above 50mm will be more ‘zoomed in’ than you can typically see.
18-50mm lenses are cheap to produce and satisfy most people’s needs when first stepping into the world of digital photography. It allows you to zoom out for landscapes or groups of people at the 18mm end, or allows you to take flattering portraits of individuals at the 50mm end.
After using one of these lenses for a few months you’ll quickly recognise whether or not it is fulfilling your needs. If you want to photograph football games for example, you’ll quickly find out that 50mm doesn’t get you close enough to the action.
You’ll no doubt encounter on your journey the sage advice of investing in lenses, this is because the camera bodies are updated pretty much yearly, however lens updates sometimes don’t occur for a decade.
The release of new technology or new discoveries are much more frequent in the world of camera sensors and processing speeds than they are in the world of optics. If you’re thinking about buying a new piece of kit, spend more on the lens, it’s a better long term strategy as the camera will be out of date much sooner.
The viewing system
The SLR has a unique viewing system.
The image in the viewfinder is the same image seen by the lens.
The viewfinder shows how much of the subject will be photographed, whether the lens is focused correctly, and the effect of the chosen aperture or a filter.
A pentaprism (five sided prism) mounted behind the viewfinder (the bit you look into) shows the image both the right way up and the right way round, whether the camera is held horizontally or vertically.
Exposure control: getting the correct exposure is a combination of f number (aperture size) and the shutter speed for the amount of light available. To help the photographer most SLRs have a built-in exposure meter which measures the brightness of the light entering the lens.
The layout differs depending on the manufacturer, but typically within the viewfinder you’ll be able to see the the chosen focus point, the aperture setting, the ISO setting, the shutter speed setting and the exposure meter.
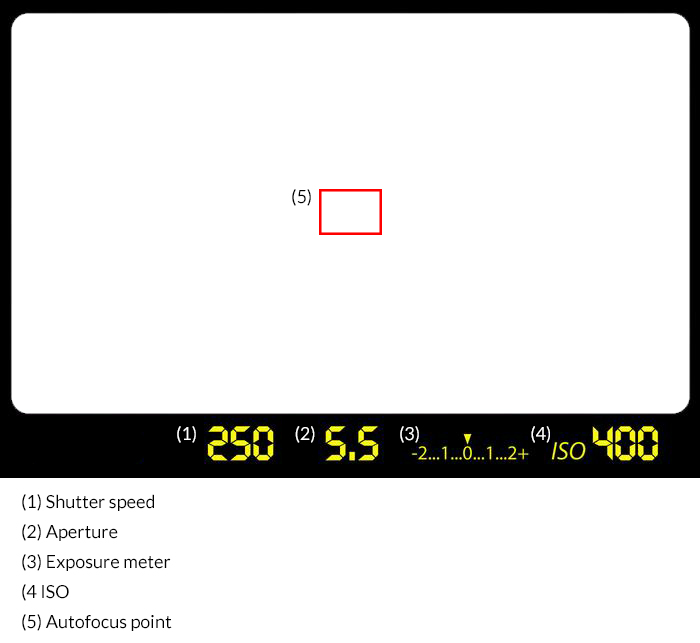
The right choice of shutter speed and aperture will make a needle in the viewfinder line up with a marker (or a small light shine if you’re using an old 35mm film camera), telling the user the exposure is correct.
In the above example the scale from -2 to +2 is the exposure meter. When the small arrow sits on 0, you know that the exposure will be correct.
A large number of SLRs have automatic exposure control which makes things even simpler for the beginner photographer to learn how the camera works.
There are typically four automatic modes on modern cameras: Fully automatic mode (A, Auto or A+) Programme mode (or P) Aperture priority (AV) and Shutter priority (TV). Each has their advantages and the one you choose depends on the sort of photographs you want to take.
Fully automatic mode, as it sounds, takes control of all of the settings so all you have to do is point and shoot. In this mode, the camera will set the Aperture, Shutter speed and ISO for you. The problem with this mode is that you have no creative control of the settings and the camera will look to create a ‘technically’ accurate exposure, which translates in real life as – the camera can get confused easily.
Programme mode or P, is also allowing the camera to take control of all of the settings, however you can adjust the aperture or shutter speed independently and the camera will adjust the other two settings for you. This is good as it gives you freedom to start playing with settings whilst knowing the picture will be exposed properly. Again however, the camera can get confused in tricky lighting conditions.
Aperture priority tends to suit still subjects in which accurate control of depth of field is important, such as landscapes and portraits. It is up to the photographer to set the aperture, and the camera automatically sets the correct shutter speed. This is good for experimenting with depth of field, focussing on one setting gives you a chance to experiment, without having to worry about the other settings.
Shutter priority gives the photographer control over the shutter speed -a better solution for capturing movement. Once the shutter speed is set the correct aperture is selected automatically by the camera. This is handy if you want to experiment with movement whilst maintaining a correct exposure.
Even on cameras with automatic exposure control there is usually some provision for manual override. Once they have some experience, many photographers feel that they like to have total control over the camera’s choice of settings. It is worth, however, starting off by taking pictures in one of these semi-automatic modes as it allows you the space to experiment, whilst still taking correctly exposed pictures.
Photography like any artistic endeavour requires practice. Observing how changing the aperture affects the shutter speed and vice versa, will then make the transition to fully manual mode much easier.
It is worth noting that plenty of professional photographers do not care for working in fully manual mode, so it should never be considered a mark of ability which mode you use.
If you produce stunning images in a fully automatic mode, then who cares. What is essential however, is that you know what the camera is doing. If you choose to work in automatic, but have the ability to work in manual mode, then as far as I’m concerned, that’s absolutely fine.
If you choose to work in auto because you don’t know how to use the camera in manual mode, I would suggest getting more practice. I say this because the camera cannot think for itself, and I guarantee you’ll find yourself at some point in your career having to override the camera because it’s not doing what you want.
That is when you need to fall back on your base knowledge in order to get the picture.
There should never be any shame in what picture mode you choose to take photographs with. Plenty of professionals use automatic modes. I used to shoot in AV mode and I still use auto ISO a lot of the time. The most important thing is that you know what the camera is doing, so if the picture isn’t how you want it to be, you know what to change.
Film lens mounts
The lens-to-camera attachment is very important on SLR cameras. It must be easy to fit, light-tight, and link up smoothly with the camera’s controls. There are two basic types of film lens mount – screw thread and bayonet.
Screw thread mounts: their great advantage is standardisation. All screw thread lenses fit any make of 35mm camera body made for this type of lens mount.
Bayonet mounts: this mount is much quicker to use, unfortunately, each manufacturer has a slightly different system, but adapters are available for many which enables photographers to put older lenses on to modern DSLRs
Digital lens mounts
As cameras moved into the modern age, manufacturers became savvy to the idea of tying in a consumer to a certain camera system for life. I.e. no longer having standard fit mounts so only the manufacturers lenses worked on the same manufacturers camera.
It has to be said that in customising the mounts specifically to the brands camera it allows for unique functionality. Autofocus wasn’t invented until 1976 and wasn’t commercially available until some time later.
Now, lenses not only autofocus, but for example in the case of the EOS R, the aperture ring can be customised to change any number of settings instead of the aperture. It can be used to change the ISO for example. From once upon a time having a simple ‘screw thread’ in the modern era we now have:
Canon EOS
Canon EOS EF-S
Canon R
Nikon F mount
Sony A mount
Sony E mount
To name but a few…
Third party manufacturers have engineered their own lenses to fit different camera bodies.
I happen to be a big fan of Sigma’s offering and I’m also hearing very good things about Tamron lenses too.
We’ll get into third party lenses at a later date, but if you’re just starting out on your photography journey there are very high quality, sometimes even superior, lenses available from third parties that won’t break the bank.
Disadvantages of the SLR
For all it’s brilliance, the SLR does have it’s disadvantages. They can be heavy, expensive and noisy.
- The shutter and the movement of the mirror can make a tremendous ‘slap’, difficult when shooting sensitive moments during weddings or documenting an emotionally charged moment.
- When taking a picture, there is a momentary loss of the image in the viewfinder – a problem during long exposures. This is because the light reaches your eye by bouncing off of a mirror, in order for the light to reach the film instead, the mirror moves out of the way, thus, you can no longer see anything through the viewfinder.
- It has more moving parts and is, therefore, more susceptible to damage from rough handling than a viewfinder or mirrorless camera. Camera age in the second hand market is typically defined by how many pictures the camera has taken, you may have seen ‘shutter count’ written as a marker of age of the camera body. Low end cameras have a life expectancy of around 100,000 photographs, high end cameras approximately 500,000.
- An SLR outfit is an expensive way to start on your photographic journey. Lenses can be thousands of pounds, as can camera bodies. Lenses hold their value better than bodies do, so they offer a better long term investment.
Weight is certainly an issue if you will be using the camera all day, or having to hike to a particular location for a landscape photograph. A professional level SLR coupled with a high end lens can easily top the scales at 3kg, which can pose significant issues in the long term.
We should also mention that the size of an SLR is an issue. One because it makes it obvious you have an expensive camera as it isn’t discreet, and therefore makes you more of a target for theft whilst on holiday for example. Two, if you have more slender hands, they can be harder to operate.
Finding the right camera for you is part of the joy of the journey into photography and a question you will only find the answer to with practice. Rent a few or buy cheap second hand gear in the first instance before taking the plunge on a new piece of kit. Better yet, beg and borrow from those around you, photography can get expensive quickly, so learn what suits your needs early on.