The ultimate guide to understanding metering and metering modes
Ever seen these icons on your camera and not known what they do? Well today you find out.
I point my camera at something and it seems to ‘know’ the correct exposure, how does it do that?
The camera has a built in light meter, and using super computer magic, calculates the correct exposure settings.
Sometimes I point my camera at something, like a bright object in a dark room, and the camera gets the exposure all wrong, what can I do to fix it?
Annoying right? You can however change how the camera interprets the scene, by changing the metering mode.
And that will allow me to choose specifically what I want to be bright and what I want to be dark?
You got it!
Every modern camera has the option to change the metering mode, even the majority of mobile phones have it too.
After photographing for a few years, you’ll probably find a mode that works for you and the majority of situations you shoot in, but understanding each one is important for the rare occasion where your camera gets the exposure reading completely wrong and you have to override it manually. In this article I will explain what metering is, how it works and how you can utilise the different modes to suit your needs and ultimately, take better photographs.
I’ve bought my first camera, but the pictures are coming out either too bright, or too dark, what am I doing wrong?
You need to understand first and foremost what the camera is ‘seeing’. As it’s not an intelligent device, all the camera can do is read the amount of light that’s available and produce an output. It can’t look at the scene and establish exactly what you want, but by knowing what the different metering modes do allows you to feed the camera more accurate information relative to the desired outcome.
Table of Contents
- What is Metering?
– Why does it go wrong - Matrix / Evaluative Metering
- Centre-weighted Metering
- Spot Metering
- How to Change Camera Metering Mode
- Troubleshooting and FAQ
- Further reading
So Then, What is Metering?
In short, the camera is reading the amount of light available in a scene, and then sets the aperture, ISO and shutter speed to create an accurate exposure.
As the user, you can set how much of the scene the camera uses to gather data abut the amount if light available.
You can choose to read the amount of light in the entire scene for pictures of say, landscapes, or you can choose to read the amount of light from an area of 5% of the frame, to get a super specific area of the picture exposed just right.
Take this landscape image for example. The camera looks at this scene and says ‘Aha! It’s all the same level of brightness, I can easily set the aperture, ISO and the shutter speed, knowing the whole image will come out correctly exposed’

Why does metering go wrong?

Generally speaking, the camera looks at any given scene and thinks ‘a completely black image is too dark, a completely white image is too bright, how do I make this scene appear somewhere in the middle? ’. If you are standing in a dark room, the camera will take this idea and the result will be a very long exposure to let in a lot of light because it assumes you want an image ‘somewhere in the middle’. But what if you are standing in a dark room, but there is a shard of light coming through a window and falling on a person, you want the room to look dark, but the person to be exposed correctly?
The camera is saying ‘I don’t get it, do you want the dark bit to be brighter resulting in overexposed bright bits, or do you want the brightest part of the picture exposed correctly, meaning the dark areas will be completely black?’
Congratulations, you’ve successfully confused your camera, it’s time to dig deeper into the menus.
 Matrix / Evaluative Metering
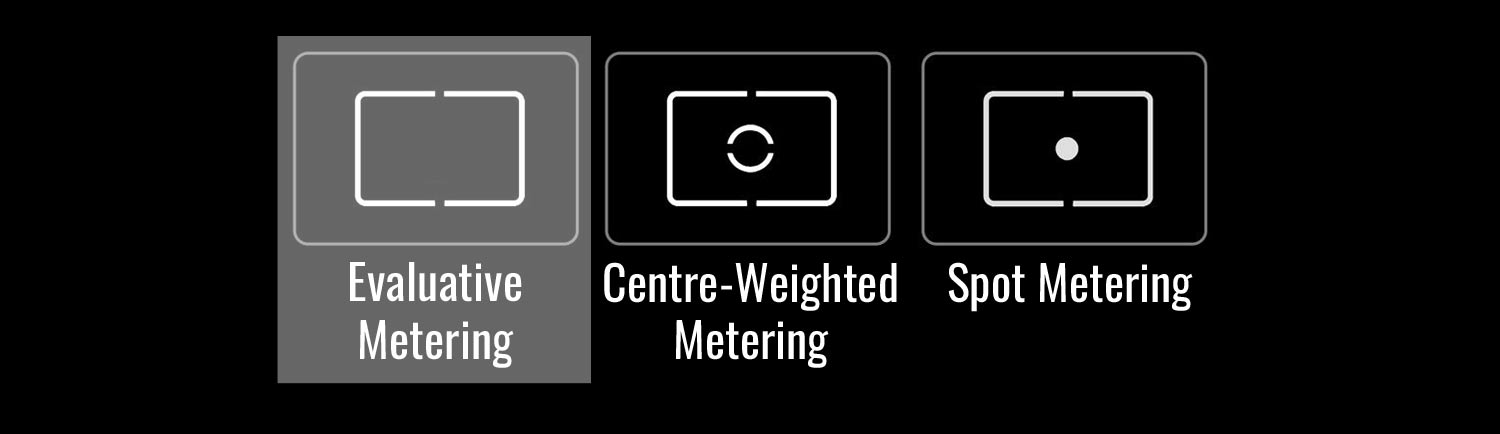
Metering systems work by dividing the frame into zones and using the light reading from that zone to determine the correct exposure. If the zone is the entire frame, then it takes into account the brightest and darkest parts of the scene and attempts to land the exposure somewhere in the middle. You will be able to use Evaluative Metering for the majority of photographs you take when you are still learning the ropes of photography, the technology in cameras is sophisticated enough to get the exposure correct the vast majority of the time. In the example photograph we are using however, I’ll show you what the camera will be attempting to do, how it gets it wrong and what you can do to fix it.
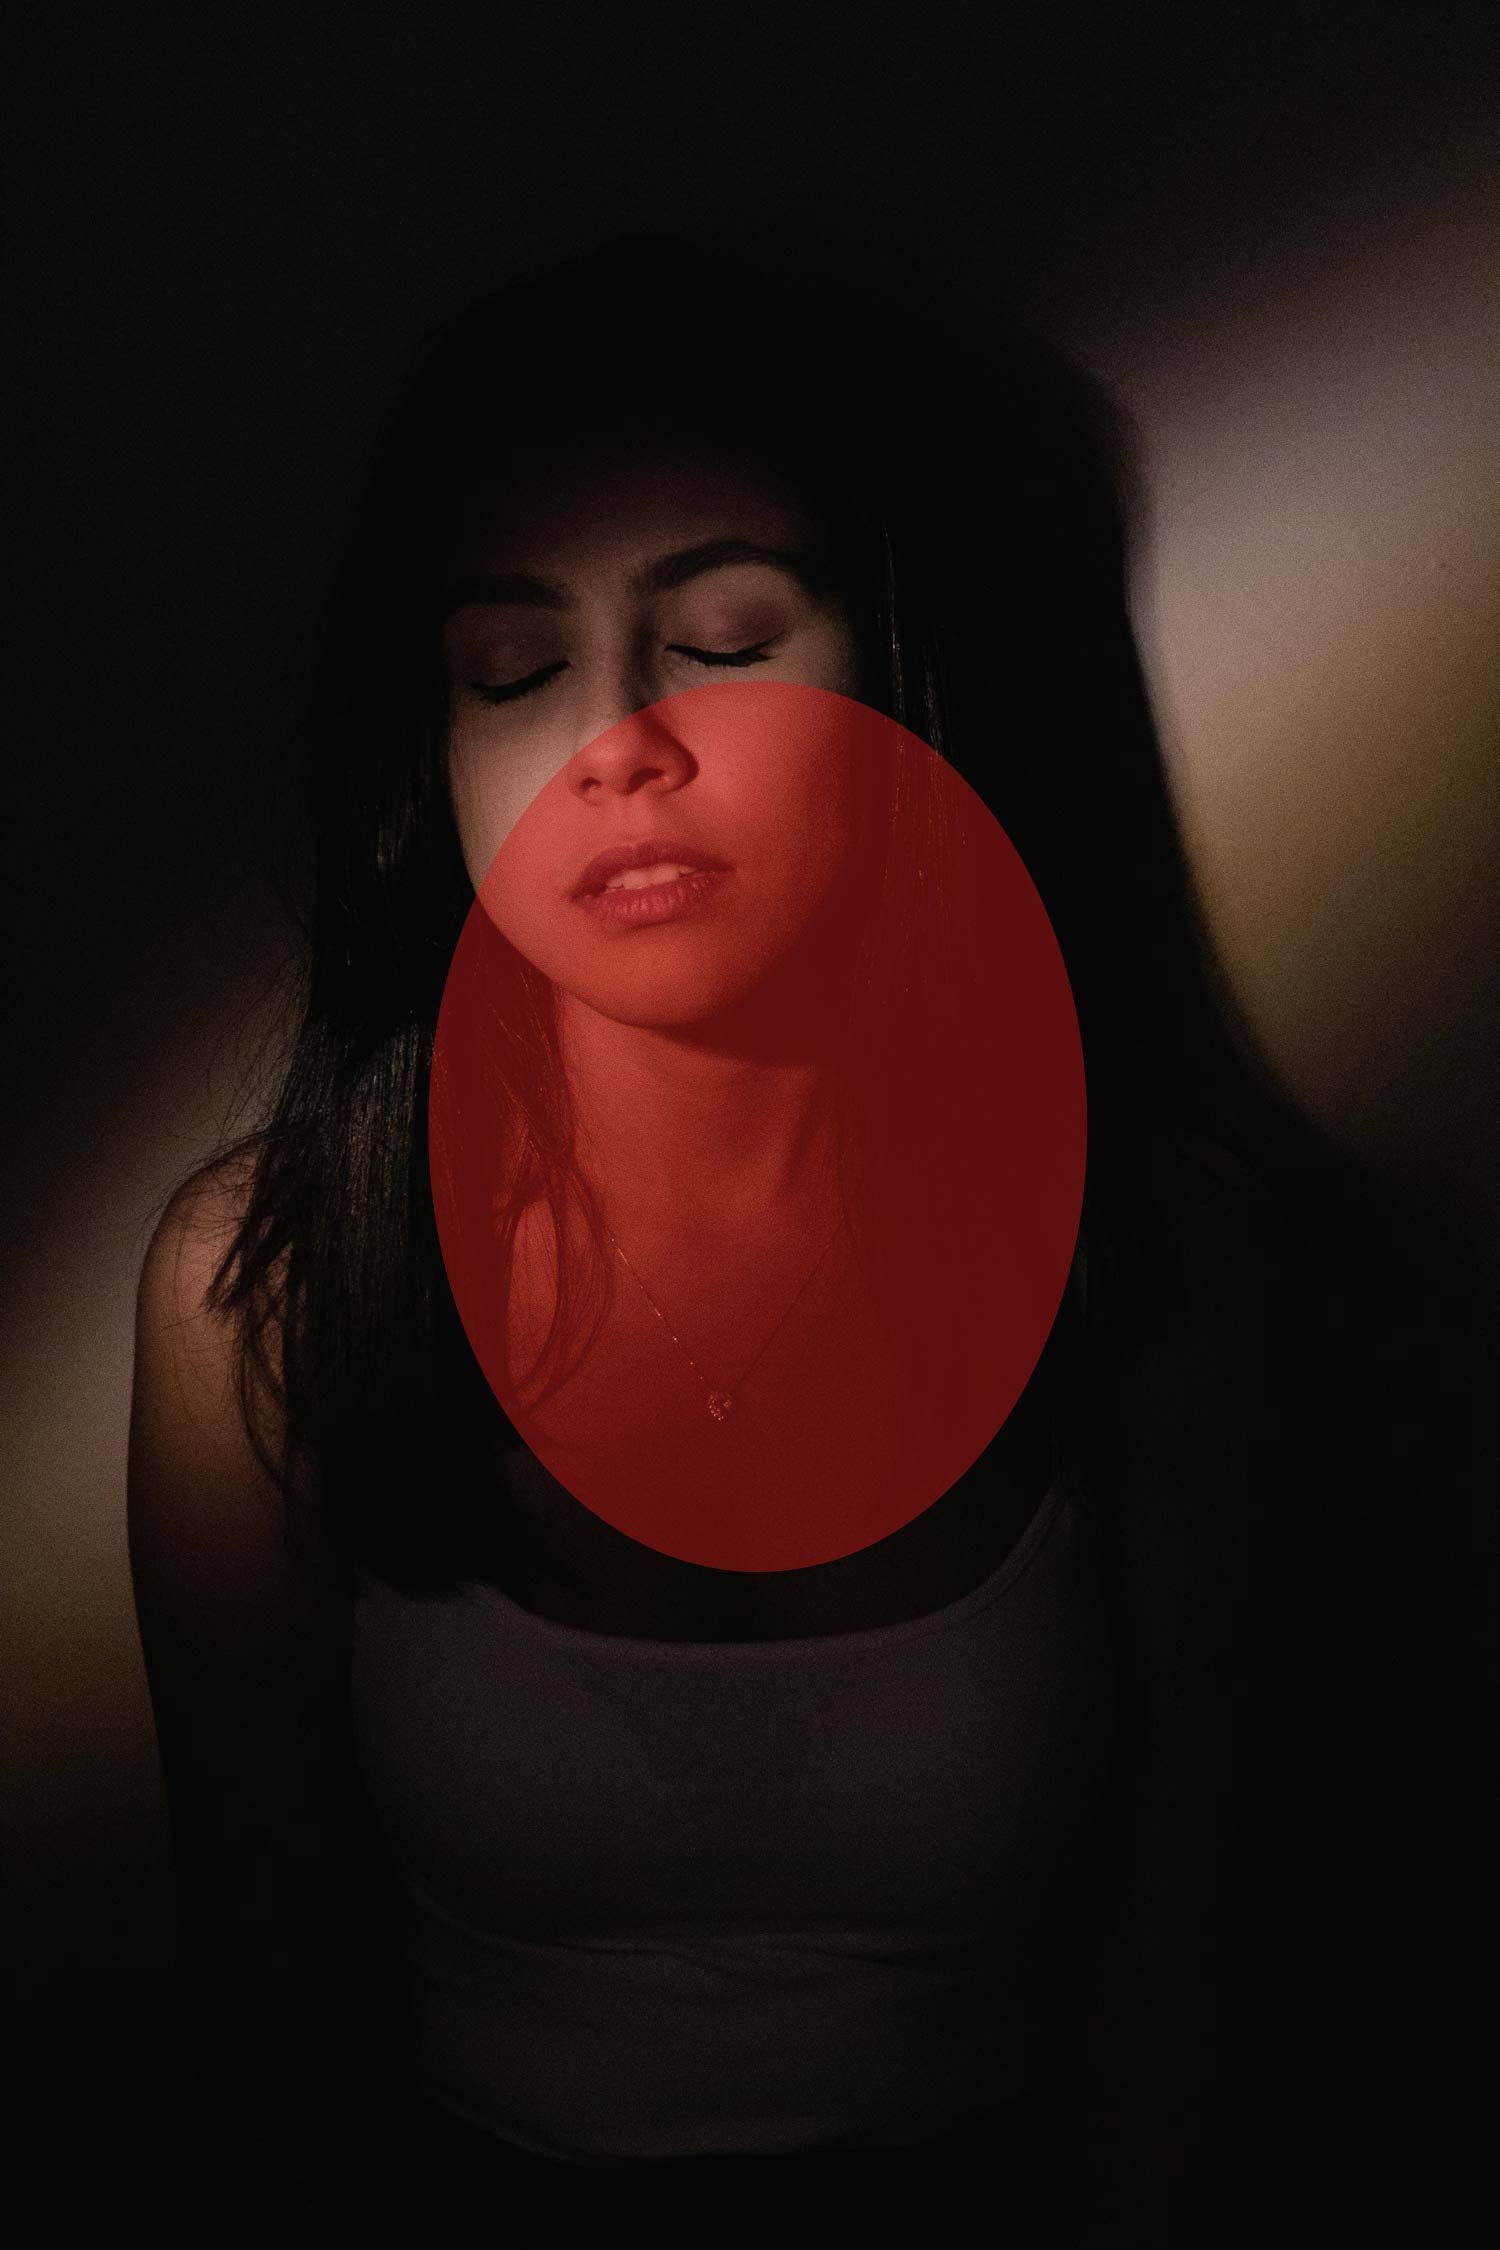
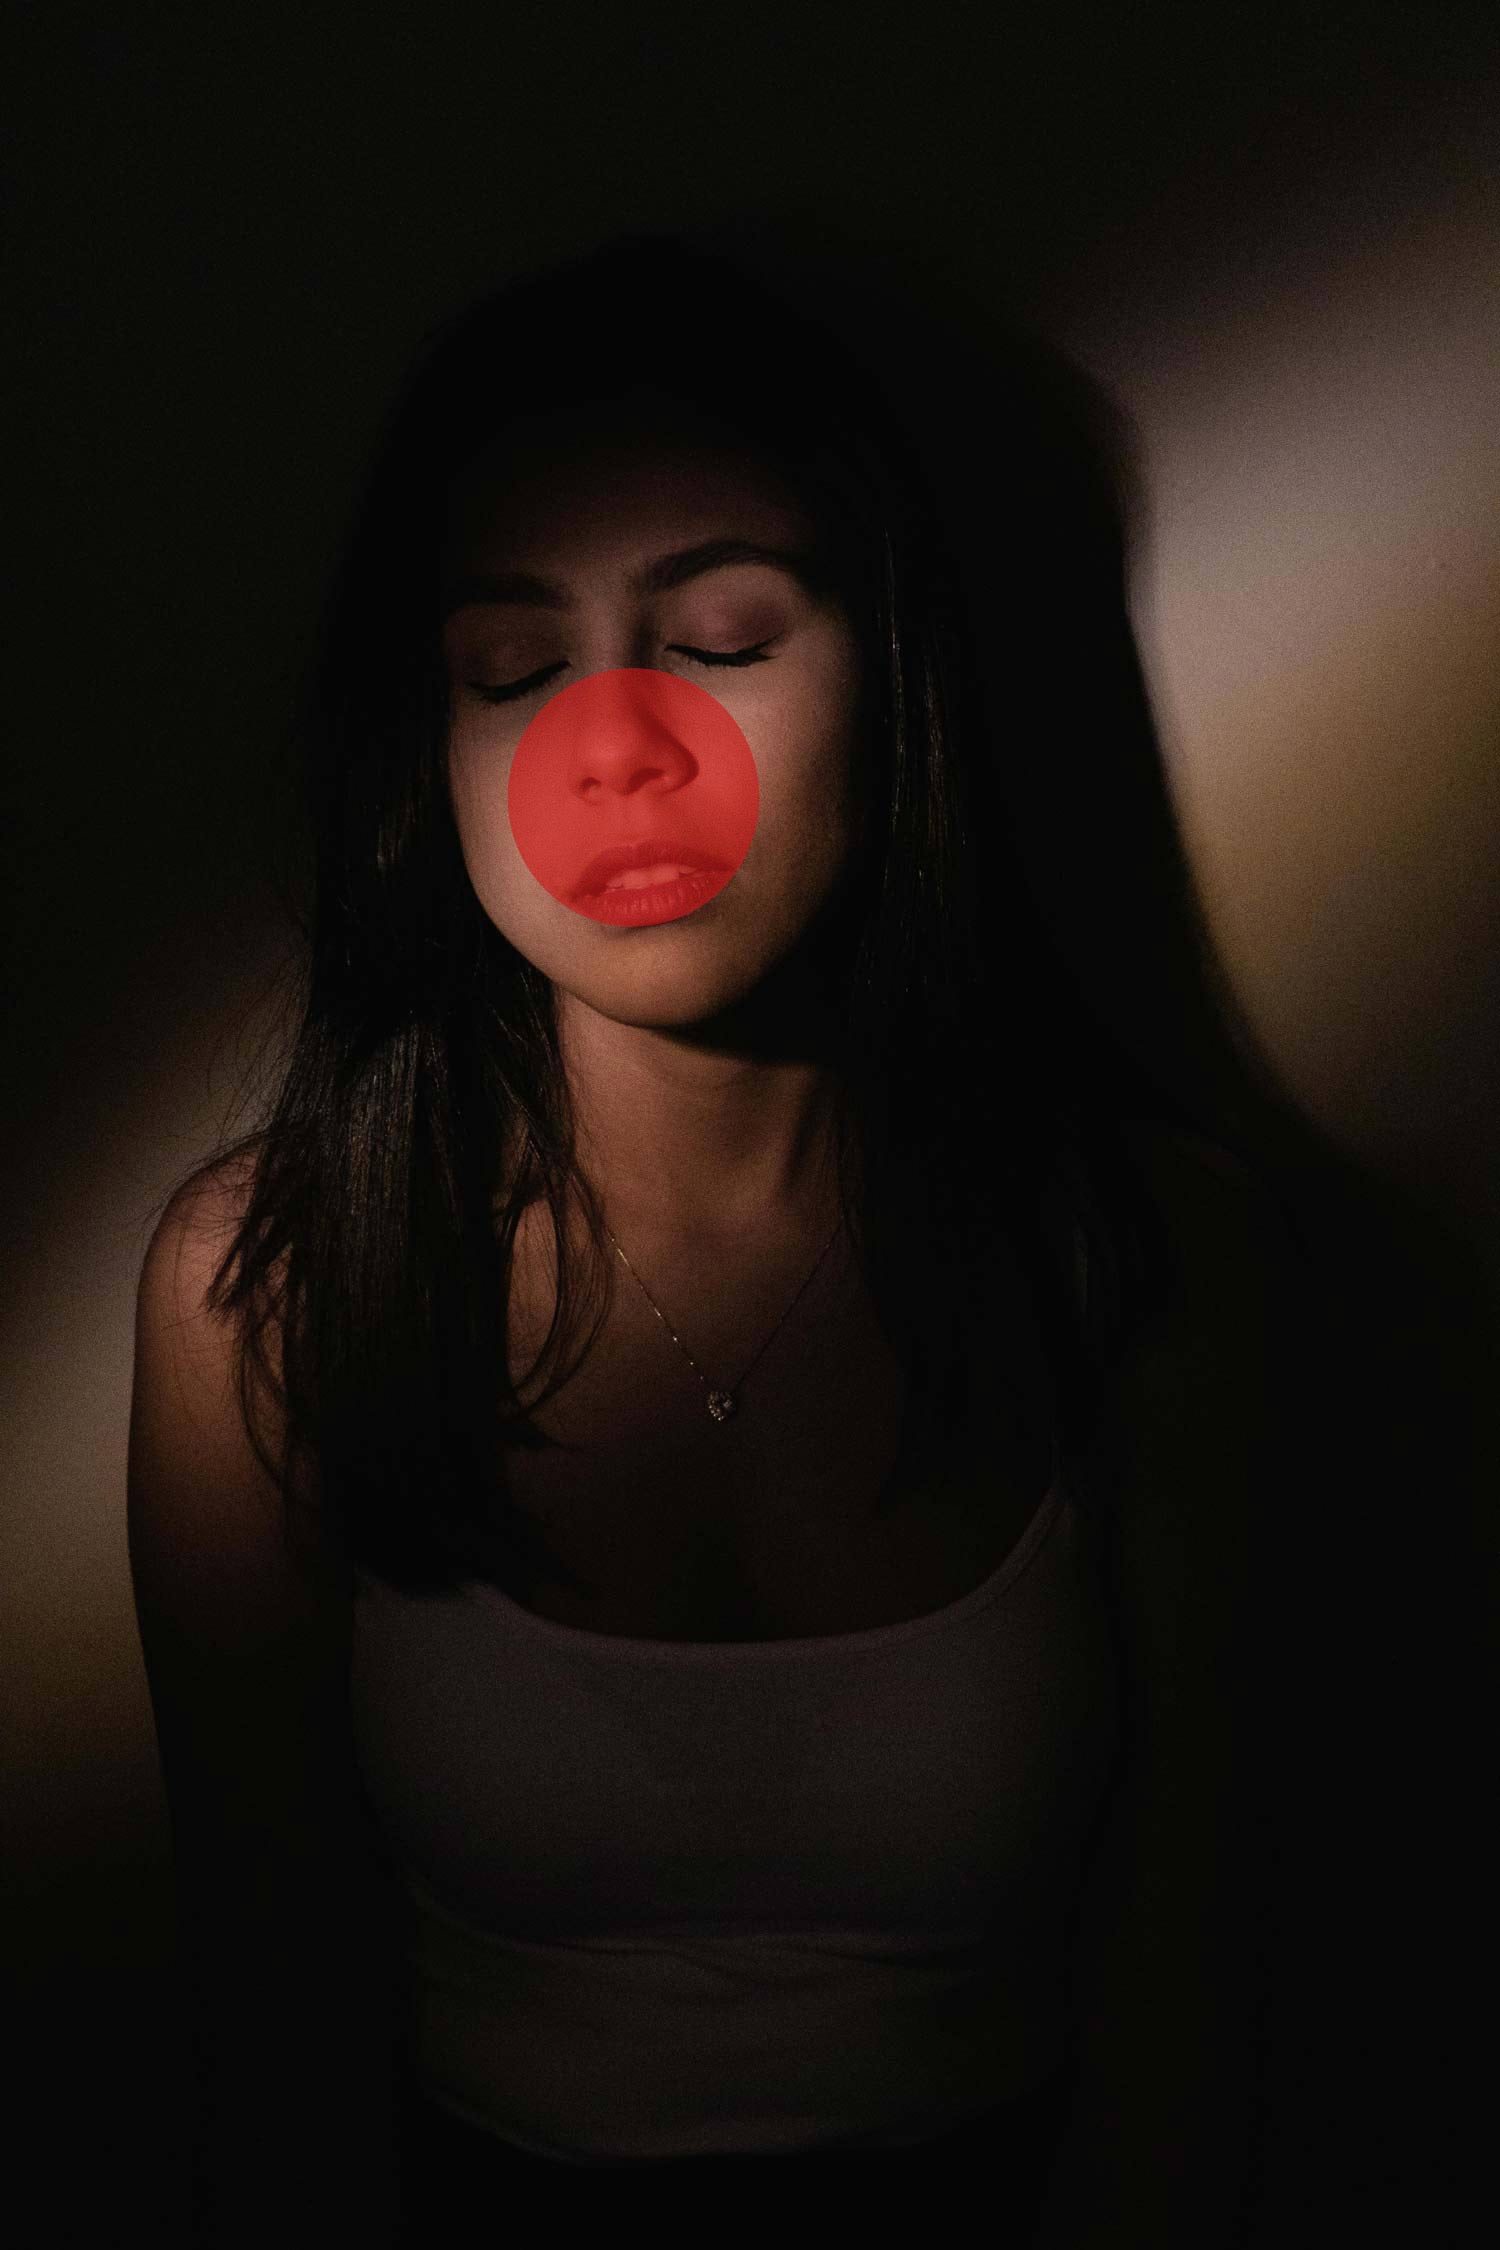
The red zone is the amount of the frame that the camera will be reading the exposure from when we have Evaluative Metering selected as our metering mode.
 The majority of the frame is very dark, a good 70% of this image is dark shadow. The camera will assess the entire scene and assume you want the exposure to be even. The camera is saying ‘the majority of this image is dark, so you’re telling me to look at the whole scene and generate an accurate exposure based upon the amount of light available in the whole picture’.
As the majority is shadow, the ‘middle ground’ exposure the camera is looking for will result in the highlights being overexposed. Like this.

Centre-weighted Metering

Evaluative metering reads the whole scene, but in this example, we need the exposure reading to be very specific.
Centre weighted metering will improve your accuracy of exposure in difficult lighting scenarios.
As the name suggests, this metering mode takes an exposure reading based upon what is in the middle 20% or so of the picture, whereas evaluative metering examines 80-100% of the image. It’s making an assumption that whatever you are pointing the camera at is significant and should be the thing that is correctly exposed in the picture, regardless of what else is happening in the scene. In our example, the camera is going to assess the red area of the picture and say ‘hey, the majority of this area is still dark, but the ratio of dark to light is lower than before, so I’ll let in less light’.
 Better than when we were using evaluative metering, but it’s still overexposed and we’ve lost some of the mood. So we need to really zone in on the area we want to determine our exposure from.
Spot metering

Spot metering lasers right in on the area that is 1-5% around your selected focus point and ignores everything else in the frame. This is the type of metering I use the most as modern DSLR’s have so many focus points to choose from, you can drop the focus point pretty much anywhere in the frame and take an exact light meter reading of that object. If you are a sports or wildlife photographer in the making, or photographing anything that is moving quickly, spot metering is the mode to use. The thing that is moving quickly is what you want to be exposed correctly, so there’s no point in exposing for the whole scene. If for example, you are photographing a blackbird or a crow, the bird’s feathers are completely black, so the camera will be thrown off by this and underexpose your picture if you are using evaluative or centre weighted metering. It will read the scene as a black blob on a light background and try to balance out the exposure. Likewise if you are photographing the moon. The camera will see this as a white blob on a black background and try to balance the exposure. The result being an overexposed moon with no detail.
In our example, we can move the focus point onto the brightest part of the model’s face and take an exposure reading from there and there only. The camera is now thinking ‘I’ve got this very small and specific bright area to make an accurate exposure of, cool, let’s even that area out and ignore the rest of the frame’.
 The result? Perfectly exposed skin.
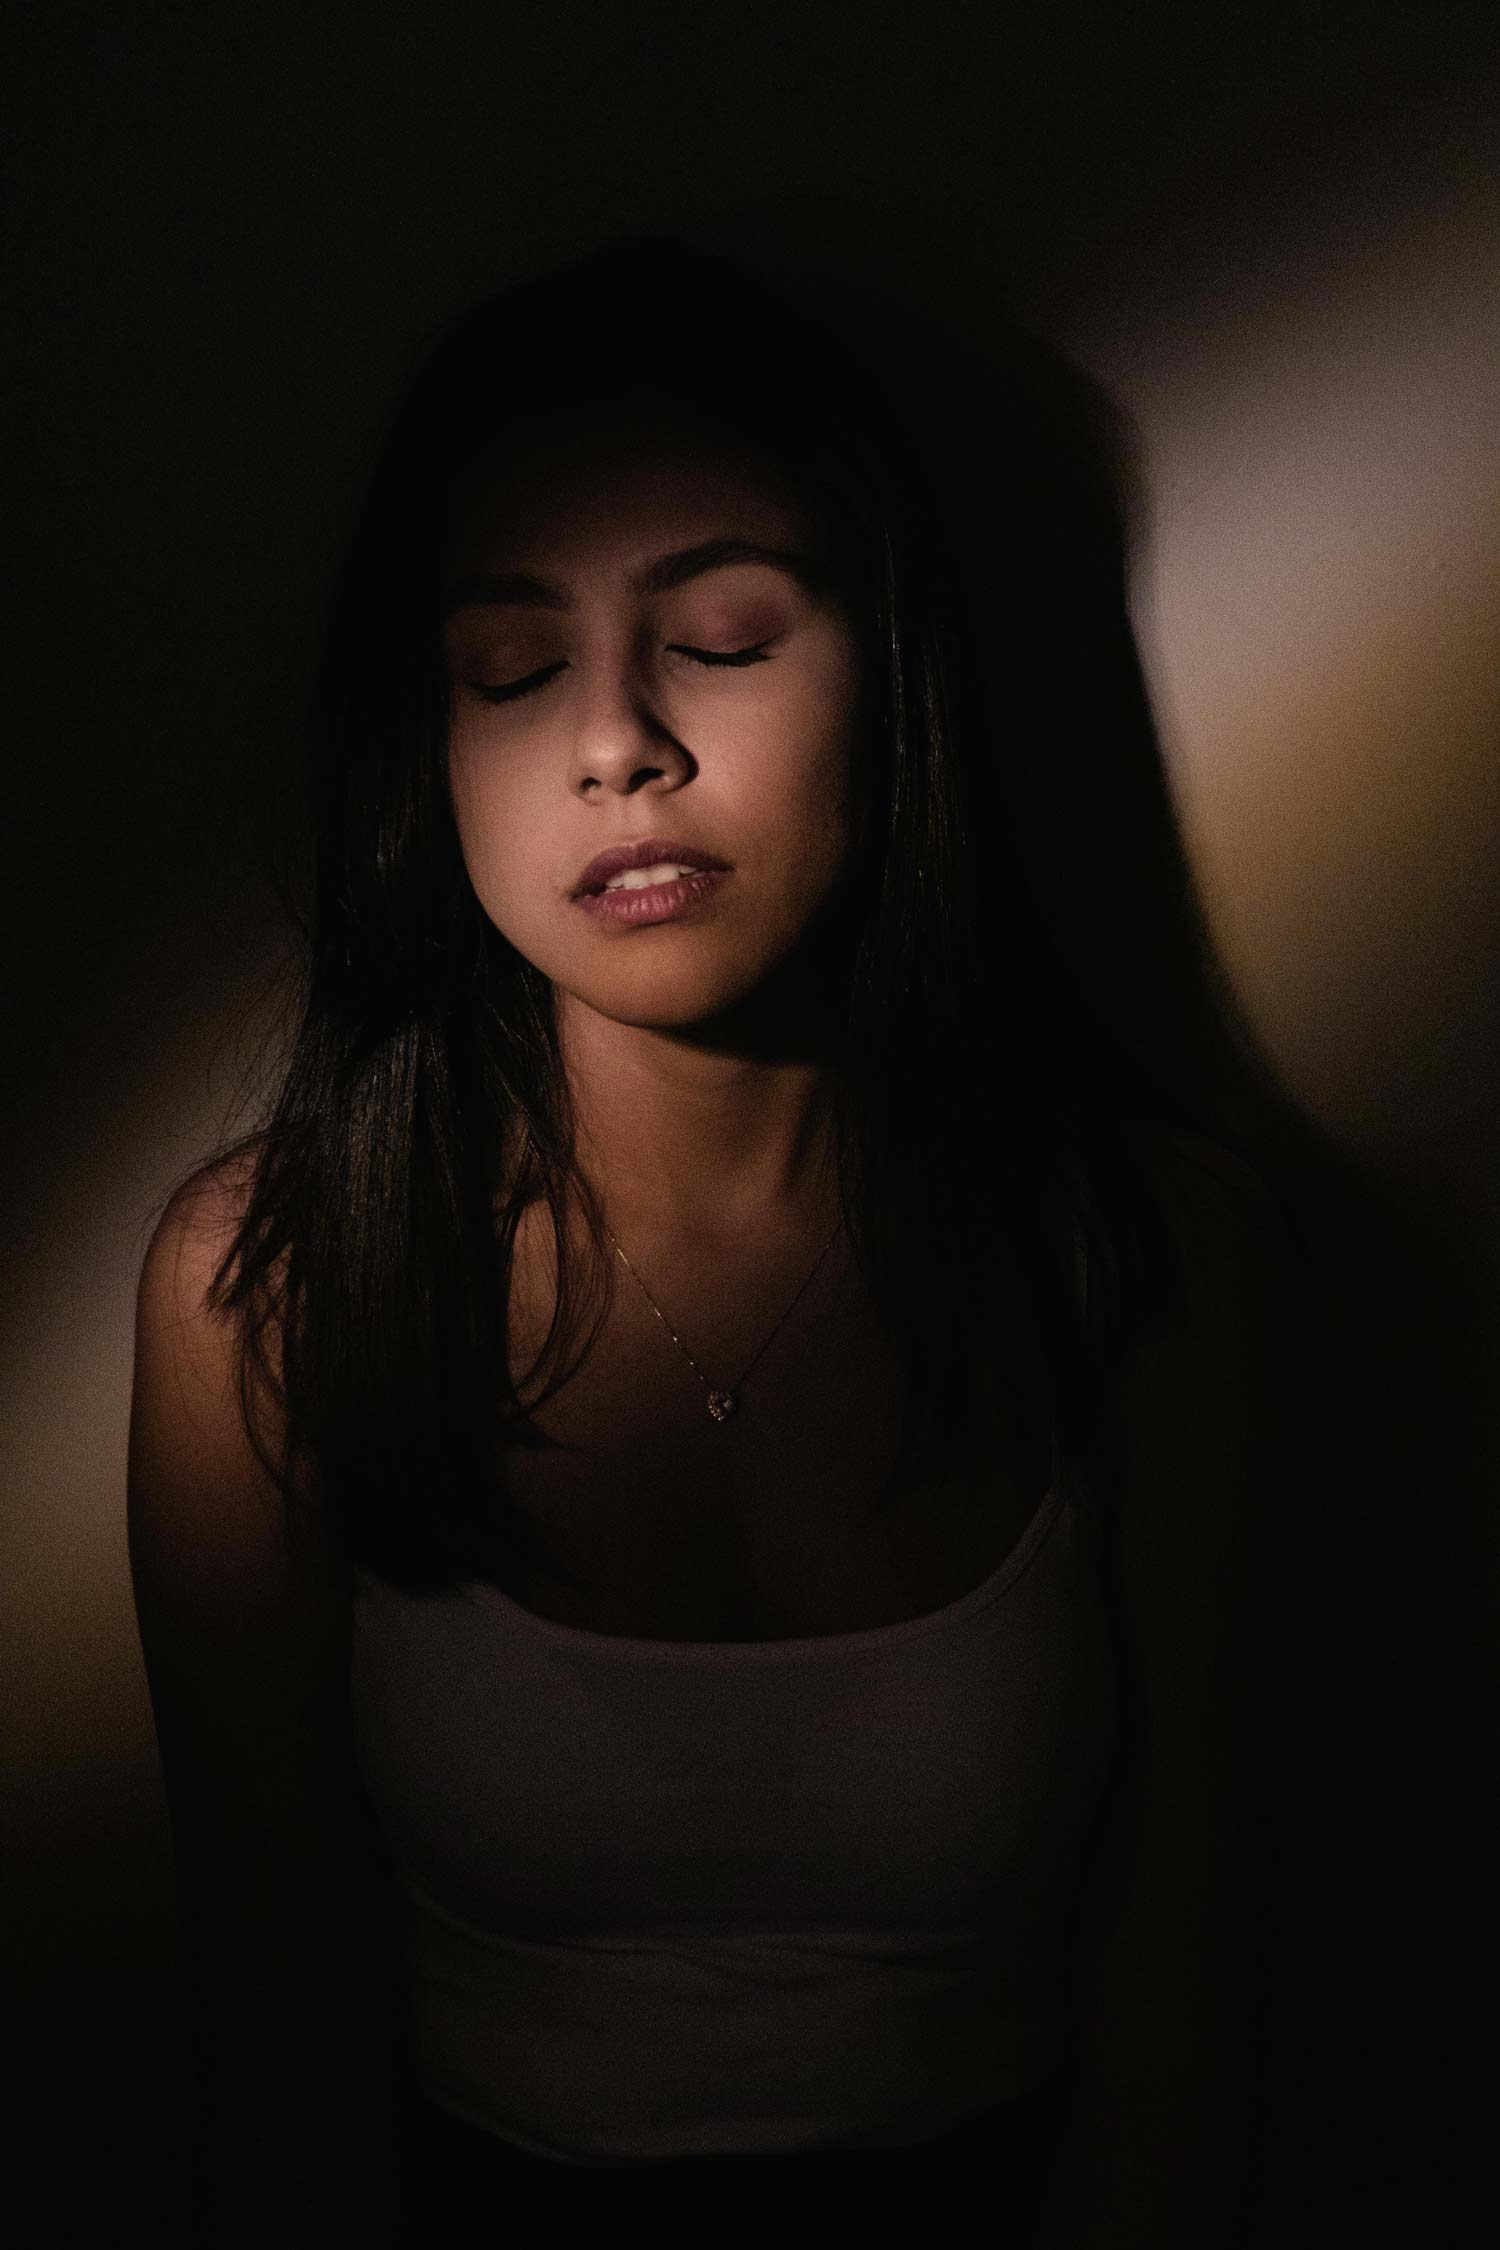
How to change metering modes
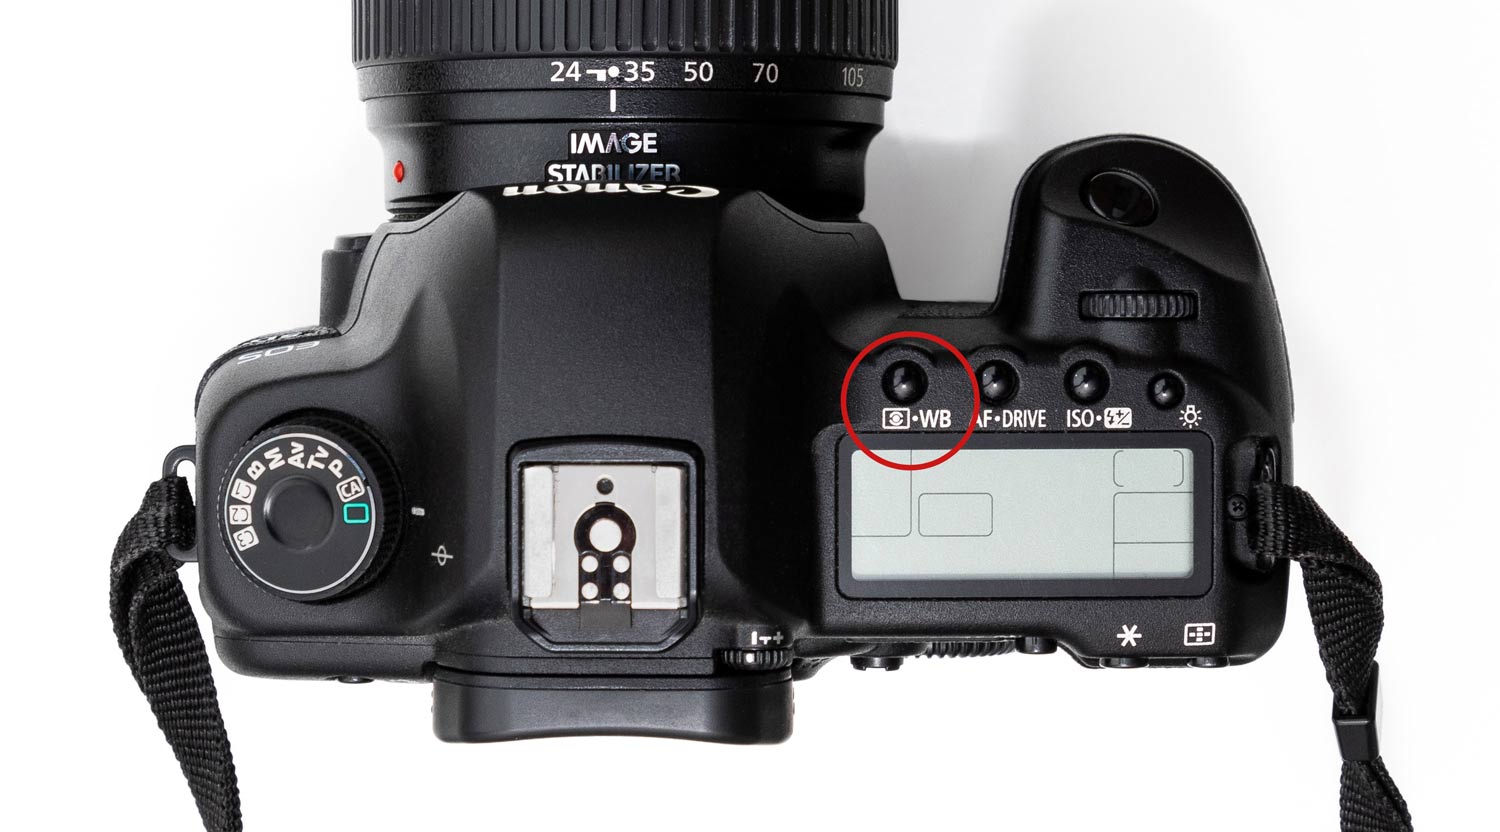
This varies from camera to camera so you’ll have to check your manual for specific instructions. Here is a look at a Canon camera, you can see the icon for the Metering Modes highlighted in the circle. It’s positioning may change depending on your camera, but the symbol should be the same.

Troubleshooting and FAQ
1) The brightest part of the image is off centre – every time I move the camera back to the composition I want, the exposure reading changes and ruins the image.
You need to switch to spot metering and then use the exposure lock. As we saw earlier spot metering takes a light reading from a very small region. Once you’re pointing the camera at the brightest part of the scene, you’ll want to lock the exposure settings, otherwise, when you recompose the photograph, the camera exposure settings will change.
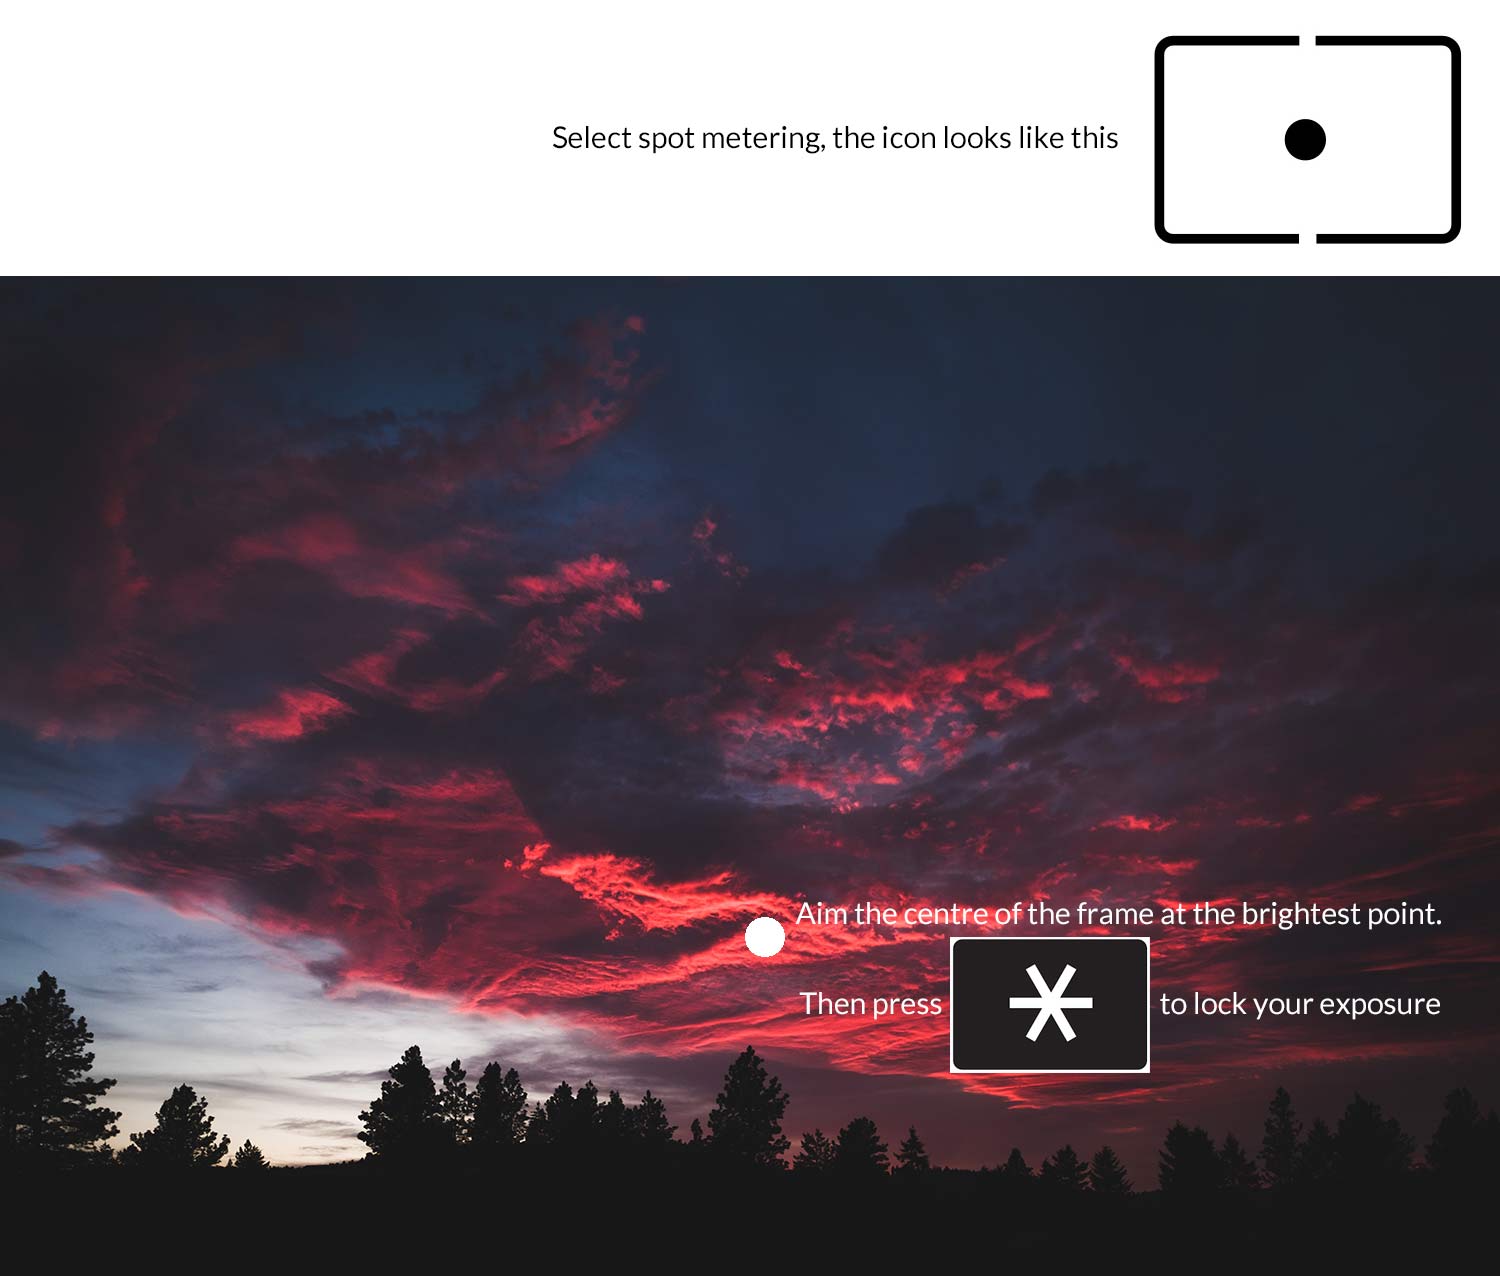
Then you can freely recompose your picture and take the photograph knowing that the exposure is locked and wont change.
2) I look into the night sky with my telescope and see the most amazing moon…
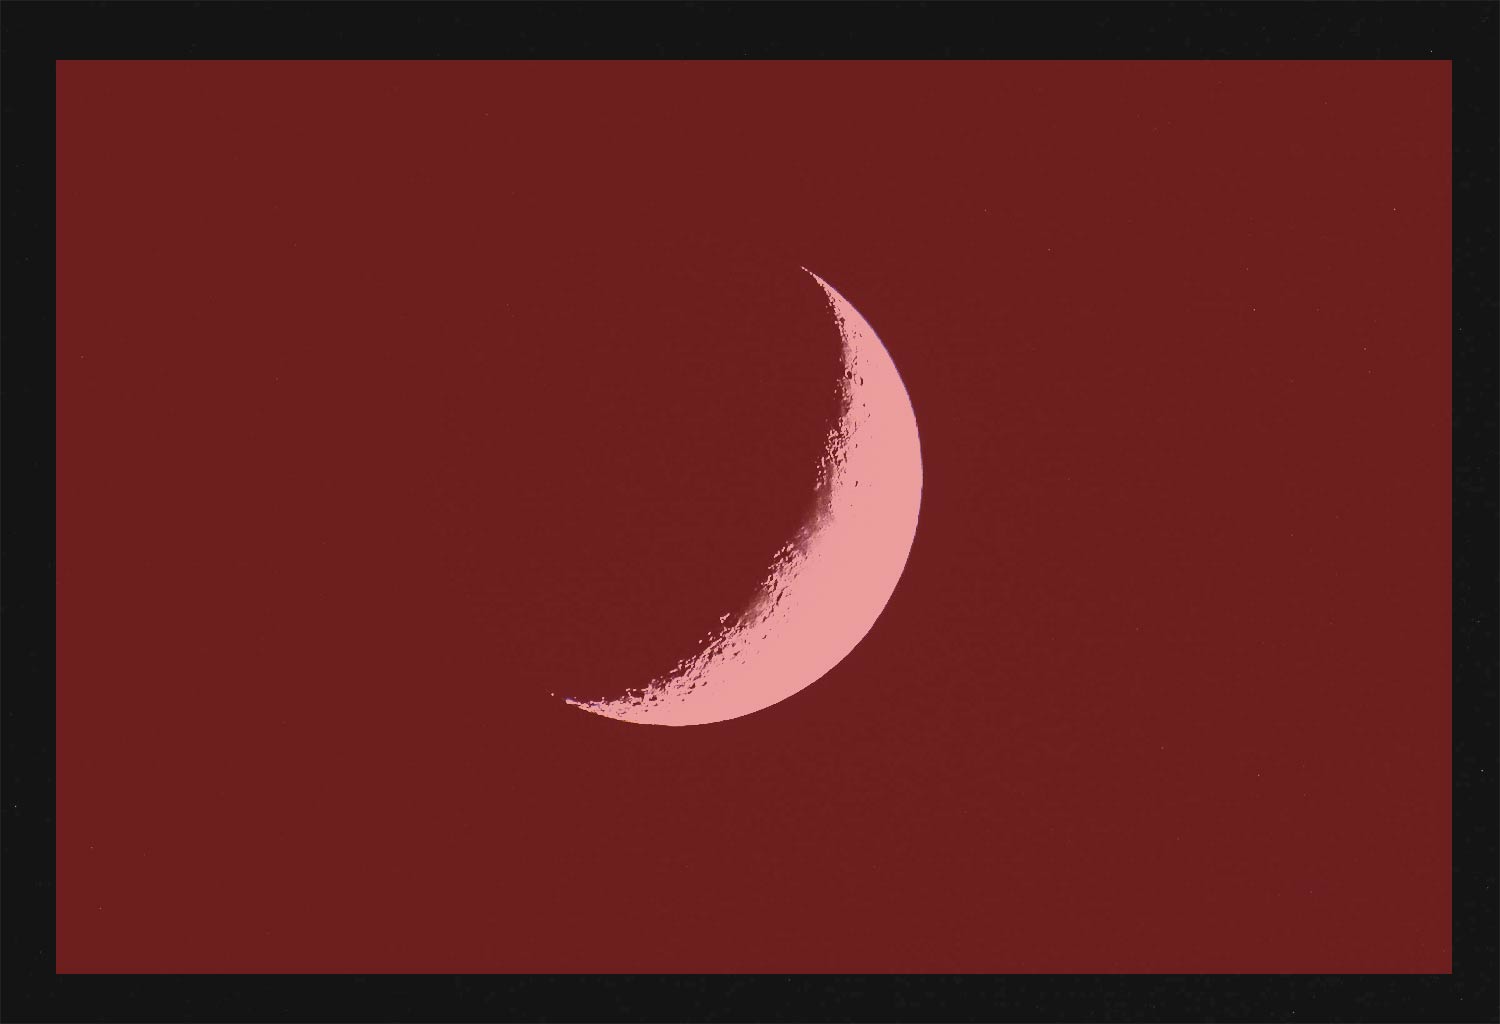
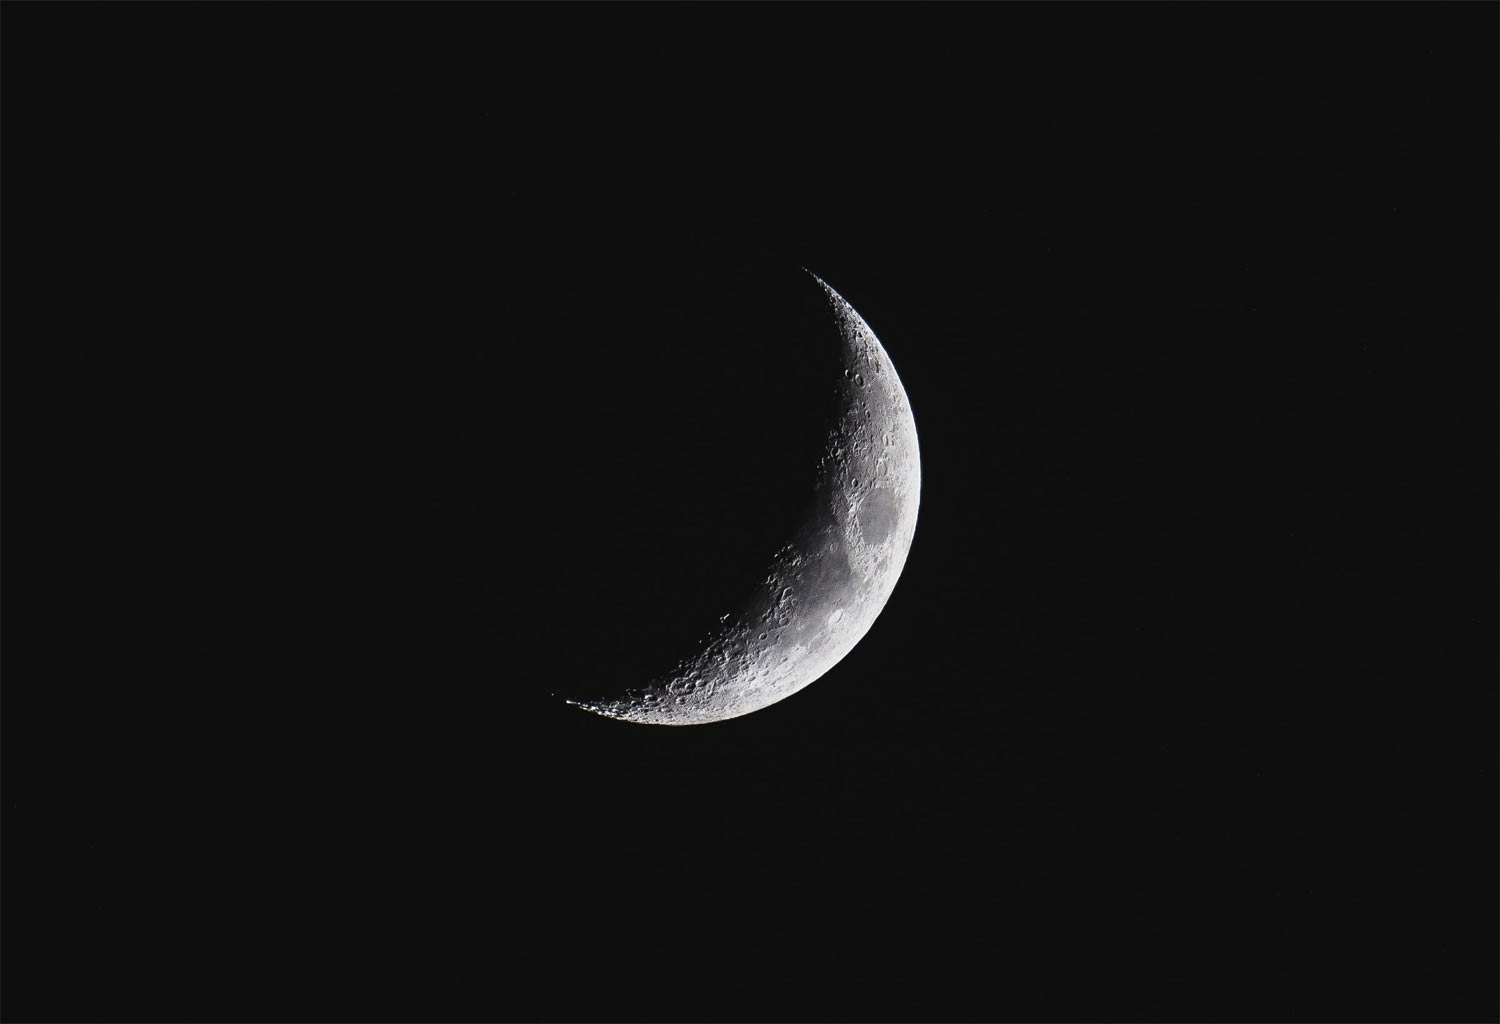 I point my camera at it, and it does this…
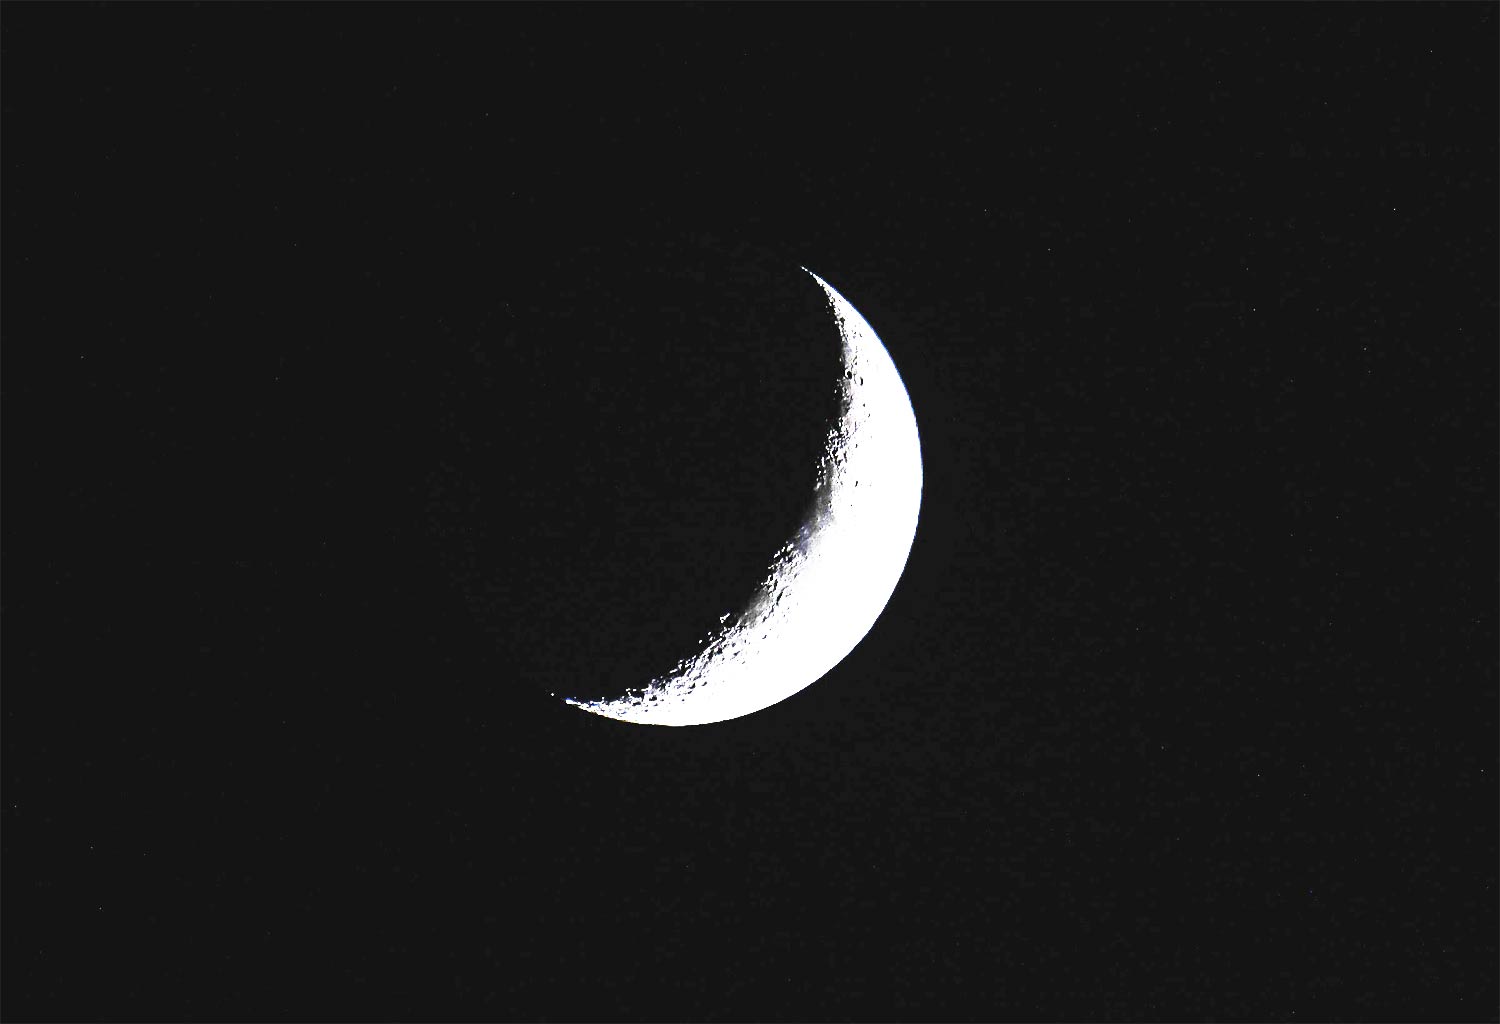 Damn piece of crap doesn’t work!
Alas, do not worry, I can show you what is happening.
Your camera is reading the scene like the image below. The red area is what the camera thinks you want an exposure reading for. The camera sees lots and lots of black and is saying ‘you want me to give you an accurate exposure based upon an image that is 95% black. Ok cool, I’ll let in lots of light to do that’. The result? The camera does exactly that and lets in lots of light and overexposes your moon.
 The fix
Use spot metering. Drop your focus point on the brightest part of the picture, select spot metering and voila, the camera gets it.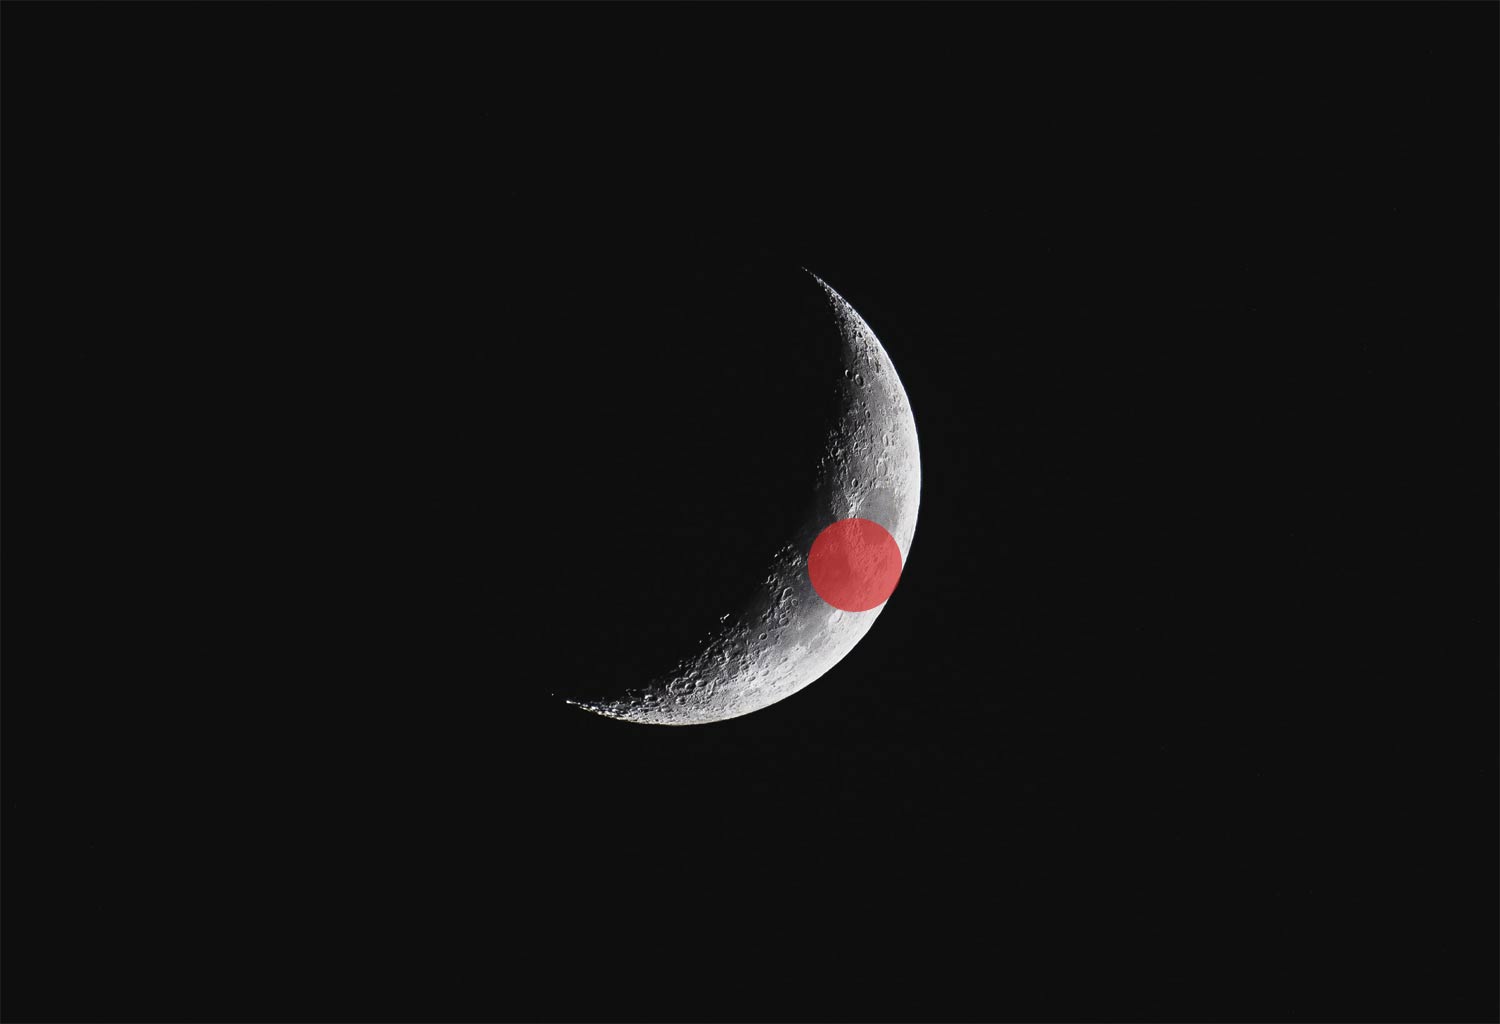
3) My bird photographs always come out as silhouettes!
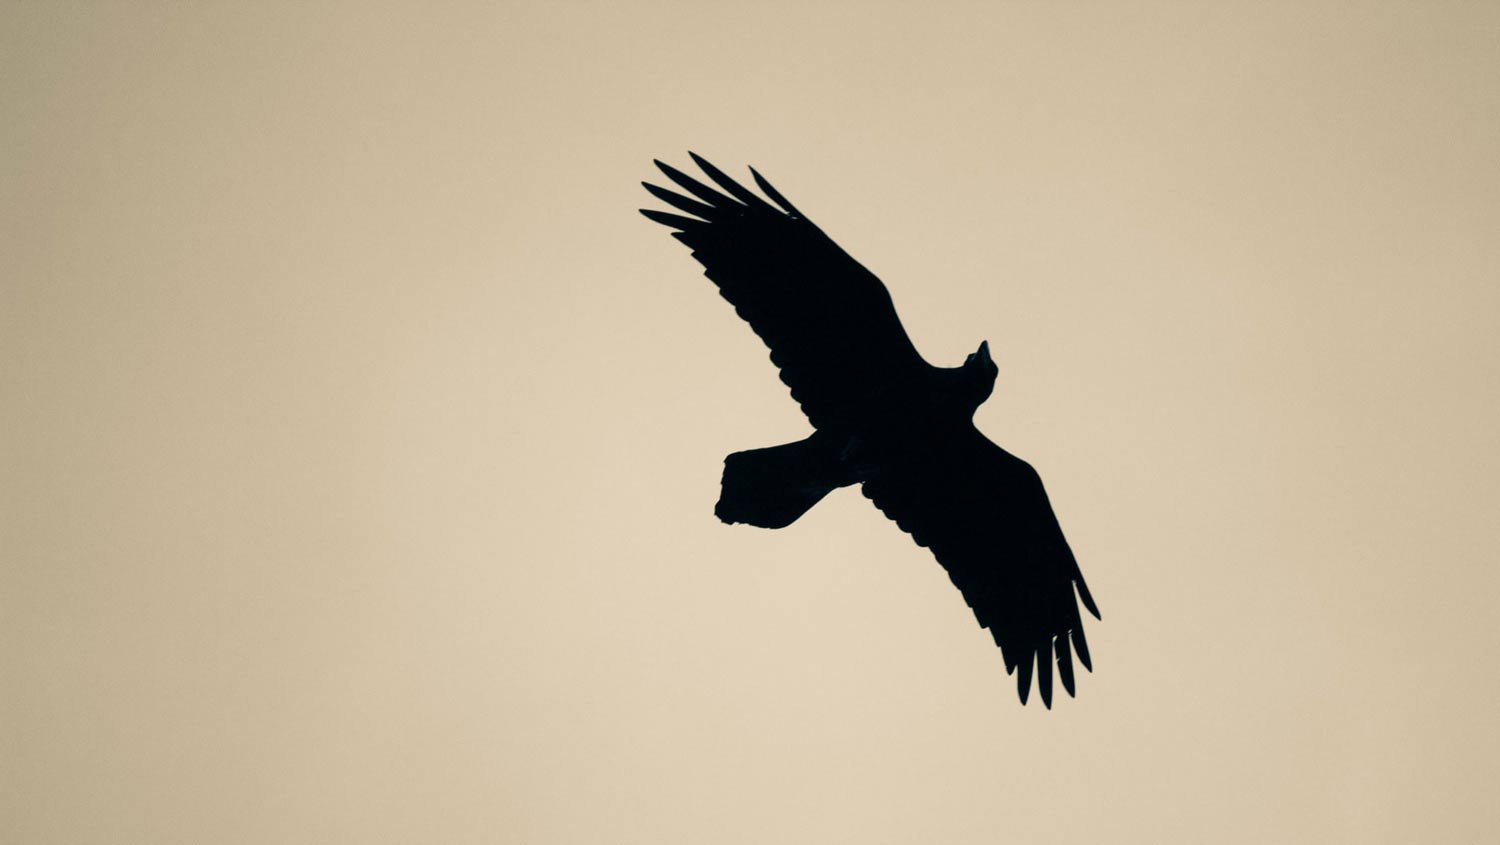
Again, consider how your camera is reading the scene. The sky is much brighter than the bird, so the camera will read the scene like this: ‘the sky is bright white and takes up most of the scene, in order to not have a completely white sky I need a fast shutter speed’. That fast shutter speed means a correctly exposed sky but underexposed bird. Always think how your camera is reading the scene. With evaluative metering on as illustrated below, you can clearly see that the camera is examining the scene and encountering the majority of the image being a very bright sky. 
The fix? Even spot metering a moving subject can be very difficult. You’re best off switching to full manual exposure mode and, using the initial shot you took that came out wrong as a starting point, continually adjust the exposure letting in more light until the detail in the bird can be seen. Be careful of your shutter speed though, anything slower than 1/500th is probably going to come out blurry if you’re panning a shot of a moving bird.
Further reading
Perfect Exposures – Michael Freeman

![]()
Understanding exposure – Bryan Peterson

![]()