

How to use bracketing to create perfect photos
In this article, I’ll go over what bracketing in photography is, what it does and when to use it.
For the vast majority of photographers the RAW image format has largely made bracketing exposures redundant. With the aid of editing tools such as Lightroom, amateurs and professionals now have access to image manipulation software that can recover a great deal of information in dark shadows and bright skies.
There is however, no excuse in this day and age, where histograms and ‘what you see is what you get’ viewfinders in mirrorless cameras and on phones exist, for you to get home from an epic location and realise you’ve either blown out the sky or where areas of shadow have faded to pure black.
Even with technological aids, there is no substitute for proper technique.
Enter bracketing exposures.
Bracketing in photography is something of a fail safe. It allows you to capture a lot more information in the highlights and shadows and gives you a greater degree of control and latitude to play with your images in post production.
You can’t trust your eyes
Sometimes, you just can’t trust what your eyes are telling you. An exposure might look accurate, but why take a chance?
Bracketing your exposures means you’re guaranteed to get it right. You can use the histogram as well to make sure you’re not hitting pure black or pure white, but that’s for another article.
What is bracketing in photography?
Bracketing in photography is the process of taking multiple shots of the same scene using different exposures each time. This allows the photographer to capture the detail in the highlights, lowlights and mid-tones of the scene – something that is largely impossible to do in one shot, particularly with landscape photography.

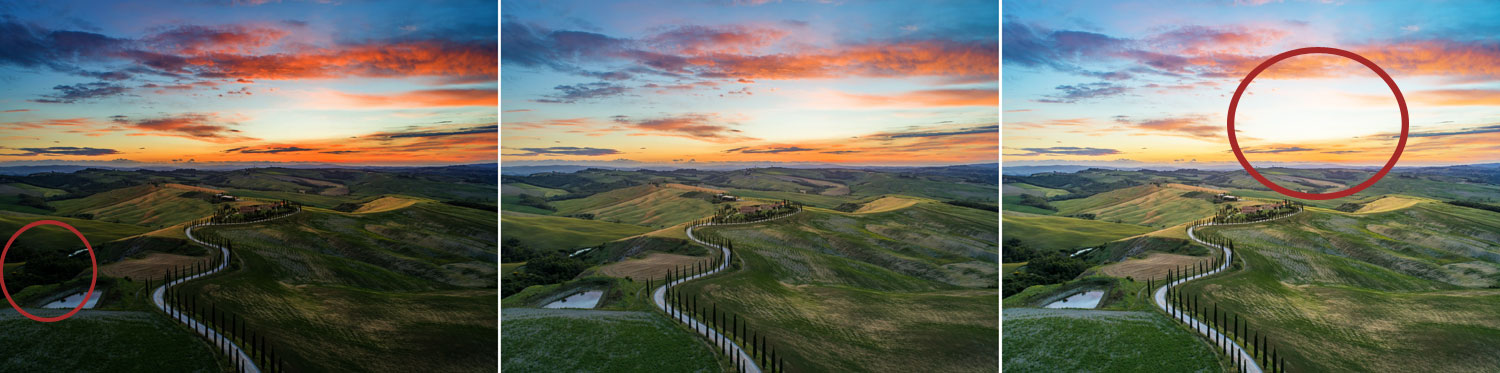
We can see in this example why we bracket exposures. The sky is brighter than the land, so when you take a correct exposure for the sky, the land is underexposed and you lose detail in the shadows. Conversely, when you expose for the land, the sky is overexposed, and you lose detail in the sky.
Taking multiple exposures covers our backs so we know we have a keeper in the bag, but it also allows us to merge exposures together in post production if we need to.
Why do we need it? Consider this image.

This could have been massively improved by bracketing the exposures. By taking a selection of images ranging in exposure, the photographer would have ensured that the sun wasn’t completely white. There is no amount of post processing that can save this. Once you hit pure white, there is no information there to work with. In the viewfinder, this may have looked fine, so bracketing would have been a really good fail safe.
Whilst bracketing is primarily used for exposure, it has evolved to be an umbrella term that incorporates a few other examples and uses.
3 Types of bracketing
- Exposure bracketing
- Depth of field bracketing
- Focus bracketing
Exposure bracketing involves taking multiple exposures whilst changing either the ISO, Aperture, Shutter Speed or Flash Exposure and sometimes a combination of all of them. The intention is to create a collection of images that vary in brightness from light to dark. This way, you capture the details in the brightest part of the image as well as the darkest.
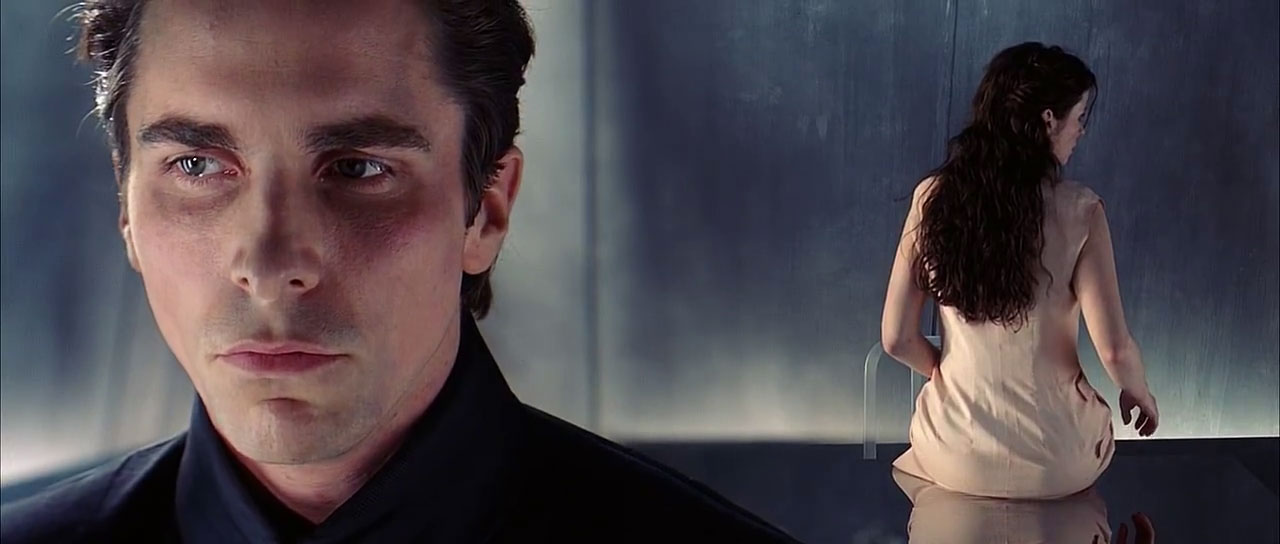
Depth of field bracketing involves keeping the exposure the same and setting the aperture as wide (lowest number) that it will go and then focussing on different points in the frame for each exposure. This gives the photographer more creative freedom in post production. Ordinarily, with a shallow depth of field only one plane of the image can be in focus. By taking multiple images focussing on different points in the frame, we can have multiple planes in focus simultaneously. In this film still below we can see this in action. A shallow depth of field creates a blurred background, but having multiple planes in focus at the same time allows you to have two points of interest in focus simultaneously whilst maintaining a blurred background. Cool tip, you can achieve this in one shot with a split dioptre filter.
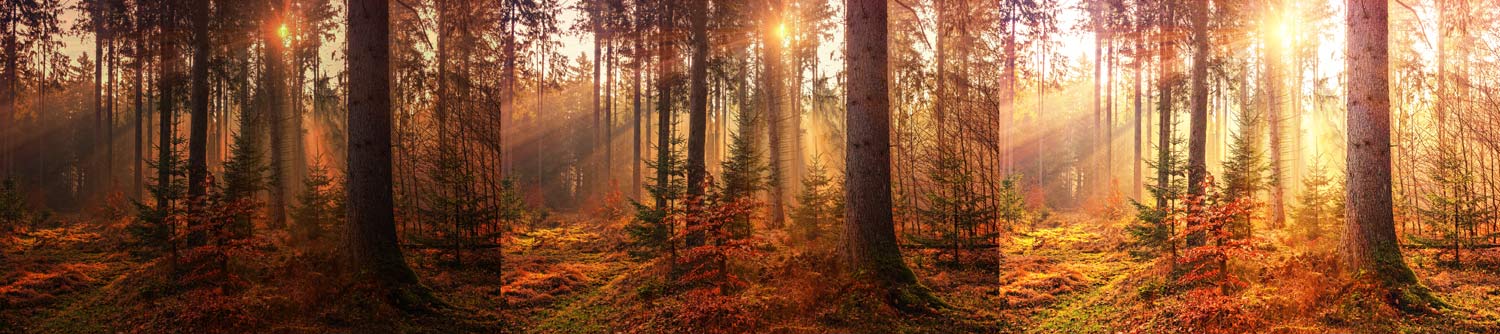
Focus bracketing involves keeping the exposure the same for each picture, but working in manual focus and changing the focus distance for each picture. Why? Lenses have an aperture at which they will be sharpest. This is never the aperture at which you can achieve the greatest depth of field, typically around f/32. Most lenses are sharpest at around f/4-f/8, this means you’ll need to stack multiple exposures whilst adjusting the focus from the front to the back of the scene. Then when you merge the photographs you’ll have a supremely sharp scene. Below we can see an example. Keeping the exposure the same but focussing on the foreground, middle ground and background in one exposure after the other gives us three photographs of optimal sharpness. We can then combine all three in Photoshop to create a landscape picture that is incredibly sharp from the foreground all the way to the background.

 How do you bracket exposures?
 How do you bracket exposures?
Remember the main point of why you’re doing it, it’s a process and it will serve you well to have an end goal in mind. Consider the three points above, which of these are you trying to achieve?
Let’s start with Exposure bracketing
YOU’LL NEED A TRIPOD. Otherwise your frames won’t line up and this whole exercise will be pointless.
The main point is to vary the amount of light entering the camera to give you a variety of exposures.
You can do this in a variety of ways:
- Shutter speed: The aperture and ISO stay the same and you vary the shutter speed from fast to slow. This will produce a variety of exposures, but changing the shutter speed will increase movement in the scene the slower the shutter speed. This is the most common method of bracketing exposures.
- Aperture: Shutter speed and ISO stay the same and you vary the aperture from high f stop to low f stop. This will produce a variety of exposures, but changing the aperture will also change the depth of field in the image.
- ISO: shutter speed and aperture stay the same and you vary the ISO from 100 upwards. This will produce a variety of exposures, but changing the ISO will also increase the amount of grain in the image, which you might not want to do.
Tip – remember if you’re changing your shutter speed that anything that is moving will look dramatically different depending on the shutter speed. A slow shutter speed is used here for example to photograph the landscape, but the movement of the water has rendered it completely smooth. Don’t get caught out by having one slow and one fast shutter speed which results in the water looking entirely different.

Bracketing in automatic camera modes:
AV – You set the aperture and the camera will adjust the shutter speed
TV – You set the shutter speed and the camera will adjust the aperture
In order to bracket exposures in these modes, you need to know what exposure compensation is. Otherwise, when you change one setting, the camera will change the other two settings to create an even exposure, i.e. it will look the same in every shot even though you’re changing the settings.
In this instance, you’ll need to use exposure compensation and adjust it from -3, -2, -1, 0, +1, +2, +3 in order to create bright to dark exposures.
The more photographs you take incrementally changing the exposure, the more options you’ll have later one, three would be your minimum and anything above seven is leaning into overkill.
Under exposing your shot in 2/3rds of a stop increments in sequence.
And then…
Overexposing your shot in 2/3rds of a stop increments in sequence.
By doing this, you’ll have a range of exposures that perfectly capture all of the detail in the extreme highlights and extreme shadows.
If you don’t have an exposure within that set of images that you’re happy with, you’ll then have the option of merging two or more of them together to create one overall accurate exposure.
You can of course adjust by more or less than 2/3rds, but you run the risk of the jump between exposures being so significant that the image just simply looks weird. You want the graduation of the tonal range to look as natural as possible even though you’ve had to manipulate it.
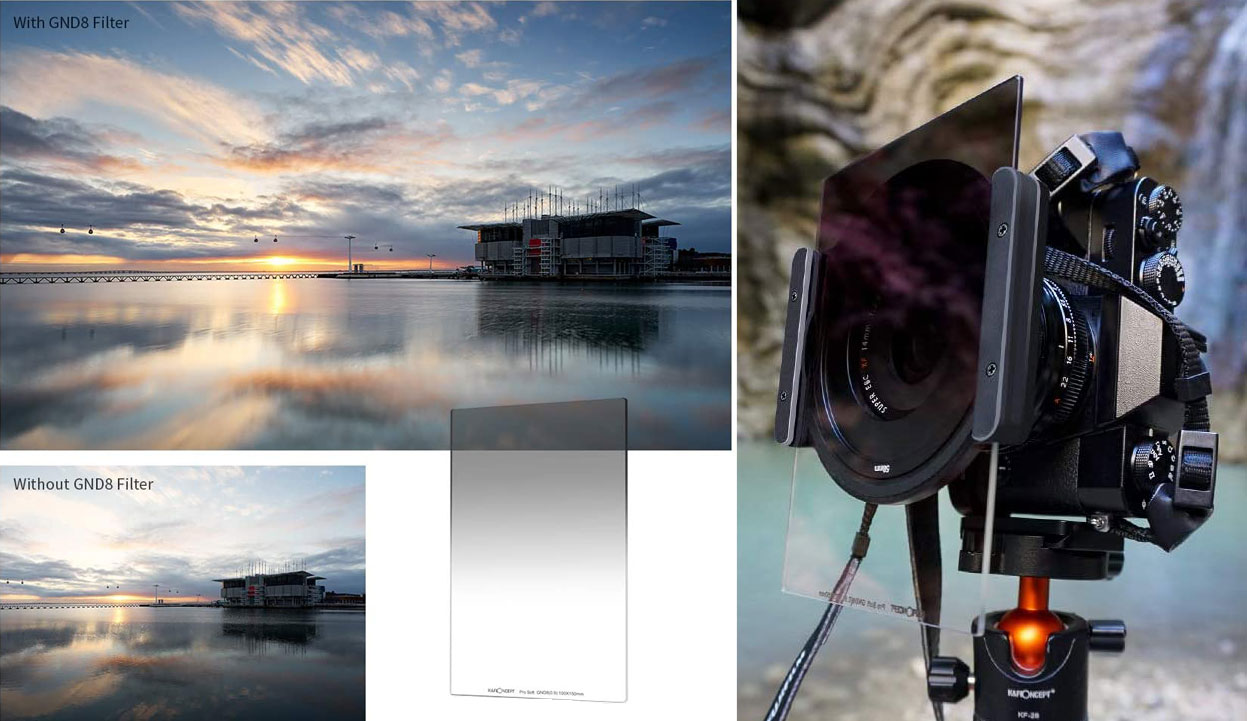
Can you create the same effect of bracketing in a single exposure?
In short, yes you can, you’ll need something called a neutral density filter or ND for short. It’s a bit of plastic that sits in front of your lens and is graduated from dark to clear. You then position the dark part over the brightest part of the scene (let’s assume the sky) to block some of the light entering the lens. This in turn evens out the overall exposure. The shortfall of this is that it graduates in a straight line so it can look artificial. Once you’ve seen it in action in real life you’ll start noticing that it is widely used on television programming to stop the sky from being pure white.
The fastest way to bracket exposures…get the camera to do it for you.
The joy of modern cameras is that they have the majority of the most used features already built into them. On the Canon EOS R, you can set the number of bracketed shots and the degree to which the exposures are bracketed and then simply fire off the number of shots you need and the camera does all the exposure adjustments for you. This video is excellent.
Using HDR to merge your exposures in Lightroom
Hope this helps, happy shooting!