
Photographic noise, also known as digital noise, refers to the visual distortion of an image caused by random variations in brightness and colour.
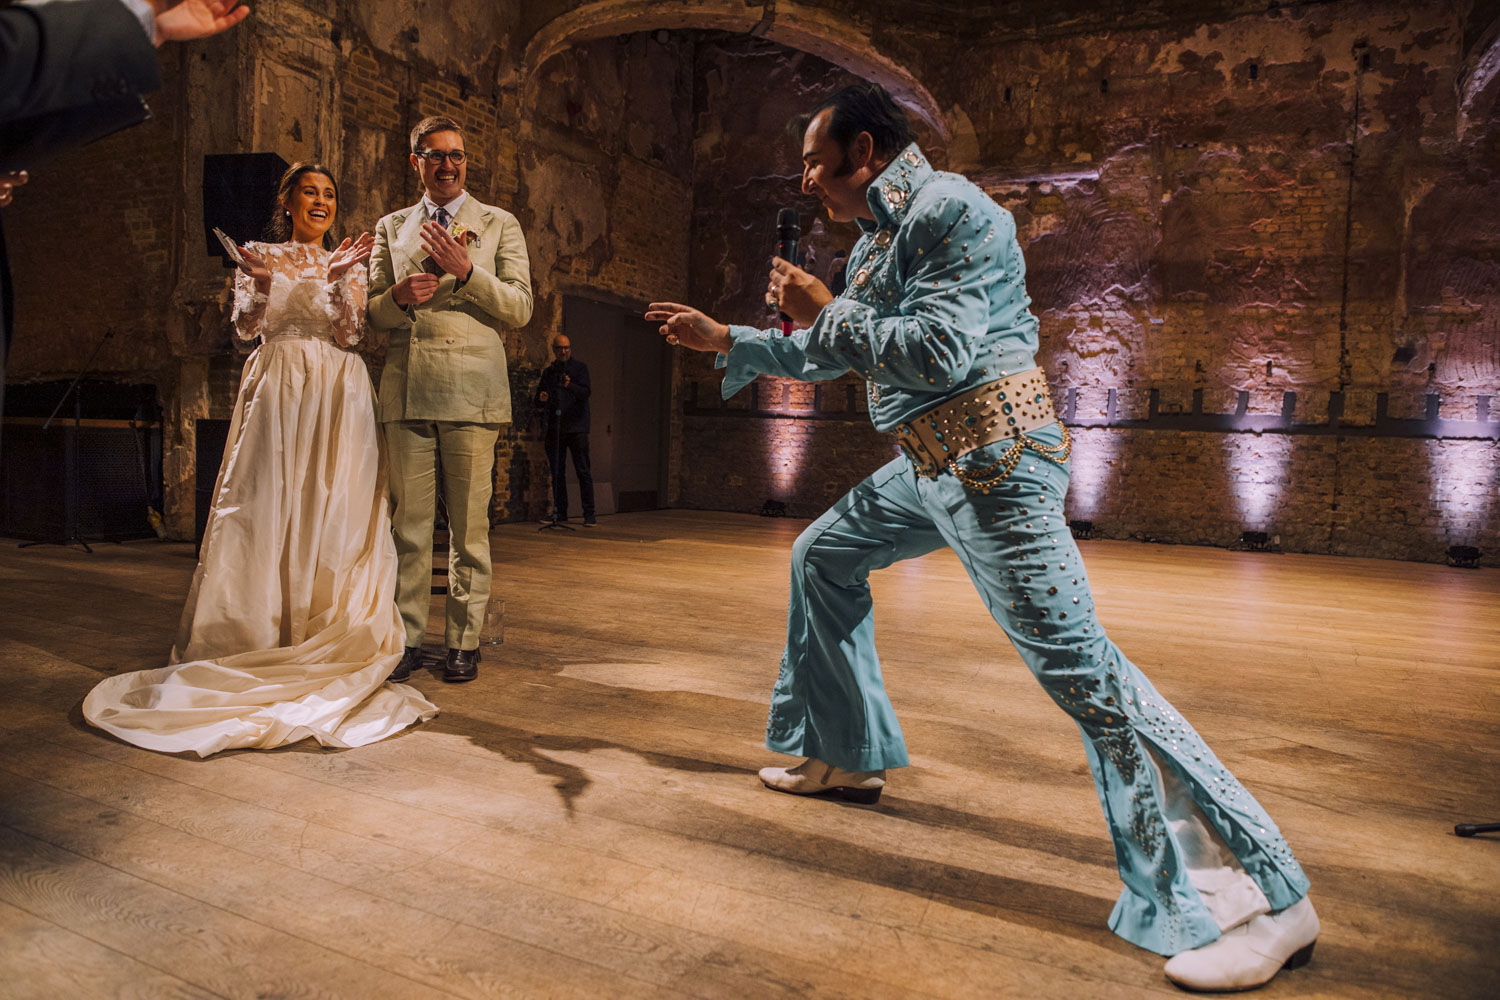
Basically all the speckled distortion you can see when you zoom in on a picture taken where there’s low light. Like this:

You see all the speckles on their faces? That’s what we call noise.
How does Digital Noise happen?
It’s your cameras job to turn light into pixels, typically noise occurs when there isn’t enough light, so the camera has to artificially turn up the amount of light. When it does this, it creates distortion, aka, noise.
This phenomenon is most commonly found in digital images, especially those taken in low light conditions or with high ISO settings. In this article, we will explore the causes of photographic noise, its relationship with ISO, and how adjusting other camera settings affects its appearance.
In simple terms – when you take a picture with a digital camera, the camera has to turn the light that enters it into a picture. To do this, the camera breaks the image up into tiny dots called pixels, and each tiny pixel has a specific colour and brightness.
But sometimes, the camera can make mistakes when it’s converting the light into pixels. These mistakes can create little speckles of colour or brightness that of course aren’t there in real life. We call these mistakes “noise” because they make the image look like it’s covered in tiny bits of static or snow.

There are a few different things that can cause noise in a digital photo. Sometimes, it’s because the camera didn’t get enough light when it took the picture or it’s just because the camera isn’t very good at converting light into pixels!
Noise can make a photo look fuzzy, like it’s covered in sand, and it can be hard to get rid of once it’s there. But luckily, there are ways to reduce noise when you take a photo.
What causes photographic noise?
Photographic noise is caused by the camera’s image sensor attempting to interpret the light that is hitting it. When there is insufficient light, the camera tries to amplify the signals coming from the sensor to produce a usable image.
This amplification process creates an increase in the signal-to-noise ratio, which results in visible noise in the image. The higher the ISO, the more amplification is required, which can result in more noise.
Think of it like you would a stereo.
If the sound quality is bad, and you turn up the volume, the quality doesn’t improve, it’s just louder.
The same is true of camera noise.
If the quality of light is bad, when you turn up the ISO you aren’t improving the quality of the light reaching the camera, you’re just forcing the camera to ‘turn up the volume’.
What Makes Photographic Noise Worse?
Photographic noise can be made worse by several factors, the first and most obvious is using a high ISO.
The higher your ISO, the more noise your image will have.
Long exposure times and high temperatures can also create noise. High ISO settings amplify the signals coming from the sensor, which can increase the noise. Longer exposure times can also cause noise to appear, especially if the camera’s sensor heats up during the exposure.
A high ISO setting increases the sensitivity of the sensor, which, whilst useful in low light conditions, will result in more noise.
When shooting events, weddings, sports or wildlife, you can’t always use flash to illuminate your subject. You may be too far away or the additional light would disturb whatever it is you’re photographing.
In these circumstances a high ISO will allow you to achieve a shutter speed that is suitable, but the trade off is you get more noise. Modern cameras are exceptionally good at handling high ISO’s, and the client is never going to care if the image has noise if you capture a really important moment.
On the flip side, lower ISO settings reduce the sensitivity of the sensor, which will result in less noise but does require more light to produce a properly exposed image.
Adjusting Other Camera Settings to Reduce Noise
There are several other camera settings that can be adjusted to help reduce noise. Shutter speed, aperture, and white balance can all have an impact on the appearance of noise in an image.
Shorter shutter speeds can reduce the amount of time the sensor is exposed to light, which can help to reduce noise. Using a wider aperture can also help to reduce the amount of noise in an image, as it allows more light to hit the sensor. Adjusting the white balance can also help to reduce noise, as it can reduce the amount of amplification required to produce a usable image.
Examples of Situations Where High ISO Might be Necessary
High ISO settings can be necessary in several situations, such as when shooting in low light conditions or when a fast shutter speed is required.
For example, when shooting at night, the available light is often limited, and a higher ISO may be required to produce a properly exposed image. Similarly, when shooting fast-moving subjects, a high shutter speed may be necessary to freeze the motion, which can require a higher ISO to produce a properly exposed image.
I shot a wedding in January of this year in the oldest church in London, it was so dark even at f1.4 and 1/60 shutter speed I was still shooting above ISO 6400. Sometimes you just have no choice.
Effects of Noise on Images
- Detail and Texture: Noise can make your images look rough around the edges and generally creates a loss of detail.
- Color Accuracy: It can throw off your colours, adding unwanted hues.
How to Reduce Noise
- Camera Settings:
- ISO: Keep it as low as possible.
- Exposure: Getting your exposure right in-camera means less post-processing. Shooting in RAW helps, and noise reducing software does exist, but getting your exposure 90% accurate means the reliance on software is much less, and the amount of noise greatly reduced.
- Post-Processing Techniques:
- Noise Reduction Software: Tools like Lightroom and Photoshop have built-in noise reduction sliders that can help smooth things out.
- Sharpening after Noise Reduction: A gentle touch of sharpening after noise reduction can help bring back some of the details lost to noise.
Advanced Noise Management
- In-Camera Noise Reduction: Many cameras offer a noise reduction feature that works its magic on long exposures. I never do long exposures so I’ve no idea if in camera noise reduction is any good. I set it to off on all my cameras as soon as I buy them.
- RAW vs. JPEG: Shooting in RAW gives you more control in post-processing to tackle noise effectively.
- External Noise Reduction Tools: For those looking to dive deeper, standalone noise reduction software can offer advanced controls and algorithms to clean up your images.
- Lightroom Ai: Lightroom has recently launched an Ai feature to tackle noise.
Lightroom Ai Noise reduction – Before and After

Lightroom’s new Ai feature is incredibly powerful, a huge step in reducing noise in a meaningful way. In the past it just made the image blurry, but this makes a significant difference, completely removing the spots of Magenta and Green that break up the detail on her face.
There is a downside though, in order to do it Lightroom has to create a new DNG file, which not only takes up alot of hard drive space, but it also takes AGES. If you need to batch process alot of pictures, you’re going to want to leave it running overnight.
Hope this helps!