How to Crop a Photo in Photoshop
The crop tool in Photoshop is incredibly useful, and in this article I’ll cover the different ways you can use it. I use the crop tool more than any other, it’s so easy to overlook tools that we use everyday and take them for granted, so this is the crop tools time to shine!
The purpose of cropping a photograph is to recompose it, removing distracting elements from the frame that distract the eye and allow the viewer to zero in on exactly what we want.
Adobe Photoshop allows us to crop images in a variety of ways depending on what we need. Images can be cropped to a specific dimension or resolution for say, printing, or they can be cropped to correct a perspective error, or they can simply be cropped and recomposed to make the scene more aesthetically pleasing.
The purpose of this article is to explain how to crop a photo in Adobe Photoshop. You’ll also learn how to crop a picture with the Perspective tool to correct the picture angle, and a few other bits and pieces that are worth knowing.
How do you crop a photograph?
Step 1
Open a picture file. Click the “Crop tool” (found in the Tools panel on the left side of the screen), or press ‘c’ as a shortcut.

Step 2
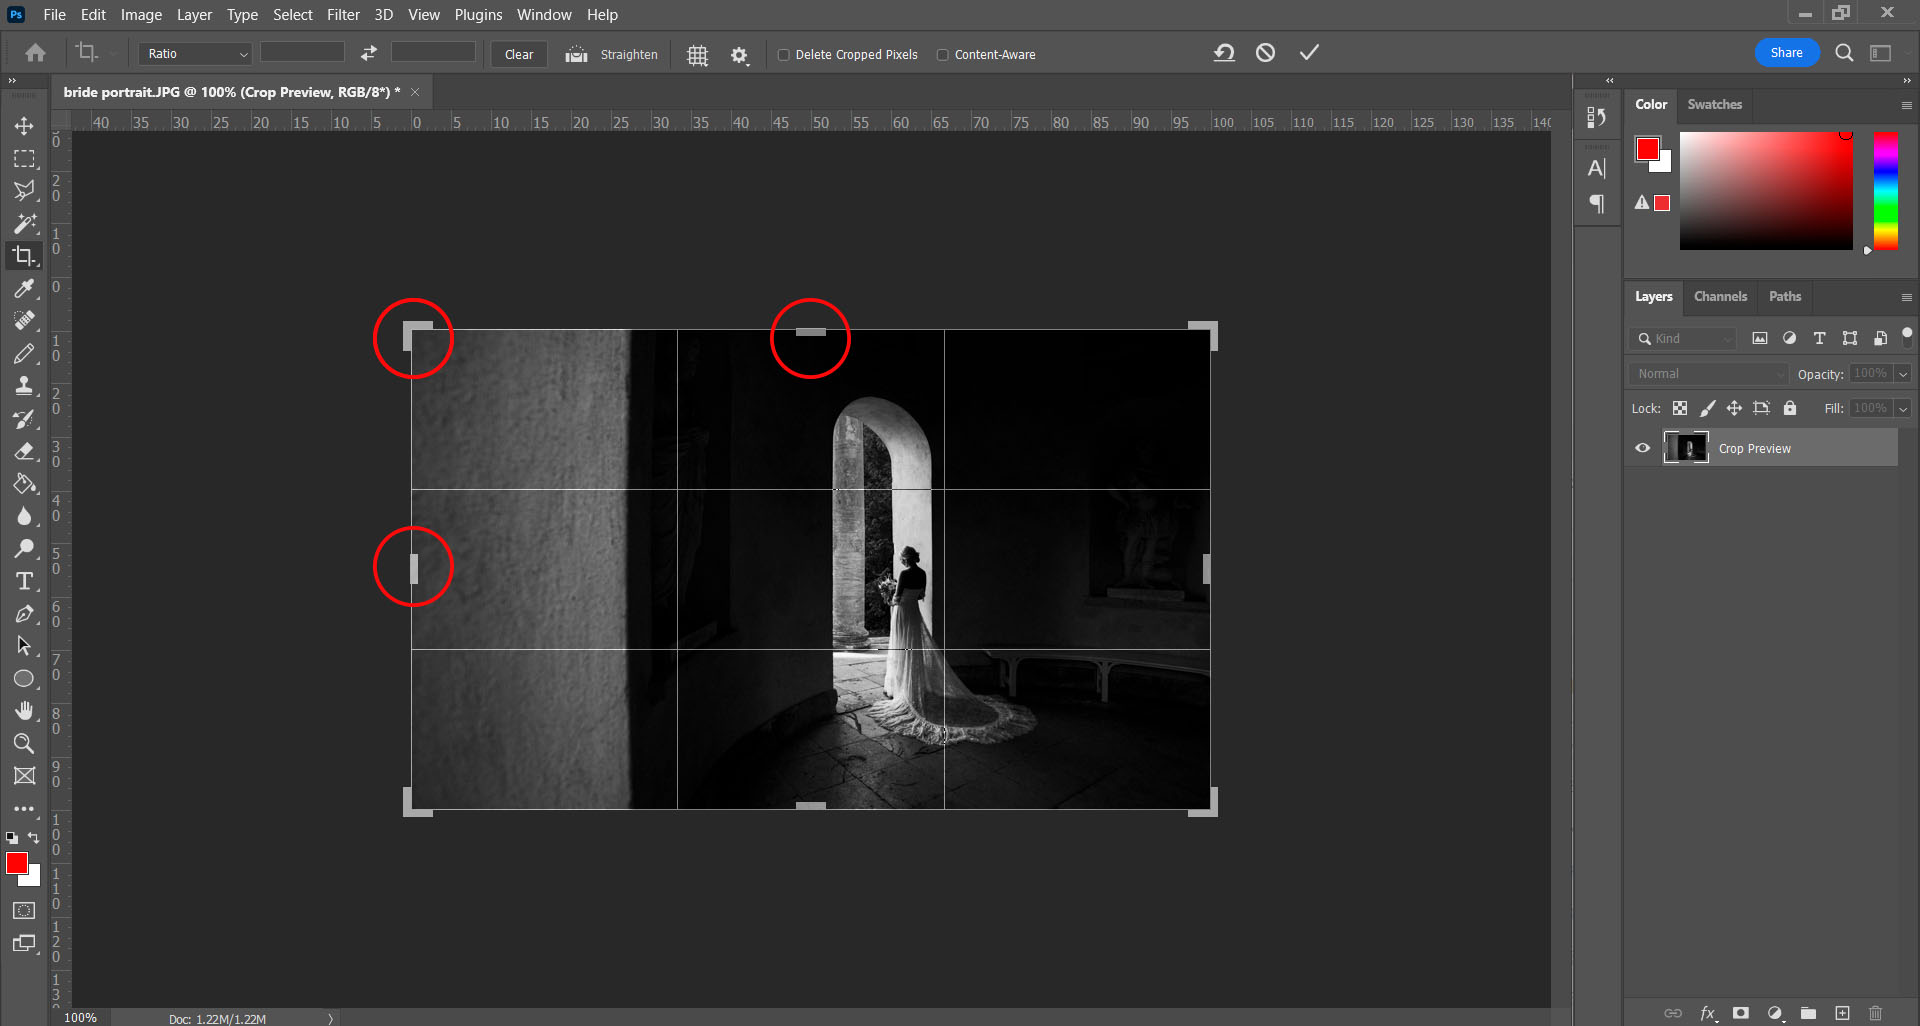
A cropping border is automatically placed around an image once you select the Crop Tool in Photoshop. “Crop handles“ can be seen around the edge of the picture. Click and drag the crop handles to reshape the image.
The image can also be repositioned by clicking and dragging inside the border.

Tip – if you want to keep the aspect ratio of the picture the same, hold the Shift key whilst clicking and dragging.
If you want to lock the centre point of the crop area, hold the Alt key whilst clicking and dragging.
Step 3
After you’ve finished, press “Enter“ on your keyboard. You can also click on the “Check Mark” icon located in the top panel of the screen to complete the process!
This is how your cropped image will look:

How do you crop a photo with the Crop-to-Selection feature?
The following are the steps that you can follow to do this:
Step 1
If you would like to keep only a small portion of the image in your file, choose an image and go to Photoshop’s “Marquee Tool” function (found on the left side of the screen). Then click on the “Rectangular Marquee tool“.

Step 2
Now you just need to select the area you want to crop.

Step 3
Once you have finished selecting, go to the “Image” section located at the top of the screen and click “Crop”

Using the crop-to-selection method, here’s what we got:

How do you crop a photo into a circle shape?
Cropping an image into a circle can be accomplished in the following ways:
Step 1
In order to do this, you will have to go to the “Marquee Tool“ again, but now, you have to click on the “Elliptical Marquee Tool“ instead since you wish to have a circle instead of a rectangle. Select the image and drag it into Photoshop. Click on “Elliptical Marquee Tool“

Step 2
You will need to select the area you want to crop.

Step 3
Upon finishing selecting, move the cursor to the “Image” section at the top and choose “Crop”.
As you can see the image is cropped to a rectangle by Photoshop, which is not the shape we need. The next step shows you how to avoid this.

Step 4
In the bottom right corner of the screen, click “Add vector mask”. This will create a circle photoshop layer.

Step 5
The circle will be cut out of the background this way. Now click on “File“ and then on “Save As“ to save this circle-shaped photo.
What is the best way to crop an image to a specific aspect ratio?
The following are the steps that you can follow to crop an image to a specific aspect ratio:
Step 1
First, you have to choose a preset aspect ratio. You can set the aspect ratio if you want to crop a picture to a specific size. Click the “Aspect Ratio” option (located at the top left corner of your screen) to select common aspect ratios, such as 8 x 10:

Width and Height are automatically calculated in Photoshop based on the aspect ratio. In this case, it entered 4 x 5, which is equal to 8 x 10:
![]()
Immediately after selecting it, the cropping border changes to an 8 x 10 size:

Step 2
Now, you have to swap the crop orientation. By clicking the swap icon (the two arrows), you can now swap the Width and Height values:
With this feature, you can switch between Portrait and Landscape modes easily:
Choose a custom aspect ratio if you want:
You can also manually enter the aspect ratio you need if it is not found in the presets.
Let’s say you want to crop an 11 x 14 image in Landscape mode so that its width is larger than its height, simply click inside the “Width” box and enter 14. Next, you’ll need to press the “Tab key” on your keyboard to jump over to the “Height” box and type 11:
This way, the crop border will automatically be resized to 11×14:
![]()
What are the steps to crop an image to a specific size & resolution?
The following are the steps that you can follow to do this:
Step 1:
The cropping we’ve been doing so far has been based on a general aspect ratio or a general shape. In addition, you can crop a photo to a specific size & resolution by using the Crop Tool. You can do this by opening the “Aspect Ratio” menu:
Step 2:
Afterwards, select W x H x Resolution (Width, Height, and Resolution):

Step 3:
For example, let’s say you want to crop the image to print at 11 x 14 inches instead of cropping it to an 11 x 14 aspect ratio. Click inside the Width field, and enter 14 as the width should be bigger than the height. In addition to the number, you will also need to enter “ïn” (for “inches”). After that, press the Tab key in the keyboard to jump to the Height field, and enter 11:

Step 4:
In addition to the first two boxes, there is now a third box for entering a “Resolution Value”. You’ll enter 300 into the box because 300 pixels per inch is the industry standard for high-quality printing, and then make sure that the measurement type is px/inch (pixels per inch):

Cropping in Photoshop: Restoring deleted pixels
It is generally the case that when you crop out parts of an image, the pixels are simply deleted. However, it does not have to be that way. You can simply hide cropped pixels if you prefer.
This approach has the advantage of allowing you to try out cropping, especially if you don’t like the results, you can reselect the crop tool and try again. By grabbing and moving one of the crop frame’s handles, you can make the deleted pixels appear again as quickly as you like.
Step 1
Crop can be accessed from the left-hand tool palette by clicking the “Crop“ button.
Step 2
At the top of the screen, click the Tool Options toolbar and uncheck the box for “Delete Cropped Pixels“. The Delete Cropped Pixels setting is on by default but you have to disable it.
![]()
Step 3
Cropping can now be done as usual. If you proceed with the crop and return to the crop tool, the pixels you removed will reappear, allowing you to re-crop the original image as many times as you like.
This will restore the entire image:
You can also restore the entire image at any time if you cropped your image without deleting cropped pixels by going up to the “Image” menu and choosing “Reveal All”:

Perspective Crop Tool: Fix a distorted angled picture
If your photo has a distorted perspective, you can use a variation of the crop tool to fix it. As an example, consider taking a photo of a tall scenery; it will appear distorted, but you can restore its appearance using the perspective crop tool.
Step 1
Choose the “Perspective Crop” tool from the toolbar located at the left side of the screen. The Perspective Crop tool can be found in the same cubby as the crop tool – to access it, click and hold the cubby and then select Perspective Crop from the list of options available.

Step 2
Using your mouse, draw a rectangular selection on your image.

Step 3
You can modify the shape of the crop frame by clicking and dragging its corners. It might be beneficial to align the crop frame parallel to the sides of an object in order to correct its perspective. Using the Perspective Crop tool, you can straighten an image by dragging its corners.

Step 4
Once you are satisfied with your crop, click the checkmark on the Tool Options bar. As soon as the crop is applied, the image’s perspective should change. In this photo, the perspective has been corrected using Photoshop’s Perspective Crop tool:

How to undo the crop?
The crop can be undone by clicking the “Edit” menu and choosing “Undo Crop”. Alternatively, you can press Ctrl+Z (if you are using Windows) or Command+Z (if you are using Mac).
By doing this, you will be redirected to the original size of the image:
Final Thoughts
Overall, cropping a photo is simple in Photoshop. There are a number of ways to go about doing it, whether it be cutting out and clipping or just trimming the edges. The crop tool is one of the most essential features in Photoshop. A lot of people don’t know how to use it, but when you learn the basics you’ll find it can solve a wide variety of creative problems. Use this guide as a starting point, and your specific needs will help you decide which method is best for you.