Having a strong social media presence to showcase my work and connect with potential clients is integral to modern business success, size of a Facebook cover photo is important as it gives me full control over how my work is displayed.
When sized correctly, I know there won’t be any image distortion or pixilation and my brand will be well represented.
Many photographers choose to adopt the newest technology and abandon the old, however it’s always wise to maintain a presence on each platform as diversification is always a win in any business.
One of the most important aspects of any social media profile is the cover photo. It serves as the first impression for visitors to your page and gives you the opportunity to convey what your brand is about in an instant.
In this article, I’ll dive into the correct size for a Facebook cover photo, including measurements in pixels, centimetres, and millimetres, as well as tips for resizing your cover photo using Photoshop or free online tools like Pixlr.
size of a Facebook cover photo
First and foremost, it’s important to understand the dimensions of a Facebook cover photo.
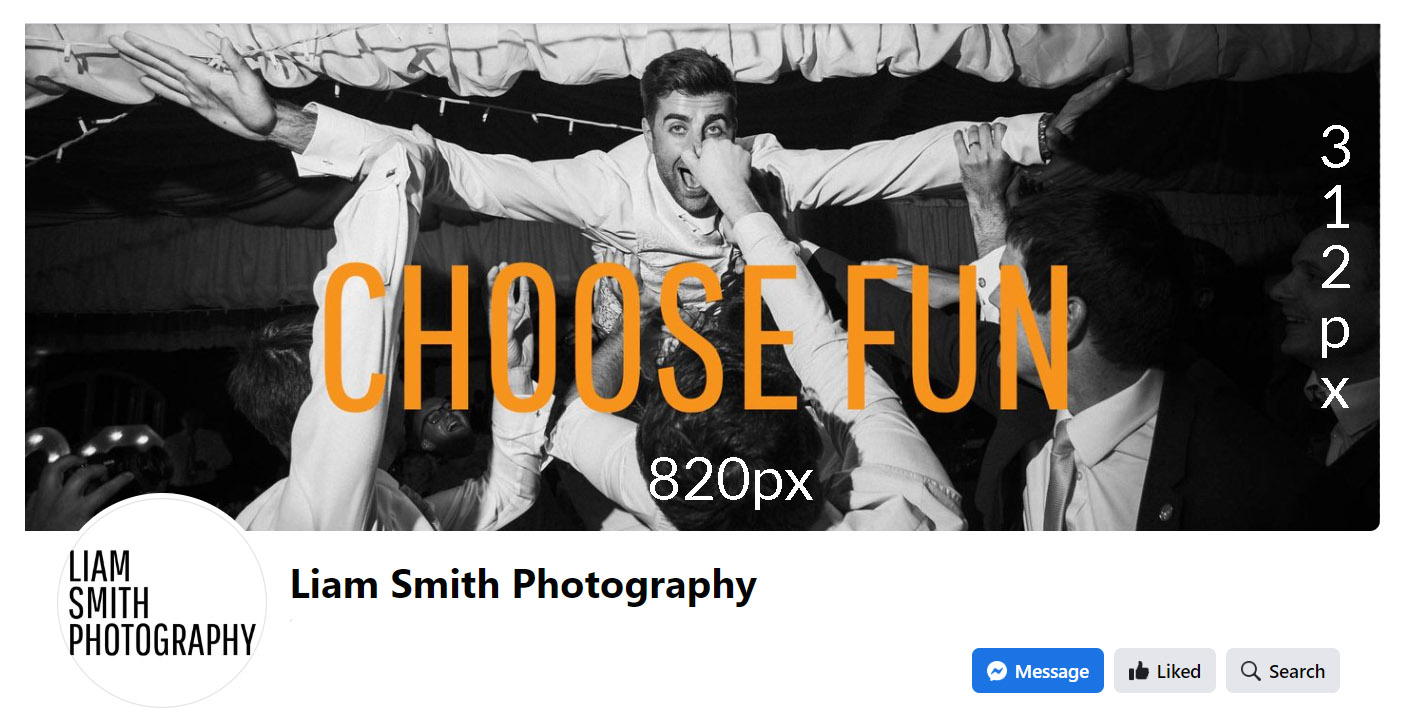
The current recommended size for a Facebook cover photo is 820 pixels wide by 312 pixels tall.
Now then.
This is like a letterbox in dimensions, so you have to choose your picture wisely.
Take this image for example:
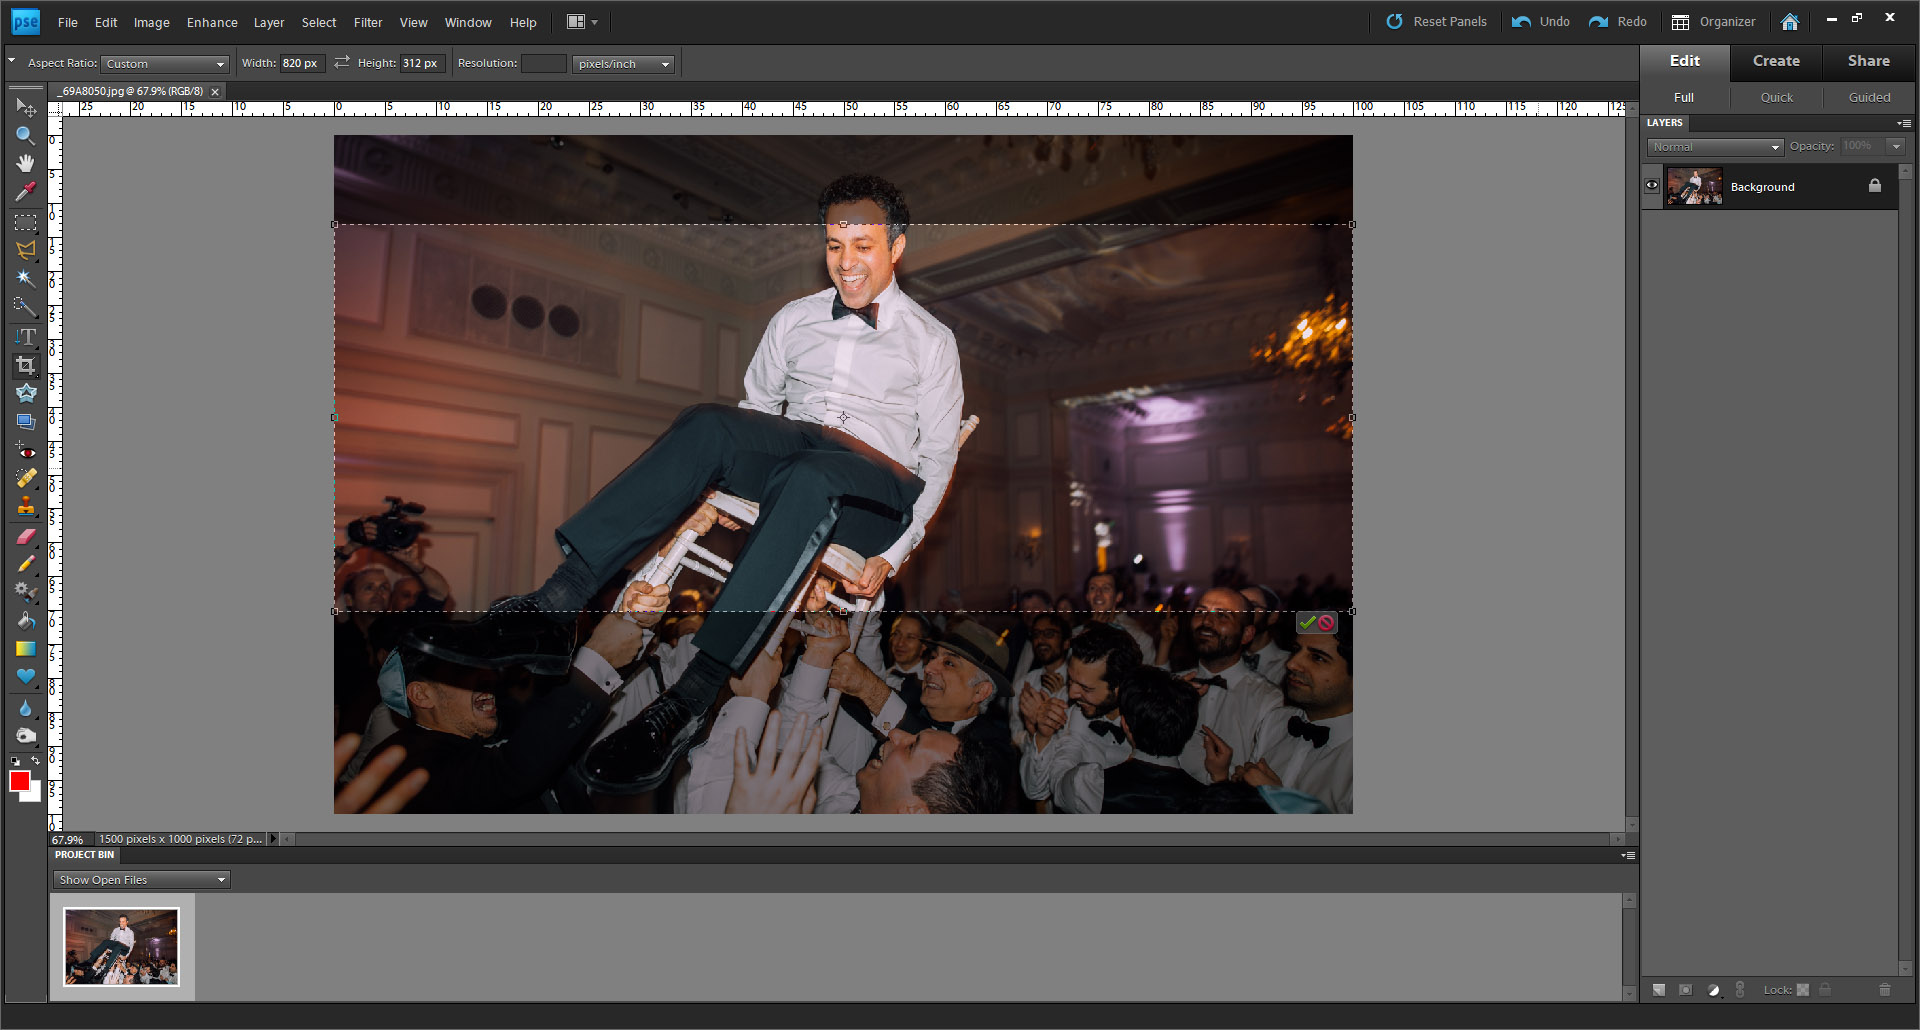
If I set the crop to 820×312 pixels, then I lost alot of the photograph, so this won’t work for me.
Which is why I chose this one:

This size has been optimized for both desktop and mobile viewing, ensuring that your cover photo looks great on all devices.
It’s worth noting that Facebook has changed the size of cover photos several times over the years, so it’s important to stay up-to-date with the latest recommendations to ensure that your cover photo looks its best.
In addition to the recommended size in pixels, it’s also helpful to understand the size of a Facebook cover photo in other measurements. In centimetres, the recommended size is 31.5 cm wide by 12.4 cm tall. In millimetres, this equates to 315 mm wide by 124 mm tall.
If you’re working with a photo that’s already the correct size, uploading it to Facebook is a breeze. However, if your photo is larger or smaller than the recommended size, you’ll need to resize it to ensure that it fits correctly. There are a number of ways to resize a photo, but two of the most common methods are using Photoshop or a free online tool like Pixlr.
Resizing your Facebook cover photo in Photoshop
Photoshop is a powerful image editing software that allows you to make a wide range of adjustments to your photos, including resizing. Here’s how to resize your Facebook cover photo using Photoshop:
- First, open Photoshop and go to the “File” menu. From there, select “Open” and choose the image you want to resize.
- Once your image is open in Photoshop, go to the “Image” menu at the top of the screen and select “Image Size”.
- In the Image Size dialog box, you can adjust the size of the image by changing the pixel dimensions, the document size (in inches, centimetres, or other units), or the resolution. If you want to maintain the aspect ratio of the image, make sure the “Constrain Proportions” option is checked.
- Enter 820×312 as the pixel dimensions
- Click “OK” to apply the changes.
- Finally, save your resized image by going to the “File” menu and selecting “Save As”. Choose the file format and location you want to save the image in, and then click “Save” again. For Facebook, choose either a JPG or a PNG.
And that’s it! You’ve successfully resized your photo using Photoshop.
Photoshop is an excellent tool for photo editing, and its resizing feature is particularly useful for creating images that are the correct size for different purposes, use it to resize photographs for all your social media accounts so you know they will display correctly.
If you’re new to Photoshop, resizing your photos can be a bit overwhelming at first. It’s an incredibly powerful program, but it need not be dauting. By following the steps above, you can quickly and easily resize your images to fit your needs.
Resizing your Facebook cover photo for free using Pixlr
Pixlr is a free online image editing tool that allows you to make a range of adjustments to your photos, including resizing. Here’s how to resize an image using Pixlr:
- First, go to the Pixlr website and click on the “Start Photo Editing” button.
- On the next screen click ‘open image’, find the picture you want to resize.
- Once your image is open in the Pixlr editor, go to the “Page” menu at the top of the screen and select “Smart Resize”.
- In the Image Size dialog box, you can adjust the size of the image by changing the pixel dimensions. Enter 820 x 312.
- If you want to maintain the aspect ratio of the image, make sure the “Lock proportions” option is checked. Otherwise click it off.
- When you’re happy with the new size, click “OK” to apply the changes.
- Finally, save your resized image by going to the “File” menu and selecting “Save”. Choose the file format and location you want to save the image in, and then click “Save” again.
And that’s it! You’ve successfully resized your photo using Pixlr.
Pixlr is a great tool for quick and easy photo editing, and its resizing feature is particularly useful for creating images that are the correct size for different social media platforms, such as Facebook or Instagram. Whether you’re resizing photos for personal or professional use, Pixlr is a free and convenient option for anyone looking to make quick edits to their images.
Facebook cover photo tips
In addition to resizing your Facebook cover photo to the correct size, there are a few other tips to keep in mind when selecting and uploading your cover photo. First, choose a photo that’s visually engaging and represents your brand well. This might be a photo of your work, a behind-the-scenes shot of your studio, or a photo that showcases your personality. Whatever you choose, make sure that it’s high-quality and visually engaging.
Another important consideration is the placement of your profile photo on your cover photo.
Facebook places your profile photo in the bottom left corner of your cover photo, so make sure that your cover photo doesn’t have any important elements in this area that might be covered up.
In addition, consider the placement of any text or logos on your cover photo, and make sure that they’re easily readable.
People can decide if they like what you’re offering in a matter of seconds. If the font on you header image is hard to read, you increase the chances of people leaving the page.
Also pay attention to how your cover photo compliments your profile picture.
Do the colours clash? Are the fonts the exact same? Do you need to introduce some contrast?
The cover photo and the profile photo are a great way to introduce people to your brand and communicate what you do in only a few seconds, use them wisely!
There you have it, the correct size for your Facebook cover photo as well as a few tips on how to make the biggest impact on your viewers, and hopefully generate you some business.