Vignetting is the darkening in the corners of a photograph.
When applied tactfully, it can be very effective. Here we will look at how to add a vignette to an image using Photoshop and using Lightroom.
Vignetting is where the image becomes darker towards the corner of the frame. Companies have spent millions in research and development to remove natural vignetting from high end and expensive lenses, but it still remains a popular effect as it can help keep the viewers eyes firmly on the middle of the frame.
Older lenses produce vignetting naturally, however the photographer doesn’t have control of the process, each image has the same amount of vignetting as it is an optical imperfection, rather than an effect.
Using Photoshop to apply the vignette however, allows the photographer to control the effect, and how dark the edges of the picture are can be increased or decreased depending on the look they would like to achieve.
There are two principle ways to create a vignette in Photoshop, and a bonus super quick method of creating a vignette in Lightroom.
I’m using this image by Parker Hilton, feel free to download the image and follow along with the tutorial: https://unsplash.com/photos/-_0X7a9yHZ0
Method 1
Quick vignette in Photoshop
Step 1 – Open your image
Go to File > Open and select the picture you want to add a vignette to.
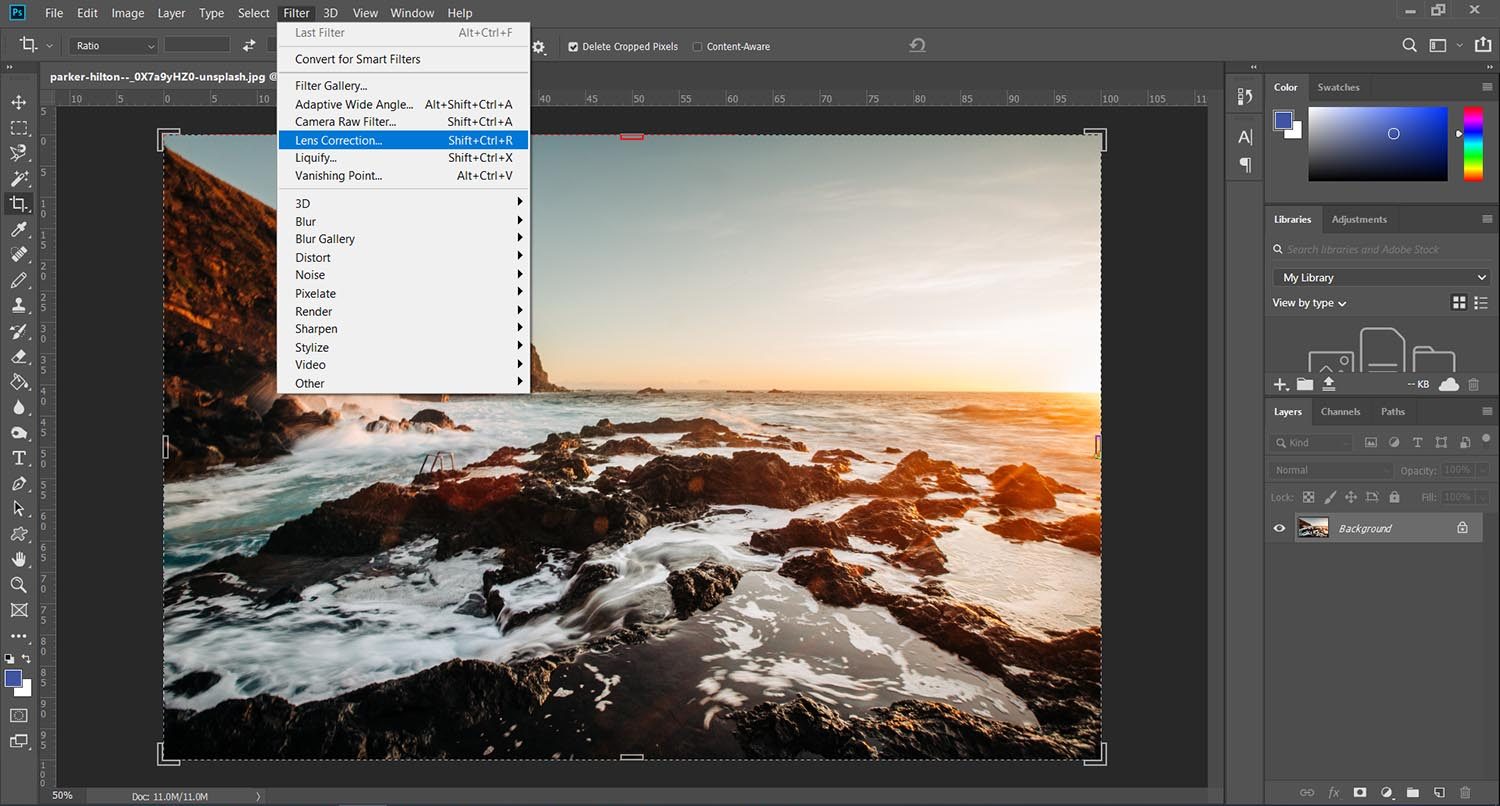
Step 2 – Open ‘Lens Correction’
Click on Filter, and then click on ‘Lens Correction’
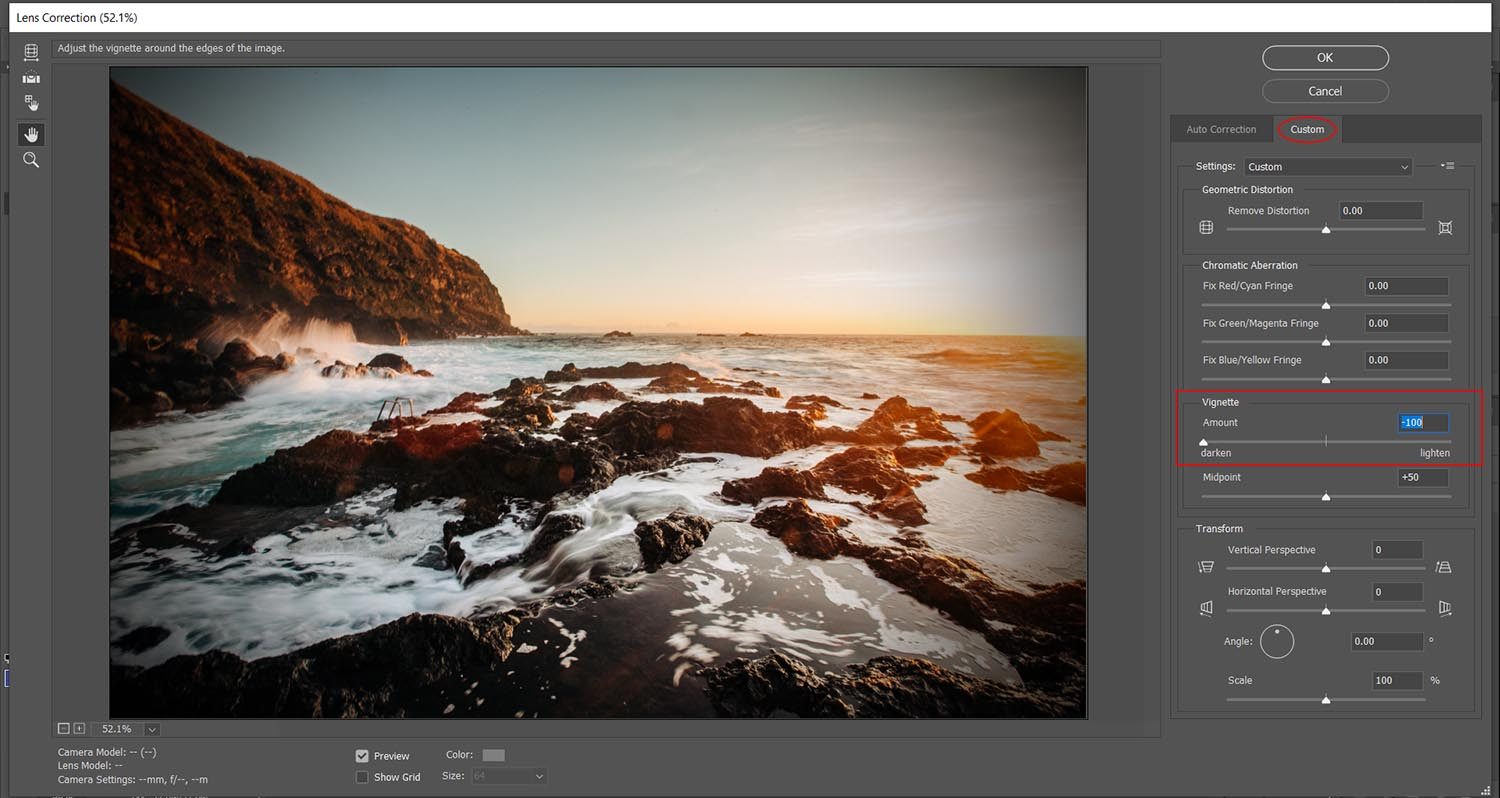
Step 3 – Applying the filter
Click on ‘Custom’ in the top right corner, and then you’ll see the panel to apply the Vignette on the right hand side.
Move the slider to the left to apply the vignette.
Click ok, save your image and you’re done!

Method 2
The detailed method, with more control
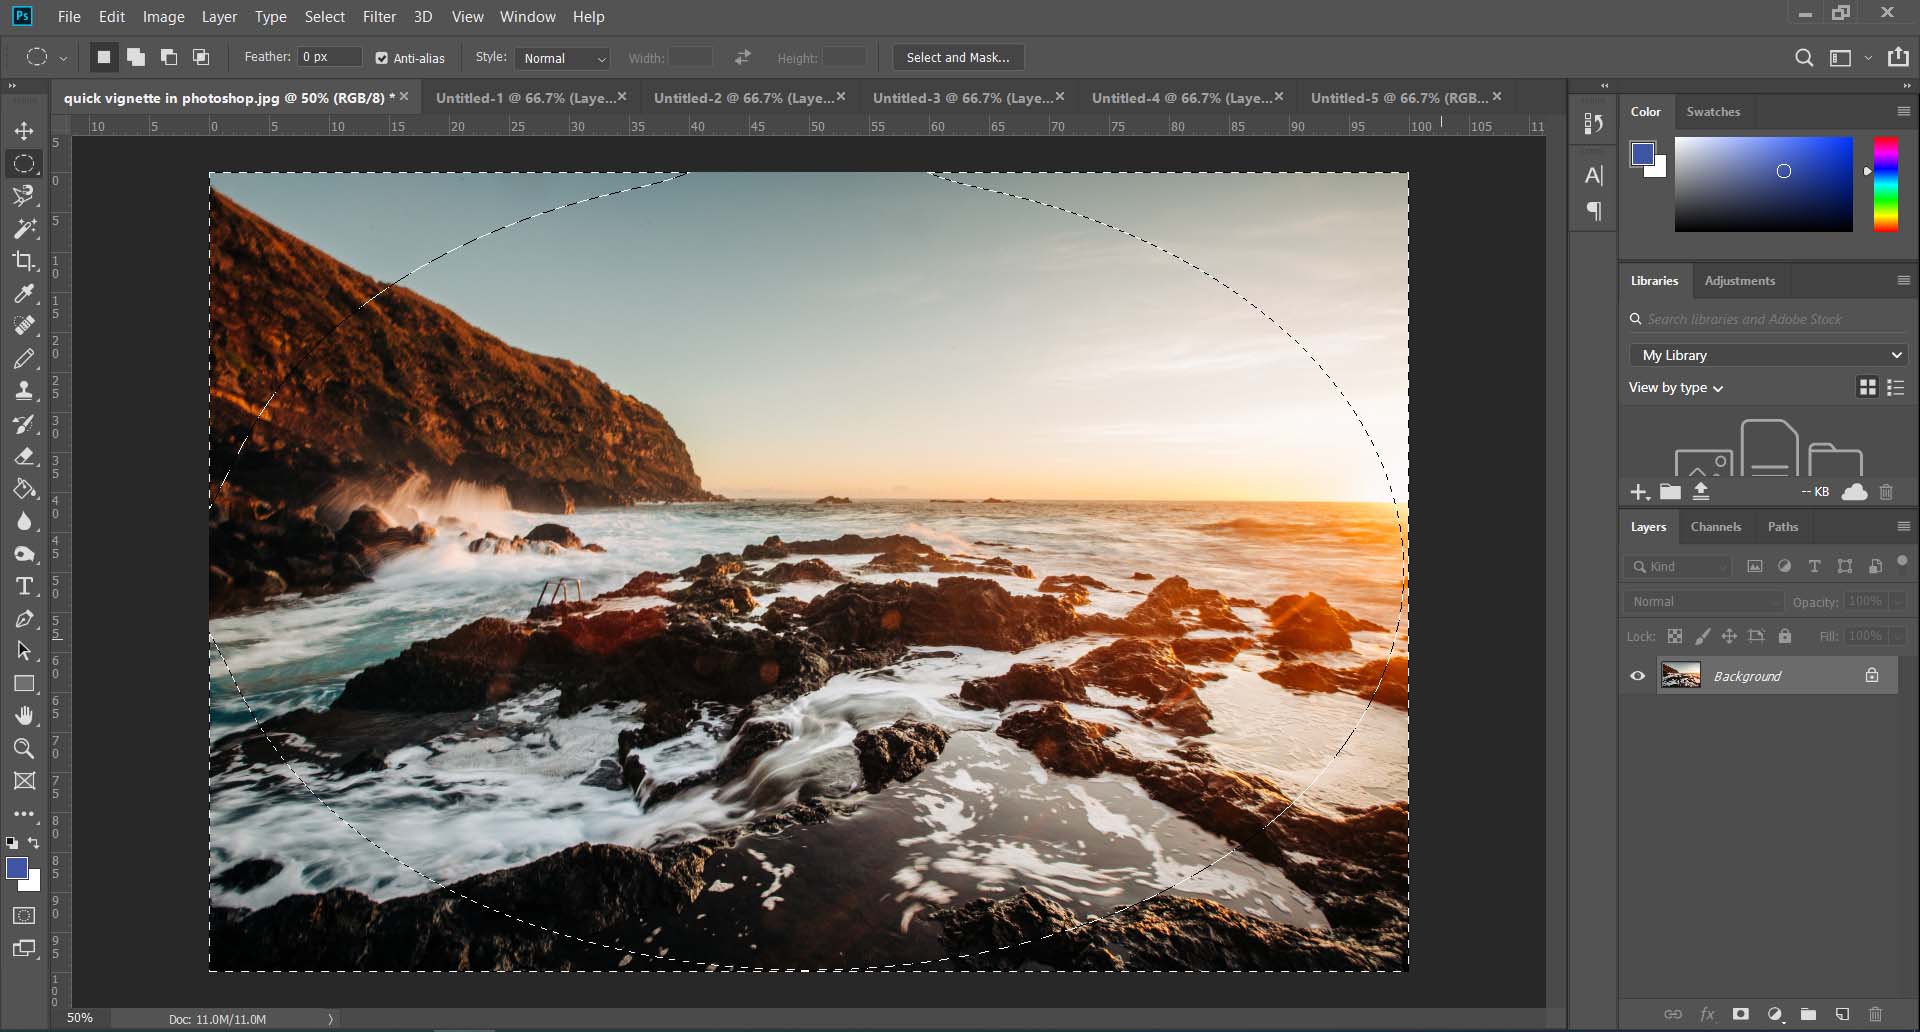
Select the elliptical marquee tool.
Click on the very top left corner of the picture and drag to the very bottom right of the picture to make an accurate and even selection.

At this stage, we have selected the middle of the picture, and we want to select the inverse of that.

So, right click on the picture and click on ‘select inverse’, and the selection will look like the below.
If we continued as is, the edge of our vignette would be a hard line and create a tunnel, we don’t want that, we want a soft edge.
So we right click on the image and select ‘Feather’.

Now we have a choice of how soft we want the edge, in this example I’ve selected ‘100’ but it’s a case of experimenting and seeing how soft you like the edge to be. Play around with numbers up to 250 pixels, click ok to confirm.

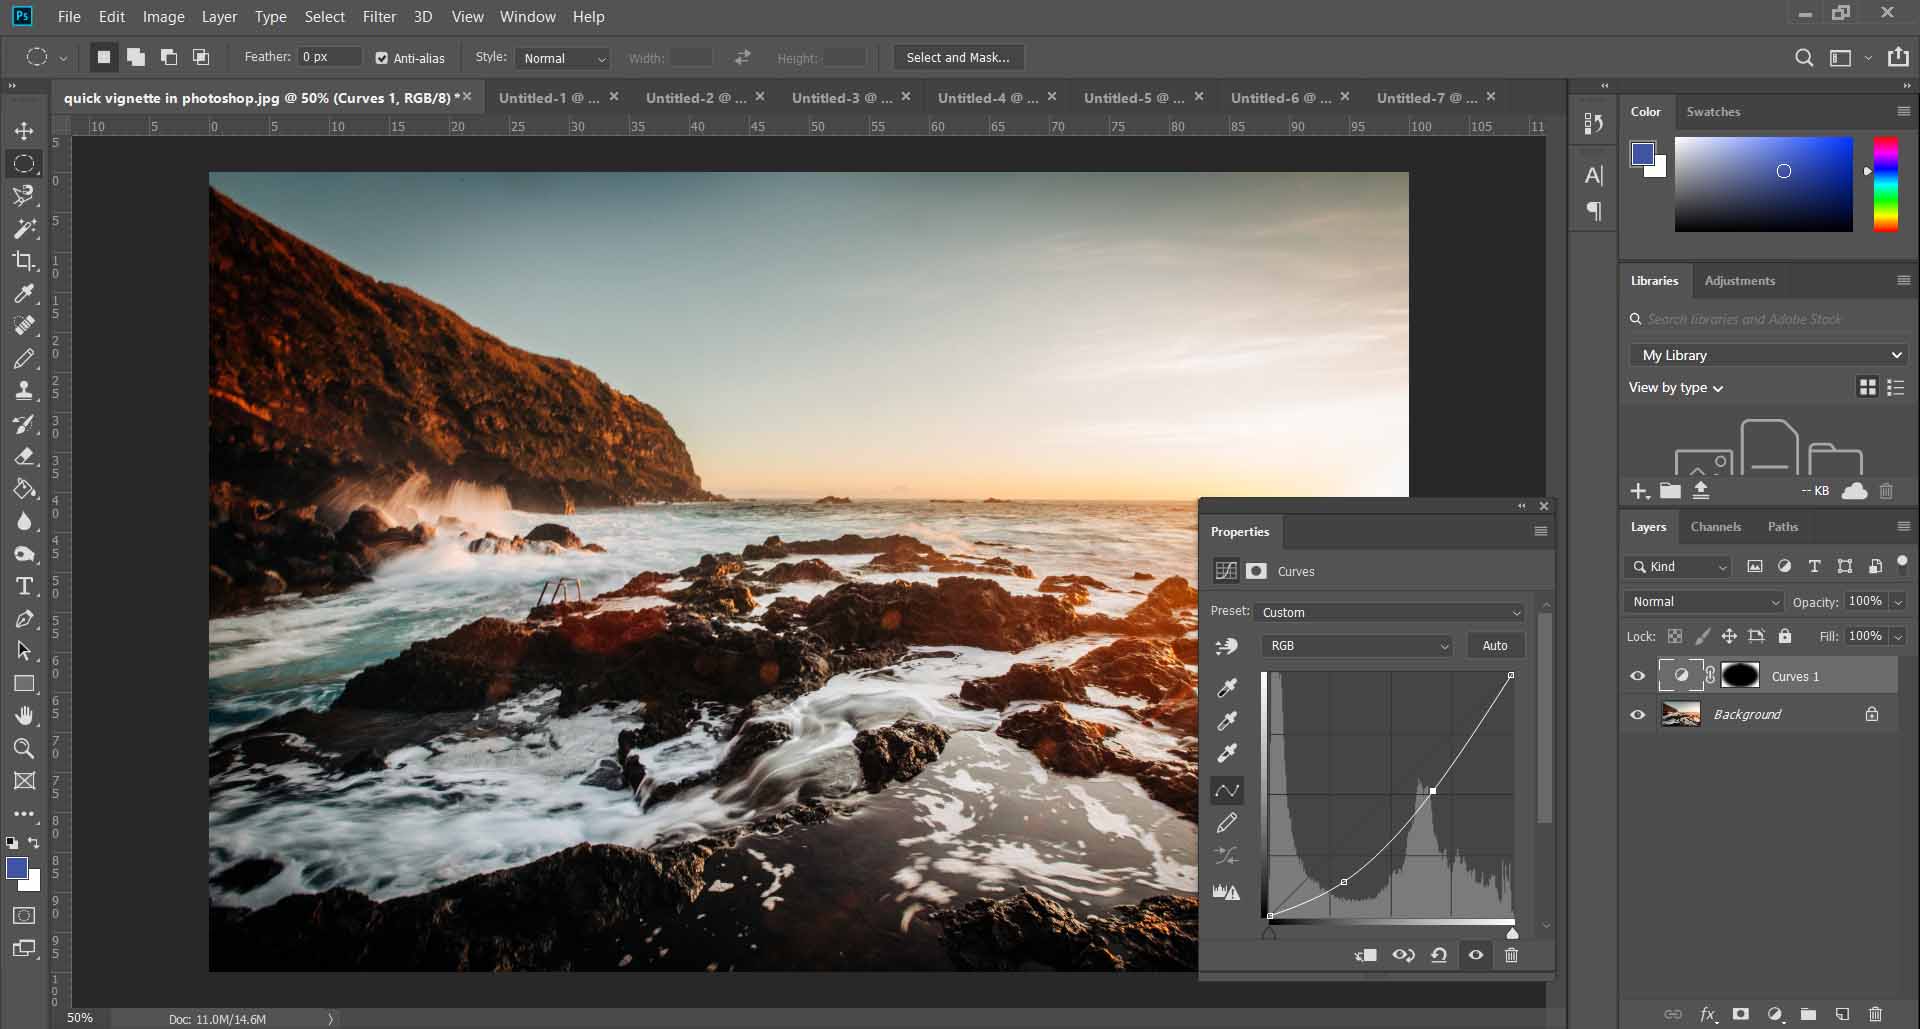
Next comes the part where we take complete control of the tonal range of the dark edges.
Select ‘Layer’, scroll down to find ‘New Adjustment Layer’ and the click on ‘Curves’.

Your curves layer will appear, and because you had the selection made, it will also have this layer mask connected to it.
Now, when we play around with the curves layer, it only makes changes to the area that we selected and not the whole photograph.
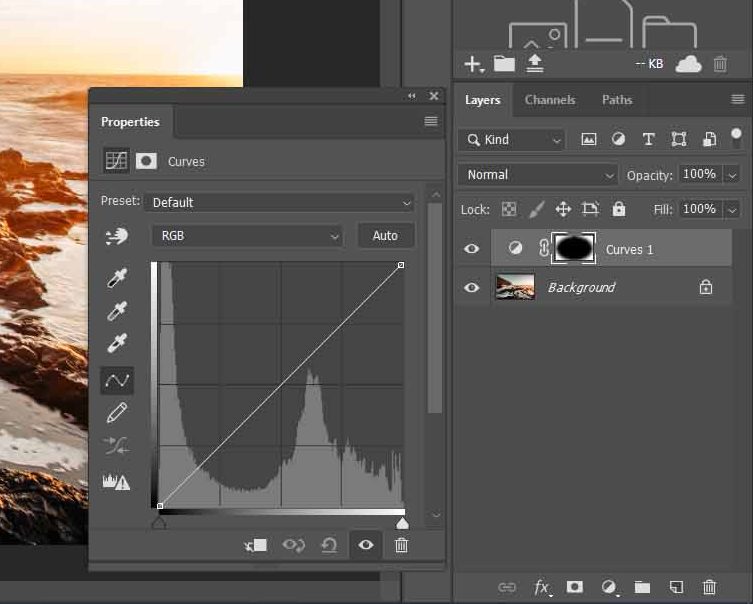
Here I have clicked on the line and dragged it slightly downwards to make the area we selected earlier darker and thus, creating the vignette. Play around with dragging the line around to see how it affects your image.

When you are happy with the vignette, click ‘Layer’, then ‘Flatten image’, Save and you’re done!
Method 3
Creating a vignette in Lightroom
Import your image
Select the ‘Develop’ module in the top right hand corner.
Scroll down the the ‘Effects’ panel and you’ll see ‘Post-Crop Vignetting’.
Change the ‘Amount’ slider to make the corners darker and you’re done.
Again, play around with the settings in this box to see what you like the look of.

I hope these three methods helped you create a vignette in Photoshop and Lightroom. Feel free to post links in the comments to your efforts, or hashtag #photographyproject on Instagram so I can see your efforts.
As always, feel free to send any questions and I’ll get right back to you.