How to back light and shoot in difficult lighting conditions
Are you just starting out on your photography journey? Or looking to push on to the next level and improve your portrait photography?
Hopefully you will take away some useful information from this post and be able to implement the tips and information to take better pictures.
Picture a beautiful scene.
Now imagine it’s overcast.
Or worse…raining.
Your model is ready, time is ticking and then your light just disappears on you. FFS.
It happens. Everything could be perfect, but if the sun suddenly disappears you can be left stranded. A team of expectant people around you or if you are at a wedding, the couple stood waiting wondering why you aren’t shooting.
It’s happened to me before plenty of times and is the main reason why I strongly suggest you add this trick to your repertoire before you become unstuck.
It’s a go to method for taking beautiful naturally lit portraits that can be replicated in near enough any location.
A big bonus for this trick is that it can be used if it starts raining and you have nowhere to shoot indoors.
My background is as a wedding photographer, so naturally most of my experience is drawn from there. If you want to test how good you are as a photographer, shoot a wedding. It’s one of the hardest things you will shoot.
I don’t mean to compare it to shooting snow leopards in Tibet for 6 months. I mean more like it will test every facet of your photography knowledge. Documentary, fine art…standing still. It all gets tested.
Trees are your best friends
Every time I visit a new location, I will look for trees just in case I have to implement this trick.
Let’s get into it.
What do you need for a good portrait?
Flattering light.
Decent background.
Shelter if windy.
Shelter if rainy
Happy model.
Here’s how we are going to get all these things.
Who’s your best friend? Yes, trees, correct.
Trees give you shade from harsh sun. Placing your subject in the shade of a tree will create even light across the whole face. This is flattering for any person as there are no harsh shadows and therefore no weird shapes to contend with.
This is your first win. Second win, it creates a difference in light between the subject and the background.
Result?
Exposing for the skin of the model will result in the background being overexposed, which will either eliminate any clutter in the background, or, overexpose it to the point of it being pure white to give you a clean canvas to work with.
Nice.
Back lighting
Tip – make sure that the light is coming from behind the subject. This is called back-lighting. Reason for this is you might otherwise end up with dappled light coming through the leaves and landing on the face making weird shapes. You might want that sometimes, but for this example, we want even lighting. The type of light that Jose Villa and Elizabeth Messina always seem to shoot in. Back-lighting has the added benefit of separating your subject from the background, creating a similar effect to a hair light/halo effect.
Here’s an example of how this can work in the real world.

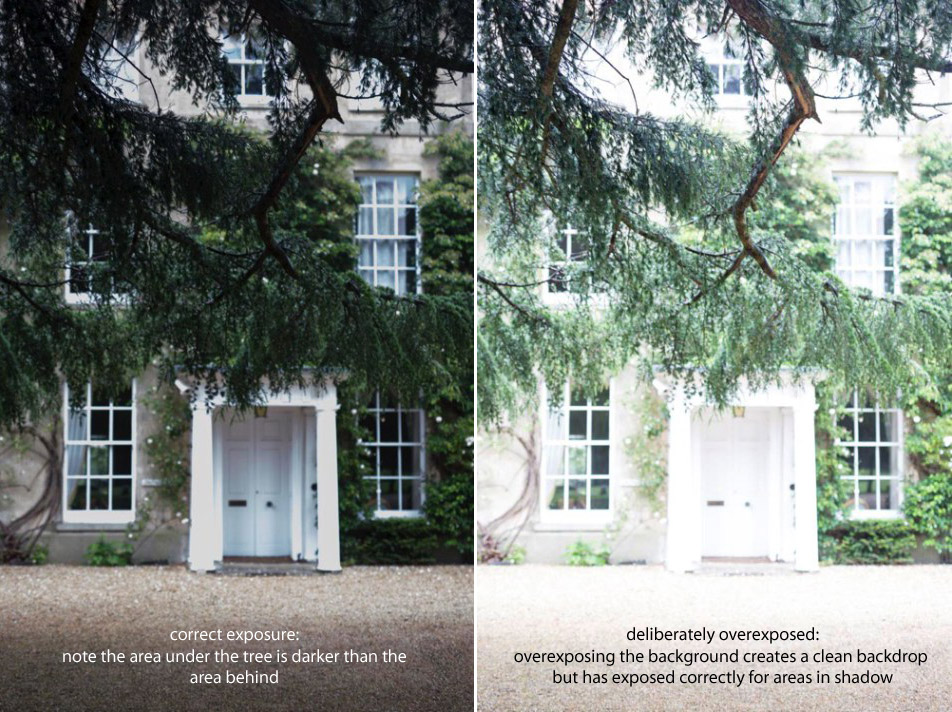
In this picture on the left I have exposed for the background, which you can see has rendered the area under the tree near enough black.
Take photographs of your hand
I always take a photograph of my hand to get an idea of accurate exposure for skin tones. If my hand is exposed properly, then their face will be too.
Placing my hand in the shaded area and increasing exposure now gives me accurate exposure for skin tones and renders the background much, much brighter.
This difference in light is what you should be looking for. A shaded area with a brighter area behind it.
What your eye sees and what the camera sees are often very different. Where you might not see a great deal of contrast, the camera will, so play around in different lighting conditions to get to grips with it.
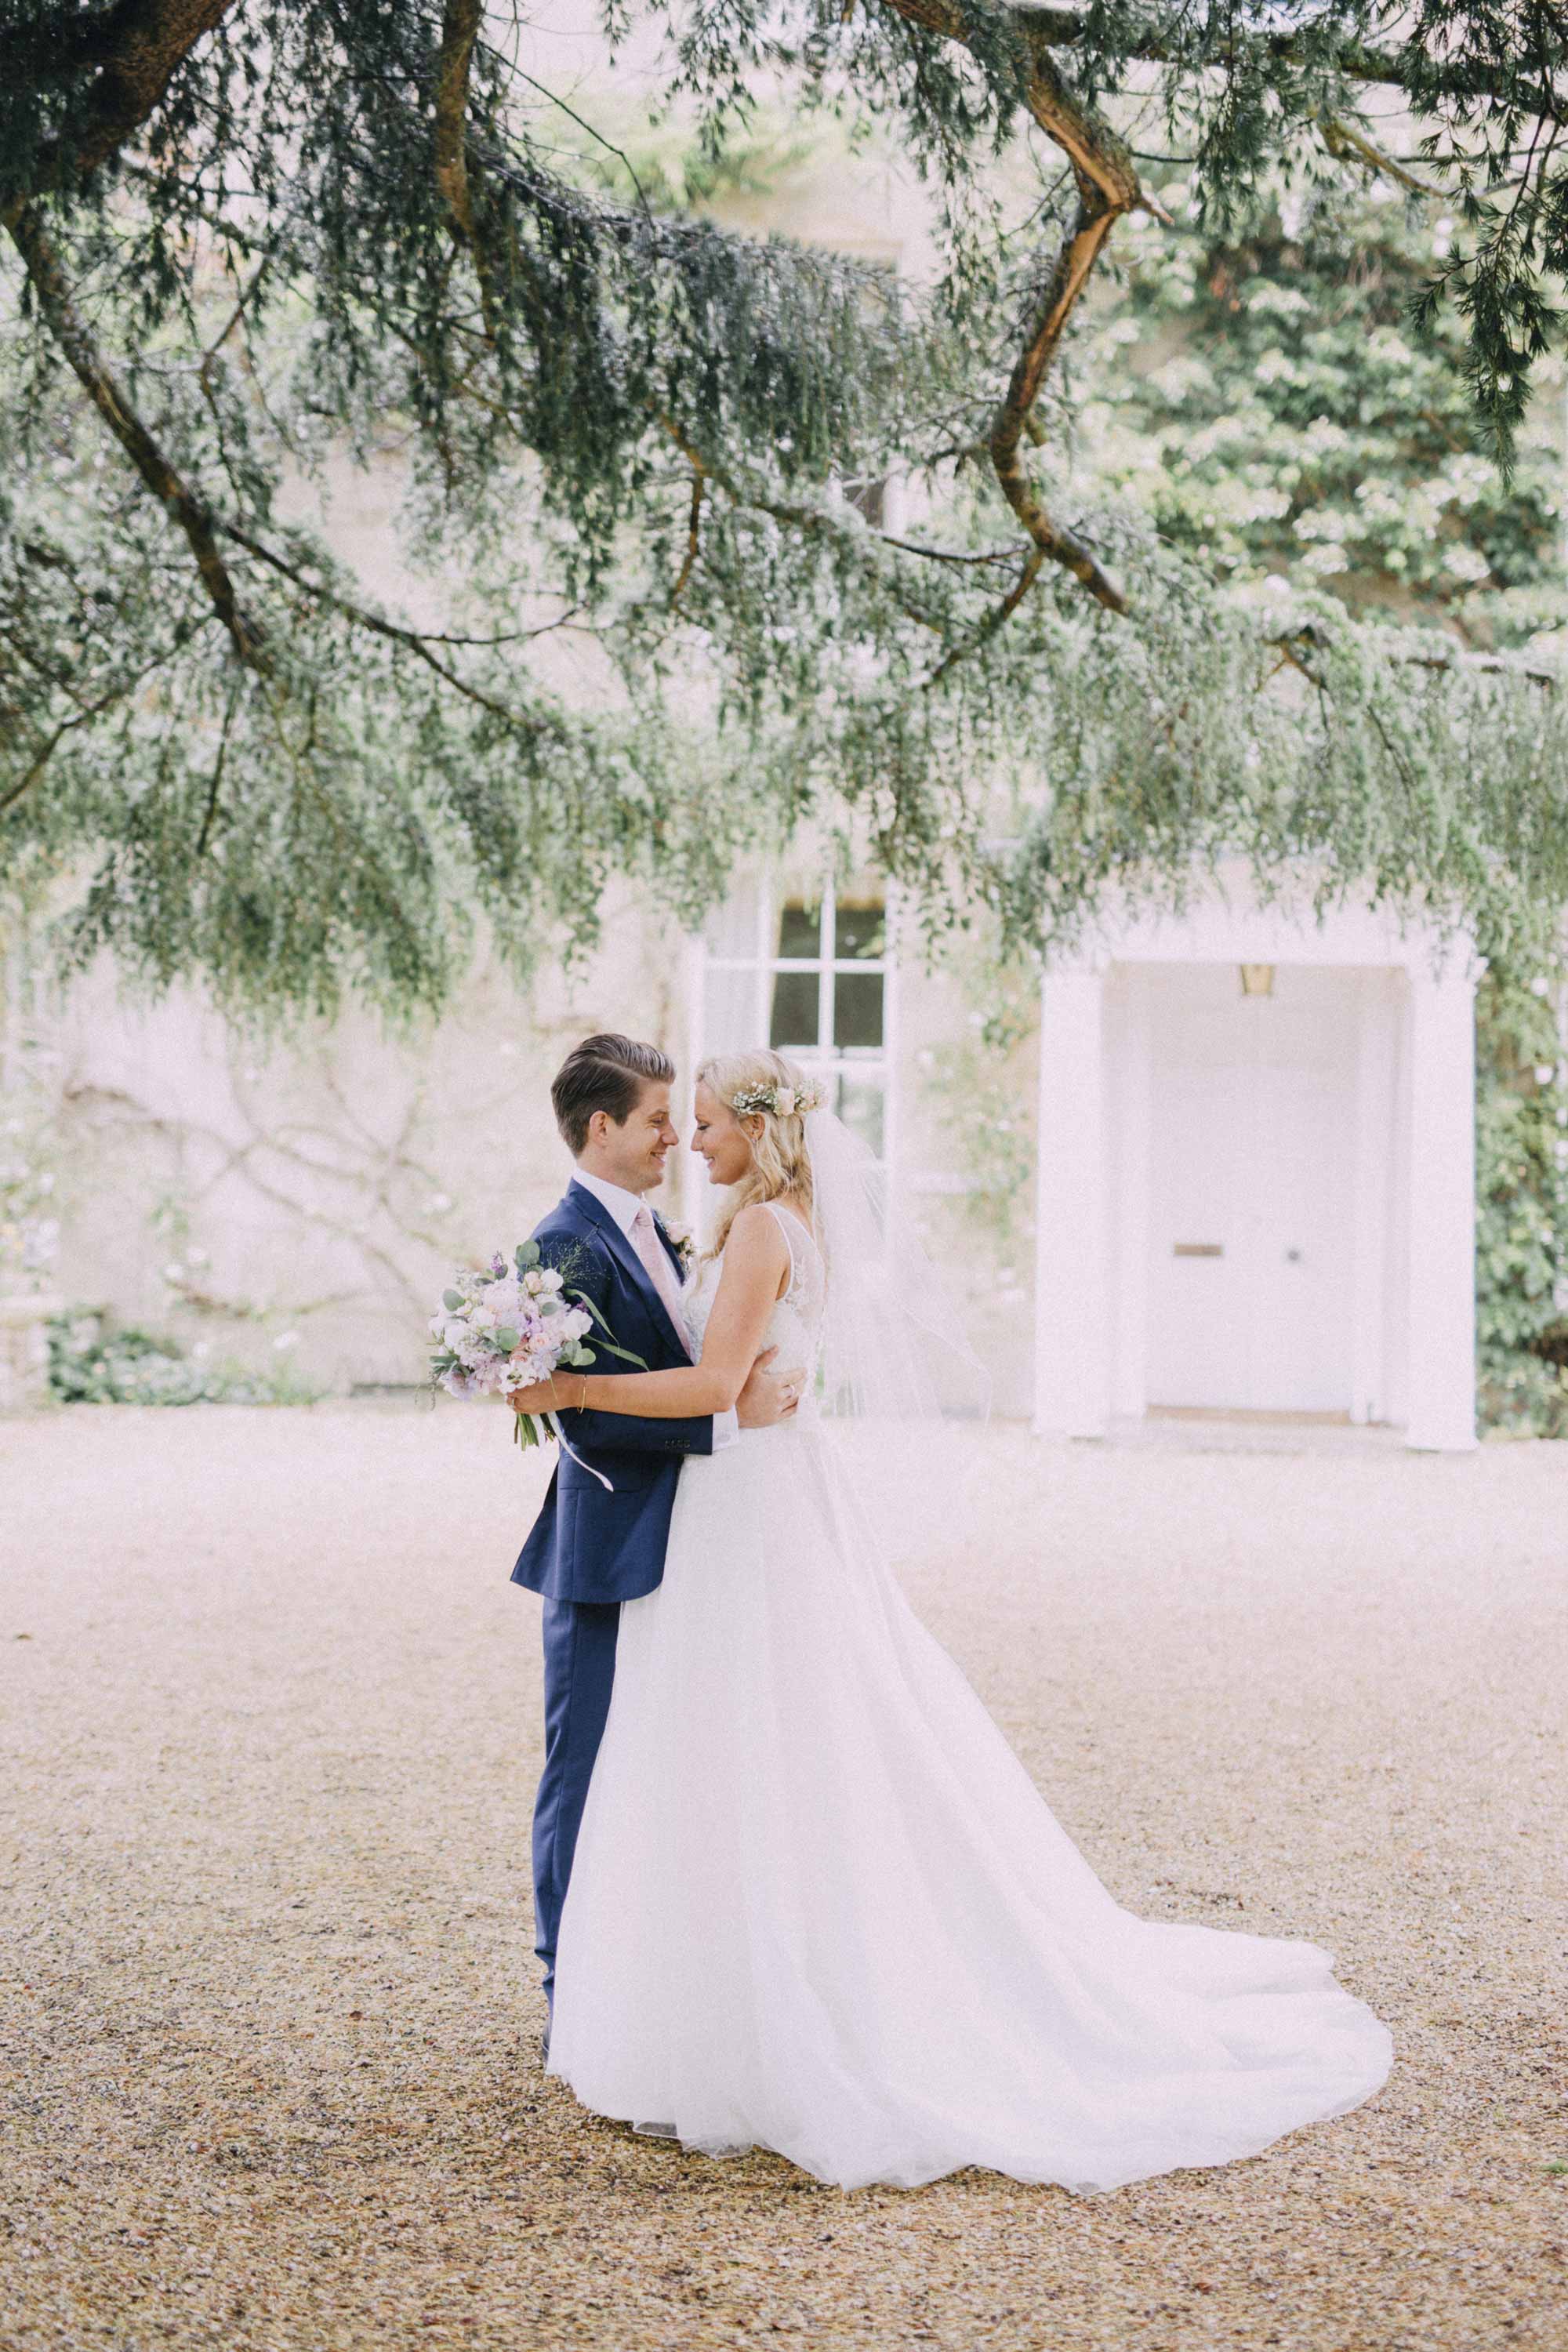
In this image taken moments later, the full effect is revealed.

The couple are perfectly, evenly lit and the background is bright and clean allowing them to stand out.
When I took this, it was raining
Not only was it overcast and a crappy grey sky with no contrast, but it was also raining.
When I first started this would have been a nightmare. Training myself to see light using this method means I can create a great picture with just a tree.
Extreme depth of field
The second part of this trick is to shoot at an aperture between f/1.4 – f/2.8. An aperture any smaller than this and the background will start to be rendered in focus due to a deeper depth of field.
Shoot at an aperture that you know you can nail focus with. Shooting at f/1.4 is a high risk move if you’ve no idea what you’re doing. If the focus is off by a few inches, the extremely shallow depth of field will render the image out of focus. Remember this can’t be saved in Photoshop. Out of focus=bin.
I use a Sigma 50mm f/1.4 lens – it’s a beast, but the sharpest lens I’ve ever owned. I’ll write a review on it one day. For me it’s the best 50mm lens on the market, Sigma are producing amazing lenses, for very reasonable money. I used to use the plastic Canon 50mm f/1.8, then upgraded to the 1.4 but then realised that was crap and went all in on the Sigma.
The extremely shallow depth of field will render the background out of focus. If you’re lucky enough to have a background of trees as well, then the light coming through the leaves will be rendered as lovely, soft out of focus orbs. Beaut!
Not just for the rain
This is a perfect technique to use when it’s blazingly sunny as well. If it’s face meltingly hot, people don’t want to be in direct sunlight. Models sweat, make up runs, art directors cry.
Make sure you have factor 50 sun cream on, and put your model in the shade.
This works for me at weddings because the groom is often wearing a woollen three piece suit. He is going to be blisteringly hot and possibly anxious to wrap things up. It’s difficult for people to have their head in the game if they’re too hot and can’t even.
Go out and practice, let me know how you get on.
Captain camera.
