Real estate photography is often an entry point into professional photography for many new starters. It was for me before weddings became my main source of income, and it taught me a lot about the world of professional photography.
Some home truths
My experience as a real estate photographer and a teacher gives me something of a unique position. One where I’m able to candidly describe the realities of the working world, whilst being able to teach how to do it to a professional standard.
It’s worth noting that when first starting out, this is not going to be particularly glamorous
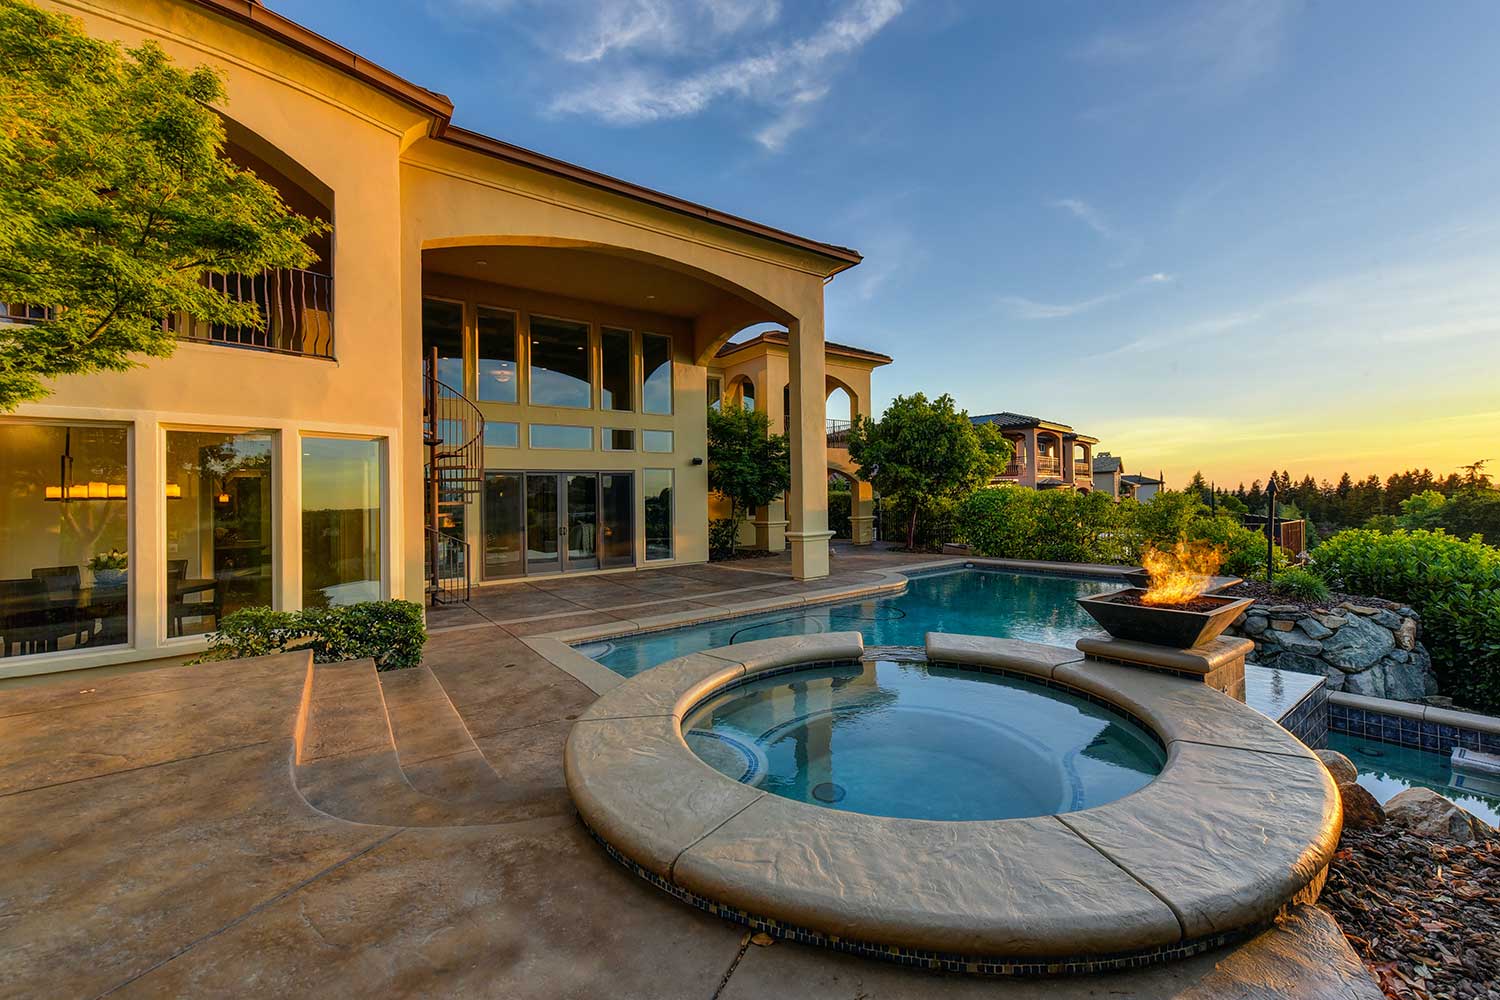
If you go on any estate agents website, of course the first images you wee will be of houses worth millions, in beautiful settings, on a bright summers day.
If this is your first venture into real estate photography, you should go into it with your eyes wide open. That means, expect rented flats, high volume of shoots in one day, long hours and low pay.
In the cities where demand for property is high and turnover is equally high, you will be paid a low amount per property shoot, but the volume will be high. The volume is what makes it viable.
Lets set some expectations.
How much can you expect to earn?
In the UK, £15-£30 per property is not unusual at the entry level. You’ll be expected to take pictures of all the rooms and some of the exterior.
If you shoot five properties in a day at £30 each, that’s £150/day, and £3000 a month (minus expenses).
On paper, sounds good for a starting position.
Realistically, you’re going to average more like £2000/month.
Parking in cities is expensive, working with rented property clients is a nightmare (they’re not the home owner, so they don’t care about the photographs), and you lose a lot of time having to set up rooms and sometimes even having to clean a space to get the photographs.
Even worse, you often have to go to the estate agent to get the keys. Can you park outside their office to get the keys? Ha. LOL. Not a chance.
More time wasted.
That being said, if you embrace it, you can learn your trade at very low risk. i.e If the shoot doesn’t go well, it can always be redone.
This makes it an attractive proposition for someone looking for their first job. You can build your skillset, get free training, often get a company car and phone and sometimes even have a budget for buying new equipment. So whilst the work itself is not always easy to shoot million pound properties, there is money to be made, and it’s a great launce pad for your career.
No doubt you’ve got plenty of questions, that’s good, always ask questions. In this article we’ll look to cover:
- What equipment do I need for real estate photography?
- What lens do I need for real estate photography?
- What does real estate photography involve?
What Does Real Estate Photography Involve?
The business of Photography is probably 10% taking photographs.
That sounds insane right?
Admin, editing, travel, writing emails, preparing the house for photography. All of it takes time, and all of it has to be done.
Real estate photography is fast paced and has a high turnover.
If you’re used to spending days editing your photographs then you’re in for a shock, you will not have that luxury in this business.
Once you’ve completed your five shoots in a day and got home at the close of business hours after spending the last hour stuck in traffic on a hot summers day, guess what?
Now you have to edit the pictures and upload them before bedtime.
Shooting and delivery of the images is expected on the same day. Know this at the beginning and you won’t have to find out the hard way with an angry client.
Sometimes you’ll get twenty four hours, on a big shoot with high production you’ll get a little longer. But on the low end, high turnover rental properties, you’ll be shooting and editing the same day.
This is essential to your workflow as well, as you’ll be shooting five days a week presumably, you’ll want to clear the workload each day so it doesn’t build up.
Real estate photography tutorial
Let’s talk gear real quick – at a bare minimum, you will 100% need a full frame camera, 16mm lens, tripod and a flashgun.
If you haven’t got these, then you’re going to be in trouble.
Why?
It’s part of the interior photography/estate agent/buyer stupid non verbal agreement. Everyone knows from the photographer to the client that the lenses used make the rooms look bigger than they are. That’s why floorplans are so important.
But that doesn’t matter, estate agents and realtors will demand that you shoot the house wide angle.
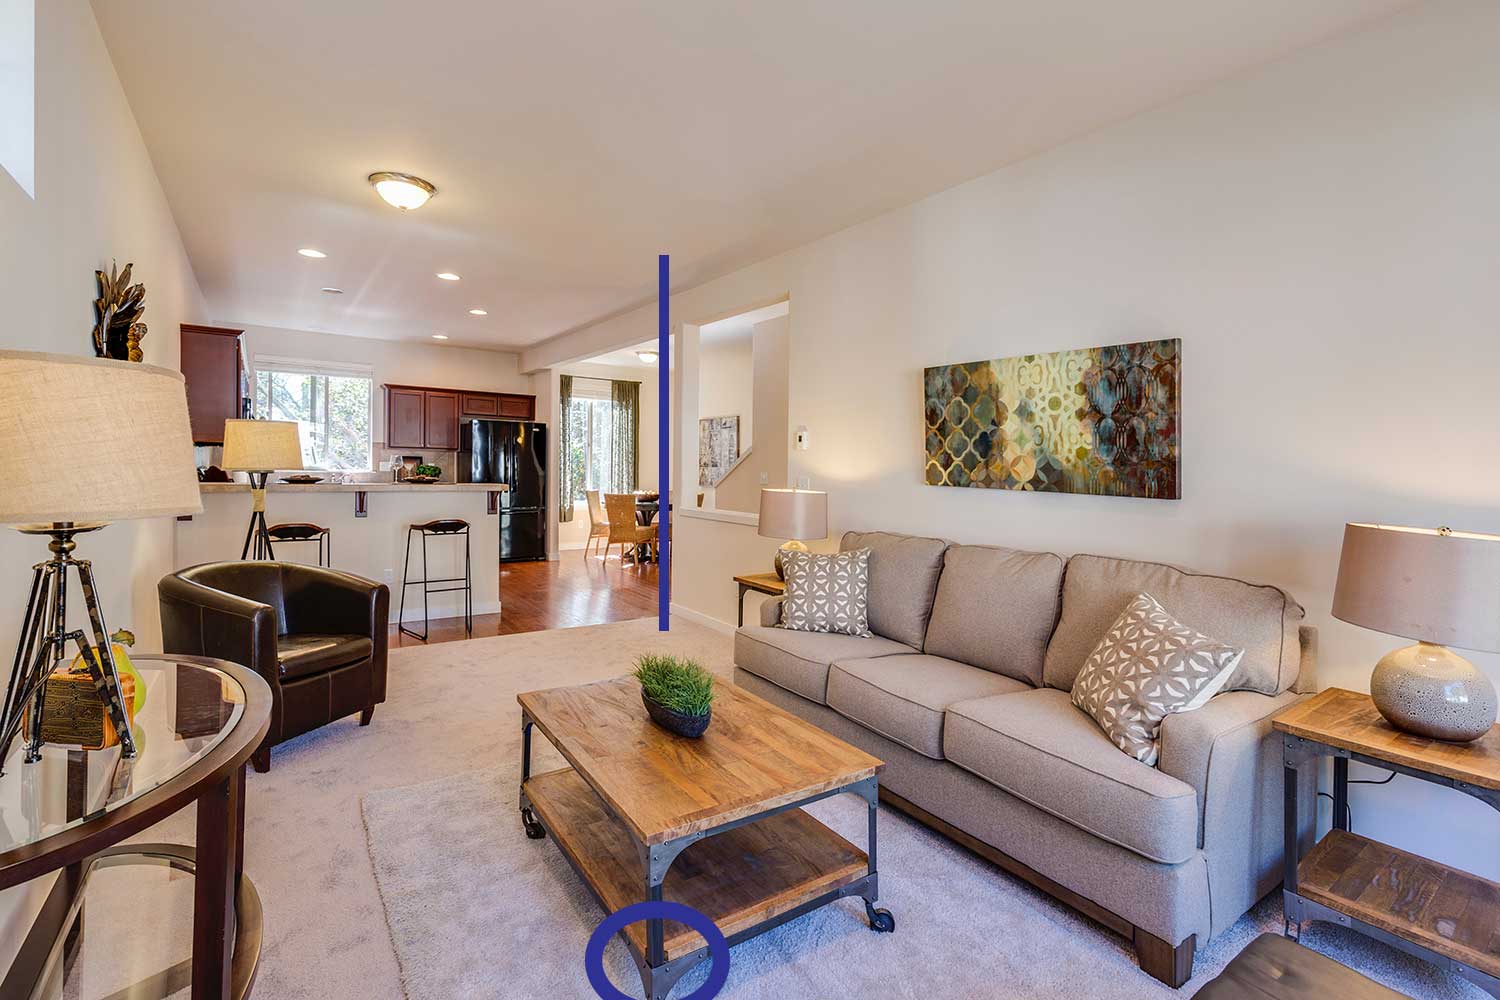
Lets look at some examples
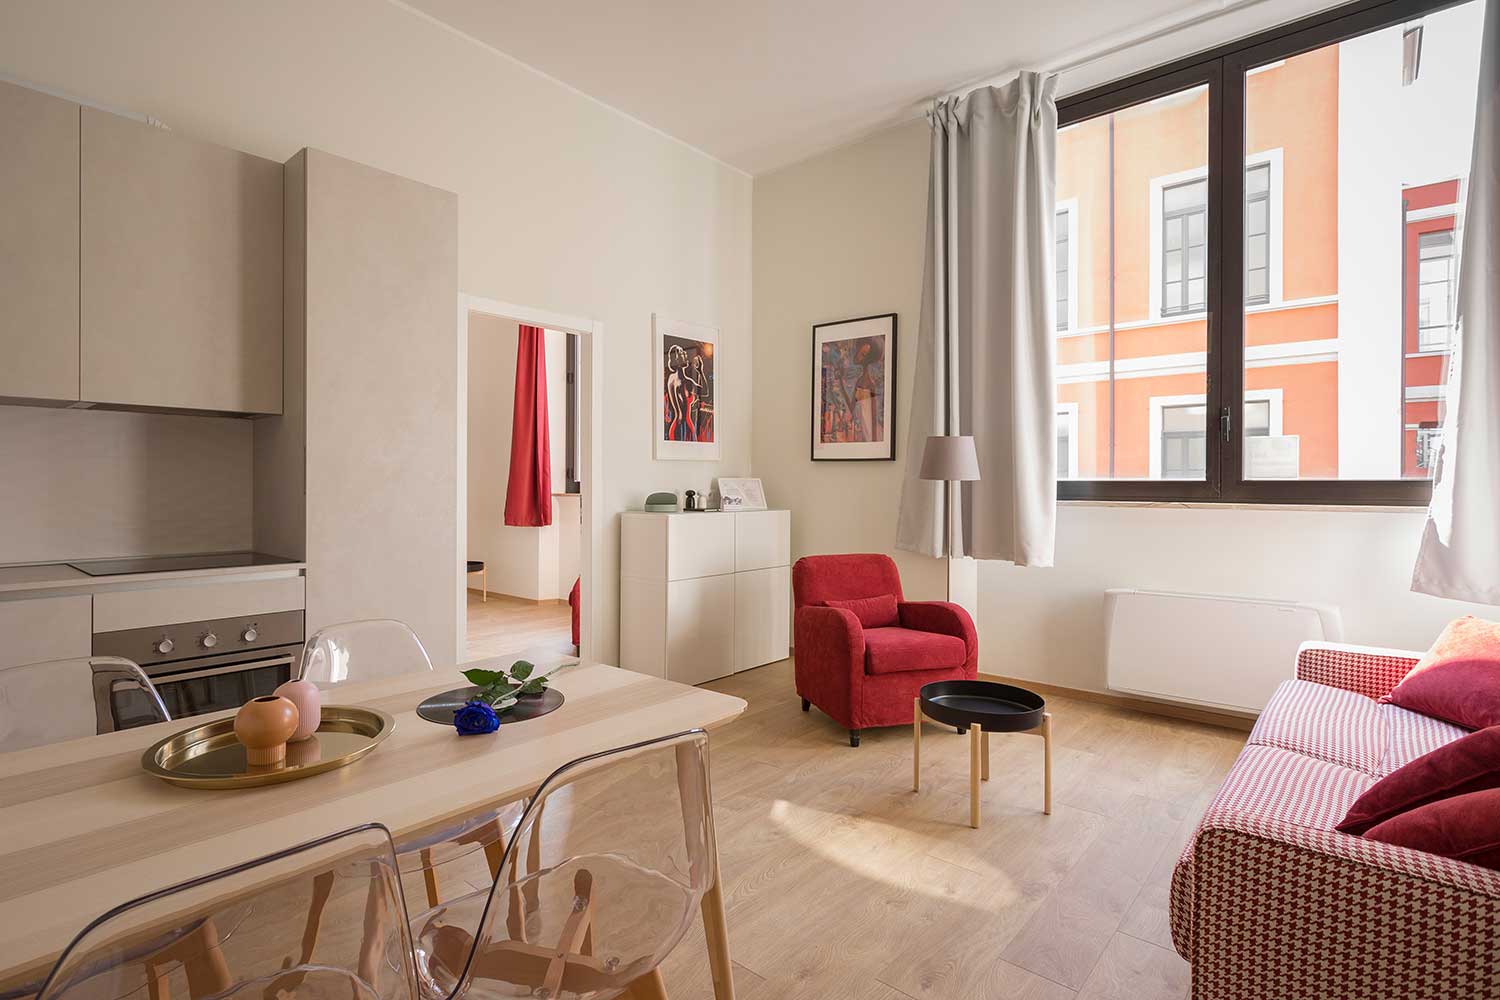
These images are bright and airy, properly colour balance so the lights don’t make the room look too yellow, well composed and look inviting.
Only looking at good pictures won’t help you improve, so let’s look at some common issues with real estate photography so you can see the difference and improve your own images.
Let’s start with this image:

On first glance, not too bad. But there are some improvements to be made.
First – always take multiple shots from a single viewpoint. It tips the odds in your favour that if you take a picture that the agent doesn’t like, you’ll have an alternate angle already backed up. What we’re trying to avoid at all costs is a reshoot. It’s lost time and lost money.
Composition
Look what happens when you have elements of the picture touching the bottom of the frame. It makes the room feel smaller. It makes the coffee table look like it’s on top of you and you feel cramped. Couple this with too much space at the top of the frame and it feels unbalanced.
Next, the vertical lines aren’t straight.
In Lightroom, there is a button that corrects the distortion created by your lens. Make sure it’s switched on.
Wobbly lines warp the image and create inconsistencies across the whole set of images taken around the property. I also gives the frame angular momentum and makes it feel like the whole room is tipping in one direction.
This next image is nice and would work as an additional image that you can take and submit along with all the other wide angle shots. If you’re only shooting images like this, be prepared to be sent back…
The compressed perspective of the lens makes the room look smaller. Make sure you have every room shot at 16mm and from multiple angles before going after your ‘hero’ image.
Here we see the effect of shooting from your own point of view.
When we angle the camera downward, it makes all of the vertical lines converge towards the floor, which makes the space feel smaller.
For consistency, set the tripod at one height and then don’t change it. Shoot the whole property at that set height.
Get a spirit level for your hotshoe
It will ensure all your pictures are level, which will make your images consistent, and will save you tie later not having to straighten the edges in Photoshop.
Pay attention to where doorframes and strong lines are. If you cut them off the resulting image can be quite jarring.
Again, if unsure, take multiple pictures in a panoramic style to give you the latitude to play with afterwards. In this example, take one picture angled slightly to the left to incorporate the door frame and then take another slightly to the right to incorporate the framed head board. As it is, the eye is drawn to the corner of the room and makes the space feel dead. You want the eye to be tricked into considering how much space there is. Showing more of the left hand side of the frame and allowing the eye to move into the hallway would create this illusion.

This is a lovely image, well exposed, straight lines, chairs in a neat line, worktops clear…it looks great.
…And it’s completely unrealistic.
Don’t forget you are going into peoples homes. Most people can’t colour co-ordinate their curtains with their upholstery and artwork. I’ve also been to properties where they haven’t washed up the dishes either, so don’t beat yourself up if it doesn’t always look like a show home, we are there to photograph, not clean.
What equipment do I need for interior photography?
A wide angle lens
My go to was the Canon 17-40mm f/4 L
Why?
Because it was an L lens that I could afford. The 16-35mm f/2.8 is 1mm wider, but no real estate photography uses apertures that wide, so the extra stop was redundant. I have used that lens, and it is beautiful, but the cost was too great when I was just starting out.
Other ultra wide angle lenses for Nikon and Sony.
I make no attempt to hide my love of Sigma Art series lenses, the build quality and optical performance is outstanding for the money, the Sigma 12-24mm should definitely be on your list of considerations.
I very nearly bought the Tamron 15-30mm lens for my wedding work. If you’re looking for a wide angle lens, get either the Sigma or the Tamron.
Cheaper and optically phenomenal.
Remember to check the compatibility if you already have a camera, the lens mounts may be different to the camera body you already own.
A full frame camera
You’ll need a full frame camera – this means a camera that has a sensor that is the same size as an old school piece of film.
Why is that important?
In digital photography you have two types of sensor – full frame, and cropped.
If you put your lovely new 16mm wide angle lens on a full frame camera, the image you see will be at 16mm.
If you use a cropped sensor, the 16mm lens will actually be closer to 25mm – so not wide angle anymore!
Here are some full frame cameras
Memory cards
I always use Sandisk, so here’s a Sandisk SD card.
Tripod
DO NOT CHEAP OUT ON A TRIPOD
This thing will be your best friend, do not buy a crap one.
Cheap tripods bend under the weight of the camera, are difficult to fine tune and the clips on the legs are prone to breaking.
I’ve always used Manfrotto tripods so I’m happy to recommend them.
If you have the money, get the pistol grip style head to go with it, it makes life much easier. It’s a good investment too as you’ll be able to work a little bit quicker. Saving ten seconds per picture might not sound like a lot, but multiply that over a year – 10 seconds per picture, 100 pictures a shoot, 4 shoots per day, five days a week.
that’s about 16 mins per shoot, one hour per day, five hours per week, 260hrs in a year – that’s a whole work week saved.
Flashgun
You’ll need a flashgun to balance out the shadows in dark rooms. You’ll need one that can be angled behind you and that has complete manual controls so you can fine tune the settings.
You could buy the camera manufacturers own flashgun, like the Canon 600EX II, but in my experience, they are overpriced for what they are.
Having used the Godox system, I actually think they are better. Plus, for the same price as the Canon 600, you can get a few flashguns and a remote trigger.
Check out the Godox V860 or the Godox V1.
I’ve had a play with the AD200 at a wedding once, it might be overkill for power, but if you’re shooting interiors and other events the Godox AD200 might be a great investment.
I hope this helps, as always, #photographyproject to show me what you’ve been up to.
Til’ next time folks.
Liam