Photomontage project
You will need:
dark room
photopaper
printer
photoshop/ms paint etc.
acetate
“slicing and dicing bits of the city’s rich fabric together. The images are digitally edited photographs, printed then made in to collages that are then further worked as paintings. Paint is used to stylize or emphasize aspects of the photographic materials, to add texture, layering and color. The layering is an important aspect to the work both in the computer and on the physical artworks.This process is a hybrid between painting, photography, digital art and collage and echoes the layering of history that takes place in cities”
“Although most of my current works are urban landscapes, I am interested in exploring other aspects of our environment that show the structures, infrastructures and scars of human development. I am fascinated by the American West. The freeways, power plants, gas stations and fast food restaurants on the side of the road heading out to the desert or up the coast of California are at once so familiar and at the same time so alien. The systems and infrastructure that support our current unsustainable way of life; power lines, gasoline, cars are all rich in visual interest and powerful metaphors for our current way of life.”
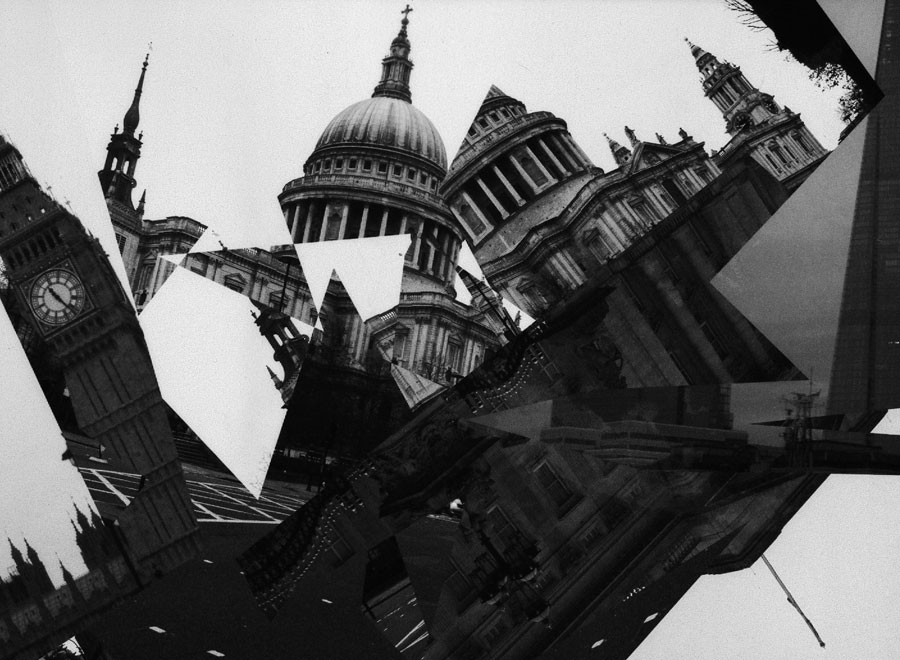
Acetate is absolutely brilliant and can easily help transform a mundane darkroom contact printing project into something much more creative. Once you’re aware of its potential to transmit any image from digital to essentially a full scale negative your creativity can run riot. Firstly we will need some landscapes, your choice entirely, in this example we’re using London cityscapes, however tweak to fit your project. What you need to ensure you achieve when capturing these photographs in the first instance is leaving plenty of white space/sky at the top and or side of your subject. By overexposing the sky you will be left with plenty of negative space to play around with your composition.
Next we need to convert them from a positive into a negative. This can be achieved in many ways, the easiest being Photoshop if you have access to it. Open your image, hit Ctrl+I to invert and then save. If you don’t have Photoshop you can invert using MS Paint, in the toolbar along the top of paint click Select All, then right click and select Invert, then save. Next you need to print the image onto acetate, pay special attention and make sure you’re placing the acetate into the printer the correct way around, otherwise the ink wont dry. The option on my printer for acetate is ‘other paper’ under paper type, but it might take a few goes for you to find what works best. Once your images are printed, time to hit the dark room.

With fresh developer and layering three pieces of acetate should take about two seconds of exposure, however again this can vary depending on the density of your negative. Move, manipulate and experiment is the aim of the game, you’ll quickly train your eye to see the final image before you make it. A good tip is to be careful of butting two pieces of acetate up together, or allowing the edge of the negative to cross over the image as you will be able to see the line, but you may be able to get it to work in your favour.

